
Image Source: i.ytimg.com
How To Unclog Kitchen Sink Drain Fast
Can you unclog a kitchen sink drain fast? Yes, you can! Most kitchen sink clogs can be cleared quickly with simple household items or basic tools.
Is your kitchen sink backed up and won’t drain? A clogged kitchen sink is a common household problem that can be frustrating. Grease, food particles, and soap scum can build up over time, creating a stubborn blockage. Fortunately, you don’t always need to call a plumber. There are several effective ways to tackle a sink drain blockage solution yourself. This guide will walk you through various methods for unclogging your kitchen sink pipes, helping you get rid of kitchen sink smell and restore proper drainage.
Why Do Kitchen Drains Get Clogged?
Before we dive into the solutions, it’s helpful to understand what causes these blockages. The primary culprits are usually a combination of:
- Grease and Oil: When hot grease or oil goes down the drain, it cools and solidifies as it travels through the pipes. This sticky residue traps other debris, creating a blockage.
- Food Scraps: Even with a garbage disposal, small food particles, coffee grounds, eggshells, and fibrous vegetables like celery or potato peels can accumulate and form blockages.
- Soap Scum: Soaps contain fats and oils that can combine with minerals in the water, forming a sticky scum that adheres to pipe walls.
- Foreign Objects: Accidental drops of small items like bottle caps, twist ties, or even jewelry can get lodged in the drain.
- Hair: While more common in bathroom drains, hair can find its way into the kitchen sink and contribute to clogs.
Simple Solutions to Try First
When you first notice a slow-draining sink, don’t panic. Start with the easiest and most common methods to clear a blocked kitchen sink.
1. The Hot Water Flush
This is the simplest method and often effective for grease-related clogs.
How to do it:
- Boil a kettle or pot of water.
- Carefully pour the hot water directly down the drain.
- Wait a few minutes and see if the water starts to drain.
- You might need to repeat this process a few times.
Why it works: The hot water can melt solidified grease and oil, allowing it to flow away.
Important Note: Avoid this method if you have PVC pipes that are old or brittle, as extreme heat could potentially damage them.
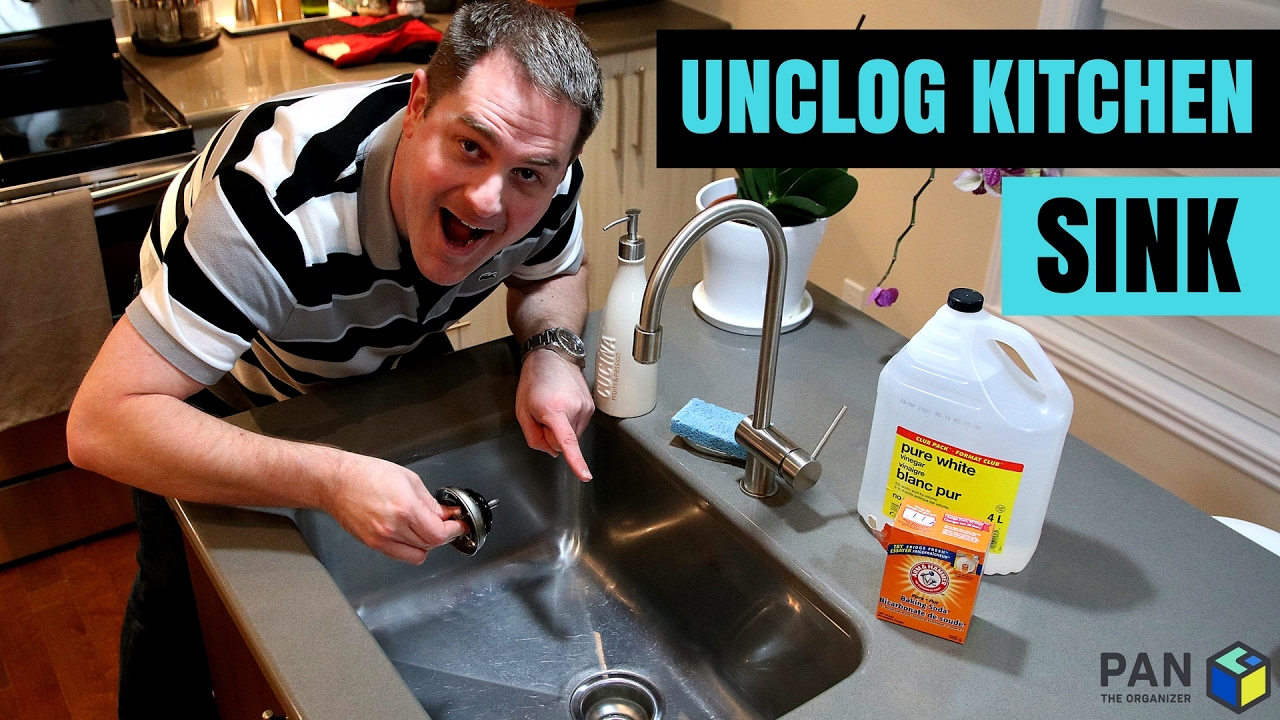
2. Baking Soda and Vinegar Drain Cleaning
This classic combination is a safe and effective way to clear minor clogs and also helps to get rid of kitchen sink smell.
How to do it:
- Pour about 1/2 cup of baking soda down the drain.
- Follow it with an equal amount of white vinegar.
- You’ll hear a fizzing sound as they react. This is normal!
- Cover the drain with a stopper or a wet cloth to keep the reaction concentrated in the pipes.
- Let it sit for at least 30 minutes, or even a few hours for tougher clogs.
- Afterward, flush the drain with hot water.
Why it works: The chemical reaction between baking soda (a base) and vinegar (an acid) creates carbon dioxide gas, which can help dislodge debris. The fizzing action can also help scrub the inside of the pipes.
3. Salt and Baking Soda Method
Salt can act as an abrasive and help break down grease.
How to do it:
- Mix 1/2 cup of salt with 1/2 cup of baking soda.
- Pour the mixture down the drain.
- Let it sit for about 15-30 minutes.
- Flush with hot water.
Why it works: The salt helps to scrub away grime, while the baking soda aids in breaking down blockages and deodorizing.
Mechanical Methods for a Stubborn Clog
If the simple methods don’t work, you might need a bit more force to remove kitchen sink clog.
4. Using a Plunger
A plunger is a very effective tool for creating suction and dislodging clogs.
How to do it:
- Create a Seal: Ensure there’s enough water in the sink to cover the rubber cup of the plunger. If you have a double sink, block off the other drain with a wet cloth to create a better seal.
- Position the Plunger: Place the plunger over the drain opening, making sure the cup is fully submerged and creates a tight seal.
- Plunge Vigorously: Push and pull the plunger handle up and down firmly and rapidly for about 20-30 seconds.
- Check Drainage: Remove the plunger and see if the water drains.
- Repeat if Necessary: You may need to repeat the plunging action several times.
Why it works: The up-and-down motion creates pressure and suction, which can force the clog loose or pull it back up.
5. How to Clear a Blocked Kitchen Sink with a Drain Snake (Auger)
A drain snake, also known as a plumbing auger, is a flexible metal cable that can reach deeper into the pipes to break up or pull out clogs.
How to do it:
- Insert the Snake: Feed the end of the drain snake into the drain opening.
- Push and Rotate: Gently push the snake further into the pipe. When you encounter resistance, it’s likely the clog. Lock the cable and rotate the handle clockwise to either break through the clog or hook onto it.
- Retrieve the Clog: Once you’ve worked through the clog, slowly pull the snake back out, bringing any debris with it.
- Flush: Run hot water down the drain to clear any remaining debris.
Why it works: The auger physically breaks apart blockages or snags them, allowing for their removal. This is a very reliable method for unclogging kitchen sink pipes.
6. Cleaning the P-Trap
The P-trap is the U-shaped pipe beneath your sink. It’s designed to hold water, which prevents sewer gases from entering your home, but it’s also a common spot for clogs to form.
How to do it:
- Preparation: Place a bucket or basin directly beneath the P-trap to catch any water and debris.
- Loosen Fittings: Use a pipe wrench or adjustable pliers to loosen the slip nuts on either side of the P-trap.
- Remove the Trap: Carefully detach the P-trap. Be prepared for water and gunk to spill into your bucket.
- Clean the Trap: Empty the contents into the bucket. Use a brush or wire to clean out any accumulated debris inside the P-trap.
- Reassemble: Reattach the P-trap, ensuring the fittings are secure but not overly tightened to avoid cracking.
- Test: Run water down the sink to check for leaks and proper drainage.
Why it works: Directly removing and cleaning the P-trap gets rid of blockages located in this common accumulation point. This is a key step in how to clear a blocked kitchen sink.
7. Removing the Sink Stopper and Cleaning
Sometimes, the clog is simply due to debris accumulating around the sink stopper itself.
How to do it:
- Remove Stopper: Most sink stoppers can be lifted out or unscrewed. For some pop-up stoppers, you might need to reach under the sink and disconnect a lever mechanism.
- Clean Stopper: Thoroughly clean the stopper, removing any hair, gunk, or food particles.
- Clean Drain Opening: Use a flashlight to inspect the drain opening and use a paper towel or old toothbrush to remove any visible debris.
- Reassemble and Test: Replace the stopper and run water to check.
Why it works: Buildup around the stopper can significantly impede water flow.
Dealing with Garbage Disposals
If you have a garbage disposal, the clog might be related to it. It’s crucial to know how to clear a kitchen sink disposal unclogging effectively and safely.
Safety First: Always ensure the garbage disposal is turned OFF and unplugged from the power outlet before attempting any unclogging.
1. Resetting the Disposal
Most garbage disposals have a reset button, usually located on the bottom of the unit.
How to do it:
- Locate Reset Button: Feel around the base of the disposal unit for a small red or black button.
- Press the Button: Press the reset button firmly. If it had popped out, it will click back into place.
- Check for Obstructions: If you suspect a jam, use tongs or pliers to carefully remove any visible obstructions from the disposal chamber (never use your hands!).
- Power On: Once reset and clear, plug the disposal back in and turn on the cold water. Then, briefly turn on the disposal to see if it runs freely.
Why it works: The reset button is a thermal overload protector. If the motor overheats due to a jam or strain, it will trip. Resetting it can resolve the issue if no physical obstruction remains.
2. Using an Allen Wrench (Hex Key)
Many disposals come with a special Allen wrench for manually turning the motor shaft.
How to do it:
- Unplug Disposal: Ensure the disposal is unplugged.
- Insert Wrench: Locate the hexagonal socket in the center of the bottom of the disposal unit. Insert the correct size Allen wrench.
- Turn Manually: Rotate the wrench back and forth to free up the grinding plates and dislodge any jams.
- Remove Debris: After freeing the mechanism, remove any dislodged debris using tongs or pliers.
- Reset and Test: Plug the disposal back in, turn on cold water, and briefly run the disposal.
Why it works: This manually rotates the disposal’s blades, breaking up jams that the reset button alone cannot fix.
3. Flushing with Water and Dish Soap
After clearing a jam, flushing the disposal can help remove lingering debris.
How to do it:
- Ensure Clear: Make sure the disposal is clear of any obstructions.
- Turn on Cold Water: Let cold water run into the disposal.
- Add Dish Soap: Pour a good squirt of dish soap into the disposal.
- Run Disposal: Briefly turn on the disposal to let the soap and water circulate.
- Flush Thoroughly: Continue running cold water for a minute or two to flush everything out.
Why it works: The water helps to flush away loosened particles, and the dish soap can help break down any residual grease.
Chemical Drain Cleaners: Use with Caution
Chemical drain cleaners can be effective but should be used as a last resort due to their corrosive nature and potential to damage pipes or harm the environment.
When to Consider Chemical Cleaners:
- When other methods have failed.
- For clogs that are clearly organic matter rather than solid objects.
How to Use Safely:
- Read Instructions Carefully: Always follow the product’s instructions precisely.
- Wear Protection: Use rubber gloves and eye protection. Ensure good ventilation.
- Don’t Mix Chemicals: Never mix different drain cleaning products, as this can create dangerous fumes.
- Use Sparingly: Avoid using them too frequently, as they can weaken pipes over time.
- Flush Thoroughly: After the recommended waiting time, flush the drain thoroughly with cold water.
Why they work: Chemical drain cleaners contain strong chemicals (like lye or sulfuric acid) that dissolve organic matter like grease, hair, and food.
Important Warning: If you have a garbage disposal, never use a chemical drain cleaner without first consulting the disposal’s manual or the manufacturer. Some chemicals can damage the disposal’s seals or blades.
Preventing Future Clogs
The best way to deal with a clogged sink is to prevent it from happening in the first place. Here are some tips for kitchen sink drain cleaning and prevention:
- Scrape Plates: Scrape food scraps into the trash or compost bin before rinsing dishes.
- Avoid Pouring Grease: Never pour grease, oil, or fats down the drain. Collect them in a container and dispose of them in the trash once cooled.
- Use a Drain Strainer: A sink strainer will catch food particles and debris, preventing them from entering the pipes. Clean the strainer regularly.
- Run Cold Water with Disposal: If you use a garbage disposal, always run cold water for about 15-30 seconds before and after using it. This helps flush food waste through the pipes.
- Regular Flushing: Periodically flush your drains with hot water or the baking soda and vinegar mixture to keep them clear.
- Limit Coffee Grounds and Eggshells: While disposals can handle some, large quantities of coffee grounds and eggshells can still contribute to clogs over time.
Troubleshooting Table: Identifying the Clog
| Symptom | Potential Cause | Best Method to Try |
|---|---|---|
| Slow draining | Minor grease buildup, food debris | Hot water flush, Baking soda & vinegar, Plunger |
| Complete blockage, no draining | Significant grease or food blockage | Plunger, Drain snake, P-trap cleaning, Baking soda & vinegar |
| Gurgling sounds, bad smell | Vent blockage, deep clog, bacterial buildup | Hot water flush, Baking soda & vinegar, Chemical cleaner (use cautiously) |
| Sink backs up when disposal runs | Disposal jam, clog in disposal line | Reset disposal, Allen wrench, Flush with water & soap |
| Water leaks under sink | Loose P-trap fittings | Tighten P-trap fittings, Inspect seals |
Frequently Asked Questions (FAQ)
Q1: How often should I clean my kitchen sink drains?
A1: It’s a good idea to perform a preventative cleaning once a month using the baking soda and vinegar method or a hot water flush. This helps get rid of kitchen sink smell and keeps pipes clear.
Q2: Can I pour bleach down my kitchen sink drain?
A2: It’s generally not recommended. Bleach is a harsh chemical that can damage pipes over time and is not as effective at breaking down grease as other methods. It also produces toxic fumes when mixed with other cleaners.
Q3: My kitchen sink disposal is making a humming noise but not grinding. What’s wrong?
A3: This usually indicates that the disposal is jammed. Unplug the unit, use an Allen wrench to manually turn the blades, and check for obstructions with tongs or pliers. Then try resetting the unit.
Q4: How do I remove a kitchen sink clog that’s deep in the pipe?
A4: For deep clogs, a drain snake or auger is usually the most effective tool. Follow the instructions for inserting and operating the snake to reach and break up the blockage.
Q5: What’s the best way to get rid of kitchen sink smell?
A5: A common cause of sink smell is bacteria and food particles stuck in the drain or disposal. Try the baking soda and vinegar method, followed by a hot water flush. Running cold water with dish soap through the disposal can also help. Leaving a citrus peel in the disposal and running it can leave a fresh scent.
By following these methods, you can effectively clear your kitchen sink drain fast and keep your kitchen running smoothly. Remember to always prioritize safety and try the least invasive methods first when faced with a sink drain blockage solution.