
Can you fix a clogged kitchen sink? Yes, you can! Most kitchen sink clogs are manageable with common household items and simple tools. This guide will walk you through effective methods to quickly tackle a kitchen drain clog.
A slow-draining or completely blocked kitchen sink is a frustrating problem. Food scraps, grease, soap scum, and other debris can build up over time, creating a stubborn blockage. Fortunately, you don’t always need to call a plumber. There are several DIY methods to unclog kitchen sink drains that are fast, effective, and won’t break the bank.
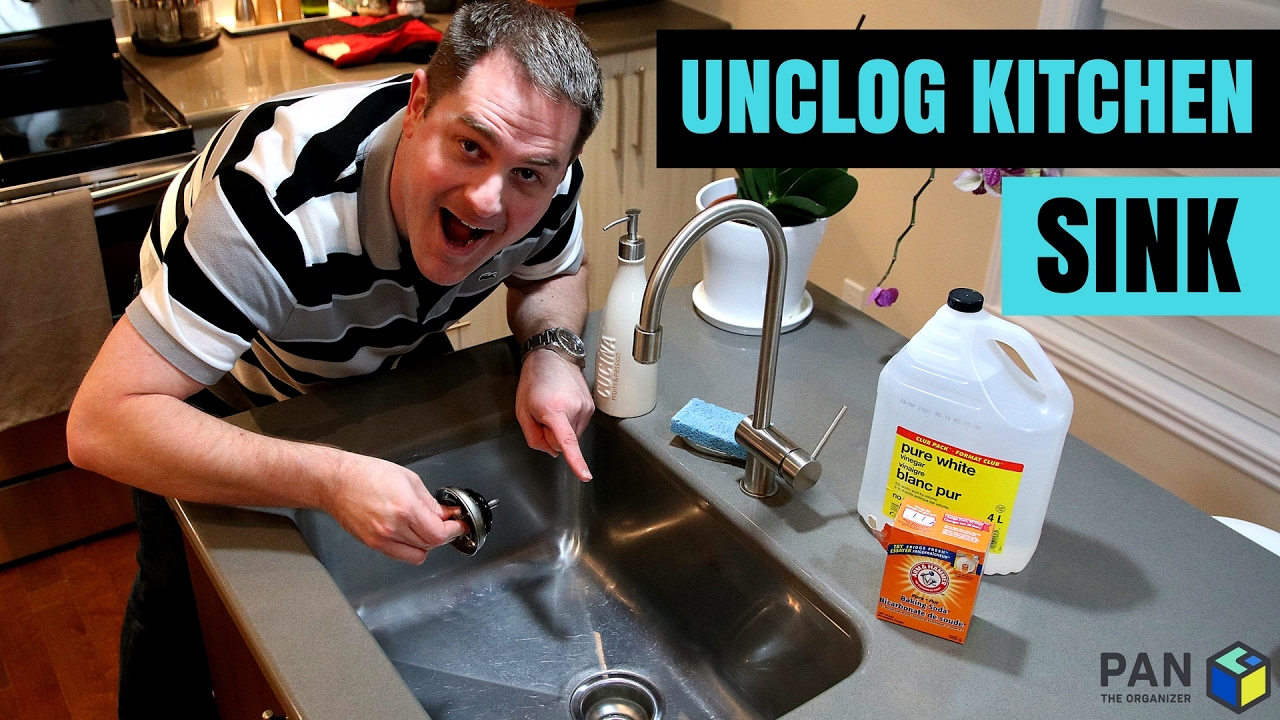
Image Source: i.ytimg.com
Common Culprits Behind a Kitchen Sink Clog
Before we dive into fixing, let’s understand what causes these blockages. Knowing the enemy makes the battle easier.
Everyday Kitchen Debris
- Grease and Fat: This is a major offender. When hot grease cools down in your pipes, it solidifies. Over time, this grease layer thickens, trapping other debris and forming a solid clog.
- Food Scraps: Small particles of food, coffee grounds, eggshells, rice, pasta, and vegetable peels can easily get stuck in the drain. Even with a garbage disposal, some items are best avoided.
- Soap Scum: The oils and fats in bar soaps can combine with minerals in the water to form a sticky residue that coats the inside of your pipes, contributing to clogs.
- Foreign Objects: Small items like bottle caps, twist ties, or even pieces of silverware can accidentally go down the drain and cause blockages.
Garbage Disposal Issues
If you have a garbage disposal, a kitchen sink disposal clogged can be a specific problem. While designed to break down food waste, they can still become jammed.
- Overloading: Trying to dispose of too much food at once can overwhelm the disposal’s motor and blades.
- Fibrous Foods: Items like celery, corn husks, and potato peels have stringy fibers that can wrap around the blades.
- Hard Materials: Bones, fruit pits, and glass are too tough for most disposals to handle.
- Starchy Foods: Rice, pasta, and oats can expand when wet, turning into a sticky paste that can clog the disposal and drain pipes.
Simple and Fast Fixes for Your Clogged Kitchen Sink
Let’s get straight to the solutions. We’ll start with the easiest methods and move to slightly more involved ones.
Method 1: The Power of Boiling Water
This is often the first and simplest thing to try, especially for grease clogs.
What You Need:
- A kettle or pot
- Water
Steps:
- Boil a kettle or pot full of water.
- Carefully pour the boiling water directly down the drain in stages. Wait a few seconds between each pour.
- Listen for any gurgling sounds or signs of the water draining.
Why it Works: The hot water can melt away solidified grease and soap scum, helping to break down the blockage.
When to Use: Best for clogs caused by grease or soap buildup.
Caution: Avoid this method if you have PVC pipes that are very old or brittle, as extreme heat could potentially cause damage. For most modern plumbing, it’s safe. Also, don’t use boiling water if you’ve just tried a chemical drain cleaner, as it can cause dangerous splashing.
Method 2: The Baking Soda and Vinegar Method
This classic DIY solution creates a fizzing reaction that can help dislodge clogs.
What You Need:
- 1/2 cup baking soda
- 1/2 cup white vinegar
- Boiling water (from Method 1)
- A sink stopper or rag
Steps:
- Pour the baking soda down the drain.
- Follow with the white vinegar. You’ll hear and see a fizzing reaction.
- Immediately cover the drain with a stopper or a rag to keep the reaction contained within the pipes.
- Let it sit for at least 15-30 minutes, or longer for tougher clogs (up to an hour).
- After waiting, remove the stopper and pour boiling water down the drain to flush away the loosened debris.
Why it Works: The chemical reaction between baking soda (a base) and vinegar (an acid) creates carbon dioxide gas, which can physically push and break apart clogs. The fizzing action helps scrub the pipe walls.
When to Use: Effective for general gunk, grease, and mild to moderate clogs. It’s a great preventative measure too.
Method 3: Using a Kitchen Sink Plunger
A kitchen sink plunger is a surprisingly effective tool for many clogs. The key is to use it correctly.
What You Need:
- A cup-style plunger (specifically designed for sinks, not toilet plungers which have a flange)
- Water
- A rag or stopper for the overflow drain (if your sink has one)
Steps:
- Remove any standing water from the sink if possible. If the clog is severe, you might need to scoop out some water.
- Fill the sink with enough water to cover the rubber cup of the plunger (about 2-3 inches). This helps create a seal.
- If your sink has a double basin or an overflow drain, seal the other drain opening tightly with a wet rag or stopper. This is crucial for building pressure.
- Place the plunger cup directly over the drain opening, ensuring a tight seal.
- Push down firmly and then pull up sharply several times in a consistent rhythm. The goal is to create suction and pressure to dislodge the clog.
- After several plunges, quickly pull the plunger away.
- Check if the water drains. You may need to repeat the plunging process several times.
- Once the clog is cleared, flush the drain with hot water.
Why it Works: Plunging creates alternating pressure and suction, which can break apart blockages and force them through the pipes.
When to Use: Excellent for most types of clogs, especially those caused by solid food debris or soft blockages.
Method 4: The Drain Snake (Auger)
If boiling water, baking soda/vinegar, and plunging don’t work, it’s time to bring out a drain snake kitchen sink, also known as a plumbing auger. This tool is designed to physically break up or retrieve clogs.
What You Need:
- A drain snake or plumbing auger (a flexible metal cable with a crank handle)
- Gloves
- A bucket or trash bag
- Rag
Steps:
- Feed the end of the drain snake into the drain opening.
- Push the snake down the pipe until you feel resistance – this is likely the clog.
- Lock the cable and begin cranking the handle. This rotates the snake’s end, helping it to bore through the clog or hook onto it.
- Continue cranking and pushing gently. You might feel the resistance lessen as the clog breaks apart or the snake grabs onto it.
- Slowly pull the snake back out, cranking the handle as you go. Be prepared for debris to come out with it. Use a bucket or bag to catch this.
- Once the snake is clear, re-insert it to ensure the path is open.
- Flush the drain thoroughly with hot water.
Why it Works: The auger’s tip can physically break up soft clogs or grab onto solid debris, allowing you to pull it out.
When to Use: For stubborn clogs that other methods can’t clear, or when you suspect a solid object is causing the blockage.
Method 5: Clearing the P-Trap
The P-trap is the U-shaped pipe under your sink. It’s designed to hold water, which prevents sewer gases from entering your home. It’s also a common place for clogs to form.
What You Need:
- Bucket
- Adjustable wrench or pipe wrench
- Gloves
- Rag or old towels
- Wire brush (optional)
Steps:
- Place a bucket directly underneath the P-trap to catch any water and debris.
- Loosen the slip nuts on either side of the U-shaped trap. You can often do this by hand, but you might need a wrench. Turn counter-clockwise.
- Once the nuts are loose, carefully remove the P-trap. Water and debris will likely fall into the bucket.
- Inspect the P-trap for any blockages. Remove any debris you find, using your fingers or a wire brush if necessary.
- Check the pipes leading into and out of the P-trap for any obstructions as well. You might be able to reach into the pipe with your fingers or a coat hanger (bent into a hook) to clear it.
- Once clear, reassemble the P-trap, ensuring the slip nuts are tightened securely. Hand-tight is usually sufficient, but you can use a wrench for a final snug turn if needed, being careful not to overtighten.
- Run water into the sink to check for leaks and ensure the drain is flowing freely.
Why it Works: Directly removes blockages from the most common culprit pipe.
When to Use: When other methods fail, or when you suspect a significant accumulation of debris in the trap itself.
Method 6: Chemical Drain Cleaners (Use with Caution)
While readily available, chemical drain cleaner kitchen sink products should be a last resort. They can be harsh and damage pipes, especially older ones, and pose risks to your health and the environment.
What You Need:
- A commercial drain cleaner product (follow instructions precisely)
- Gloves
- Eye protection
- Ventilation (open windows)
Steps:
- Read the label carefully. Different products have different instructions and warnings.
- Ensure good ventilation. Open windows and turn on exhaust fans.
- Wear protective gear. Gloves and eye protection are essential.
- Pour the recommended amount of the cleaner directly into the drain. Do not splash.
- Let it sit for the time specified on the product label. Do not leave it longer, as this can damage pipes.
- Flush with cold water as directed. Never use hot or boiling water immediately after a chemical cleaner.
Why it Works: Chemicals in drain cleaners work by dissolving organic matter like grease, hair, and soap scum.
When to Use: As a last resort for stubborn clogs when other methods have failed.
Important Cautions:
- Never mix different drain cleaners. This can create toxic fumes.
- Never use a plunger after using a chemical cleaner. The splashing chemicals can cause severe burns.
- Avoid if you have a septic system. Chemicals can disrupt the beneficial bacteria in septic tanks.
- Be mindful of pipe material. Some chemicals can damage PVC or older metal pipes.
- Consider enzymatic cleaners. These use bacteria to break down organic waste and are much safer for pipes and the environment than harsh chemical cleaners.
Dealing with a Clogged Garbage Disposal
If your sink clog is accompanied by a foul odor or humming sound from the disposal unit, it might be the culprit.
Resetting Your Garbage Disposal
Most garbage disposals have a reset button.
What You Need:
- A flashlight
- A hex wrench (often comes with the disposal) or a broom handle
Steps:
- Turn off the power to the disposal at the breaker box. This is crucial for safety.
- Look for the reset button. It’s usually a small red button on the bottom or side of the disposal unit.
- Check for jams. Shine a flashlight down the drain. If you see any debris lodged in the disposal, carefully remove it using tongs or pliers (never your hand).
- Use the hex wrench. Insert the wrench into the hole at the bottom center of the disposal and turn it back and forth to free up the motor and blades.
- Press the reset button. If it popped out, press it firmly.
- Turn the power back on at the breaker box.
- Run cold water into the sink and then turn on the disposal to see if it works.
Other Disposal Fixes
- Ice Cubes: Grinding a tray of ice cubes can help clean the disposal blades and dislodge minor build-up.
- Citrus Peels: Grinding lemon, lime, or orange peels can help freshen the disposal and deter odors.
If the disposal continues to hum or show no signs of life after these steps, the motor may have failed, or there might be a more serious jam that requires professional attention.
Preventative Maintenance: Keeping Your Drains Clear
The best way to deal with a clogged kitchen sink is to prevent it from happening in the first place.
What NOT to Put Down Your Kitchen Sink
- Grease, oil, and fats: Always wipe greasy pans with a paper towel before washing, and pour grease into a disposable container and throw it away.
- Coffee grounds: They don’t dissolve easily and can clump together.
- Eggshells: The thin membrane can stick to pipes, and the shell fragments can create rough surfaces for debris to cling to.
- Starchy foods: Pasta, rice, and potato peels can expand and form a thick paste.
- Fibrous vegetables: Celery, corn husks, asparagus, and artichokes can tangle around disposal blades or wrap around pipe edges.
- Fruit pits and seeds: They are too hard for most disposals and can cause damage.
- Bones: Small or large, they are best disposed of in the trash.
- Abrasive cleaners: These can damage pipe surfaces over time.
- Feminine hygiene products, cotton balls, dental floss: These items do not break down and can cause serious clogs.
Simple Daily and Weekly Habits
- Use a drain strainer: This simple mesh screen catches larger food particles before they enter the drain. Clean it out regularly.
- Run hot water after each use: Especially after washing greasy dishes, flush the drain with hot water for about 30 seconds. This helps melt any residual grease.
- Weekly baking soda and vinegar flush: Pour half a cup of baking soda down the drain, followed by half a cup of vinegar. Let it sit for 15 minutes, then flush with hot water. This is excellent for maintenance.
- Clean your disposal regularly: Use ice cubes and citrus peels periodically.
When to Call a Professional Plumber
While many kitchen sink clogs are DIY-friendly, there are times when you should call in the experts.
- Persistent Clogs: If you’ve tried multiple methods and the sink still won’t drain, the clog might be too deep or too stubborn for DIY tools.
- Multiple Drains Affected: If sinks or toilets in other parts of your house are also backing up, it could indicate a blockage in your main sewer line, which requires professional equipment.
- Foul Smells Persist: Persistent bad odors that aren’t resolved by cleaning can point to deeper plumbing issues.
- Water Backing Up: If water is backing up into other drains when you use a particular fixture, this is a sign of a serious blockage.
- Lack of Confidence: If you’re uncomfortable with any of the DIY methods, especially those involving disassembly or stronger chemicals, it’s always safer to call a plumber.
Troubleshooting Common Sink Drain Issues
| Problem | Likely Cause | Recommended Solution |
|---|---|---|
| Slow Draining Sink | Minor buildup of grease, soap scum, food particles | Boiling water, baking soda & vinegar, regular drain straining, weekly maintenance flush. |
| Complete Blockage | Significant accumulation of debris, grease, or object | Plunger, drain snake, P-trap cleaning, consider professional help if persistent. |
| Foul Odor | Trapped food debris in disposal or P-trap | Clean disposal with ice/citrus, check P-trap for debris, use baking soda and vinegar flush. |
| Garbage Disposal Humming | Jammed blades or motor overload | Turn off power, check for debris, use hex wrench, press reset button. |
| Water backing up elsewhere | Main sewer line clog | Call a professional plumber immediately. |
| Slow drain after using disposal | Food debris not fully processed or settled | Run cold water for an extra 30 seconds after use, use a drain snake to clear any remaining debris in the pipe. |
Frequently Asked Questions (FAQ) About Clogged Kitchen Sinks
Q1: How often should I use baking soda and vinegar to clean my sink?
A1: It’s a good idea to do a baking soda and vinegar flush once a week or bi-weekly as a preventative measure.
Q2: Can I pour bleach down my kitchen sink to unclog it?
A2: While bleach can kill bacteria and help with odors, it’s not very effective at dissolving the types of clogs common in kitchen sinks (grease, food). It can also damage pipes and create dangerous fumes if mixed with other chemicals. It’s generally not recommended for clearing kitchen sink pipe blockages.
Q3: My kitchen sink disposal is clogged. What’s the fastest way to fix it?
A3: The fastest way often involves ensuring the reset button hasn’t popped out and checking for jams using the hex wrench and flashlight. Make sure the power is off first! If it’s a simple jam, this should resolve it quickly.
Q4: Is it safe to use a chemical drain cleaner if I have a garbage disposal?
A4: Some chemical drain cleaners are advertised as safe for disposals, but it’s always best to check the product label carefully. Many plumbers advise against using them as they can damage the disposal’s seals and blades over time, and can be harmful if the disposal’s motor is affected.
Q5: How do I know if I have a kitchen drain clog vs. a main sewer line clog?
A5: If only your kitchen sink is affected, it’s likely a clog in your kitchen drain line. If multiple fixtures (toilets, showers, other sinks) are backing up or draining slowly, especially when one fixture is used, it’s a strong indicator of a blockage in the main sewer line.
Q6: My sink is draining very slowly. Should I just use hot water?
A6: Hot water clogged sink situations can often be improved with just hot water. However, for persistent slow draining, a combination of methods like baking soda and vinegar followed by hot water, or using a drain snake kitchen sink, might be more effective in the long run to remove the underlying buildup.
Q7: What is the best tool to use for a tough clog?
A7: For tough clogs, a kitchen sink auger (drain snake) is generally the most effective DIY tool. It can physically break up or retrieve blockages that plungers and chemical cleaners cannot.
Q8: Can I use a toilet plunger for my kitchen sink?
A8: It’s best to use a kitchen sink plunger. Toilet plungers have a flange that creates a better seal in a toilet bowl but can be awkward and less effective in a sink. A standard cup plunger is ideal for sinks.
Q9: I’ve tried everything, and my sink is still clogged. What should I do?
A9: If you’ve exhausted the DIY methods, it’s time to call a professional plumber. They have specialized tools and expertise to diagnose and clear even the most stubborn blockages, ensuring no damage is done to your plumbing system.
By following these steps and preventative measures, you can efficiently tackle most clogged kitchen sinks and keep your drains flowing smoothly.