
Image Source: i.ytimg.com
How To Remove Drain From Kitchen Sink: Easy Steps
Can you remove a kitchen sink drain yourself? Yes, you absolutely can! With the right tools and a little patience, removing a kitchen sink drain is a DIY project that most homeowners can tackle. This guide will walk you through the entire process, from gathering your supplies to the final steps of reassembly or preparing for a new drain. Whether you’re dealing with a stubborn kitchen sink strainer, need to perform a sink stopper removal, or are wondering how to unscrew a sink drain for a replacement, these easy steps will help. We’ll cover everything you need to know about kitchen sink plumbing, including what to do if you’re also facing a clogged sink drain repair.
Gathering Your Essential Plumbing Tools for Sink Jobs
Before you begin, having the right tools makes the job much smoother. You’ll want to assemble a small collection of handy plumbing tools for sink work. Don’t worry if you don’t have everything; many can be borrowed or are relatively inexpensive to purchase.
Here’s a list of what you’ll likely need:
- Adjustable Wrench: This is your primary tool for loosening and tightening nuts.
- Pipe Wrench: For a firmer grip on pipes, especially if they are stubborn.
- Basin Wrench: This specialized tool is designed to reach into tight spaces behind the sink where the drain assembly is located. It’s incredibly helpful for loosening the locknut.
- Plumber’s Putty or Silicone Caulk: To create a watertight seal for the new drain flange or the existing one if you’re just cleaning.
- Screwdriver (Flathead and Phillips): For any screws that might be part of your sink setup.
- Bucket or Towels: To catch any residual water that might spill out from the pipes.
- Safety Glasses: Protect your eyes from debris and water.
- Gloves: Keep your hands clean and protected.
- Rag or Sponge: For wiping away excess putty or water.
- Penetrating Oil (Optional): If nuts are heavily corroded or stuck.
Step-by-Step Guide to Removing Your Kitchen Sink Drain
Removing a kitchen sink drain involves a few key components. You’ll often be dealing with the kitchen sink strainer, the drain itself, and the pipes connecting to your plumbing. If you’re just looking to remove the kitchen sink plug or the entire kitchen sink basket, the process is very similar. Let’s break it down.
Step 1: Prepare the Area and Turn Off the Water
Safety first! Even though you’re not directly working with the water supply for the faucet, it’s good practice to prevent any accidental water flow.
- Clear Under the Sink: Remove everything from the cabinet below your kitchen sink. This gives you plenty of room to work and prevents your stored items from getting wet or in the way.
- Place a Bucket: Position a bucket or a thick stack of old towels directly under the drain pipe that connects to the sink’s drain assembly. This will catch any leftover water that might drip out.
- Consider Turning Off Water (Optional but Recommended): While not strictly necessary for drain removal, if you’re also working on faucet repairs, it’s wise to turn off the hot and cold water supply valves under the sink. These are usually small handles located on the pipes leading to the faucet.
Step 2: Detach the P-Trap and Tailpiece
The P-trap is the curved section of pipe directly beneath the sink drain. It’s designed to hold water, which prevents sewer gases from rising into your home.
- Loosen the Slip Nuts: You’ll see large plastic or metal nuts on either side of the P-trap. Use your adjustable wrench or pipe wrench to loosen these nuts. Turn them counterclockwise. Be prepared for a little water to spill into your bucket.
- Remove the P-Trap: Once the nuts are loose, you should be able to detach the P-trap. Carefully maneuver it out, ensuring any remaining water goes into your bucket.
- Remove the Tailpiece: The tailpiece is the vertical pipe that extends down from the bottom of the sink drain basket. It connects to the P-trap. If it’s a separate piece, it will likely have a slip nut connecting it to the drain assembly. Loosen this nut and pull the tailpiece away.
Step 3: Accessing and Loosening the Drain Flange
Now you need to get to the part that’s actually holding the drain in the sink itself. This is usually a large nut or a locking mechanism under the sink.
- Locate the Locknut: Look up from under the sink at the bottom of the drain assembly. You’ll see a large nut that secures the drain flange inside the sink basin to the rest of the drain body. This is often called the drain locknut.
- Using the Basin Wrench: This is where the basin wrench shines. Its long shaft and pivoting jaw are designed to reach this locknut in the confined space. Position the wrench onto the locknut.
- How to Unscrew Sink Drain Locknut: Turn the basin wrench counterclockwise to loosen the locknut. This can sometimes be the trickiest part, as it might be corroded or very tight. If it’s stuck, a shot of penetrating oil might help. Allow it to sit for a few minutes before trying again. You might need to use your adjustable wrench or pipe wrench if the basin wrench doesn’t provide enough leverage.
- Remove the Locknut and Gasket: Once loosened, unscrew the locknut completely. You’ll also likely find a rubber gasket or a fiber washer beneath the locknut that helps create a seal. Remove these as well.
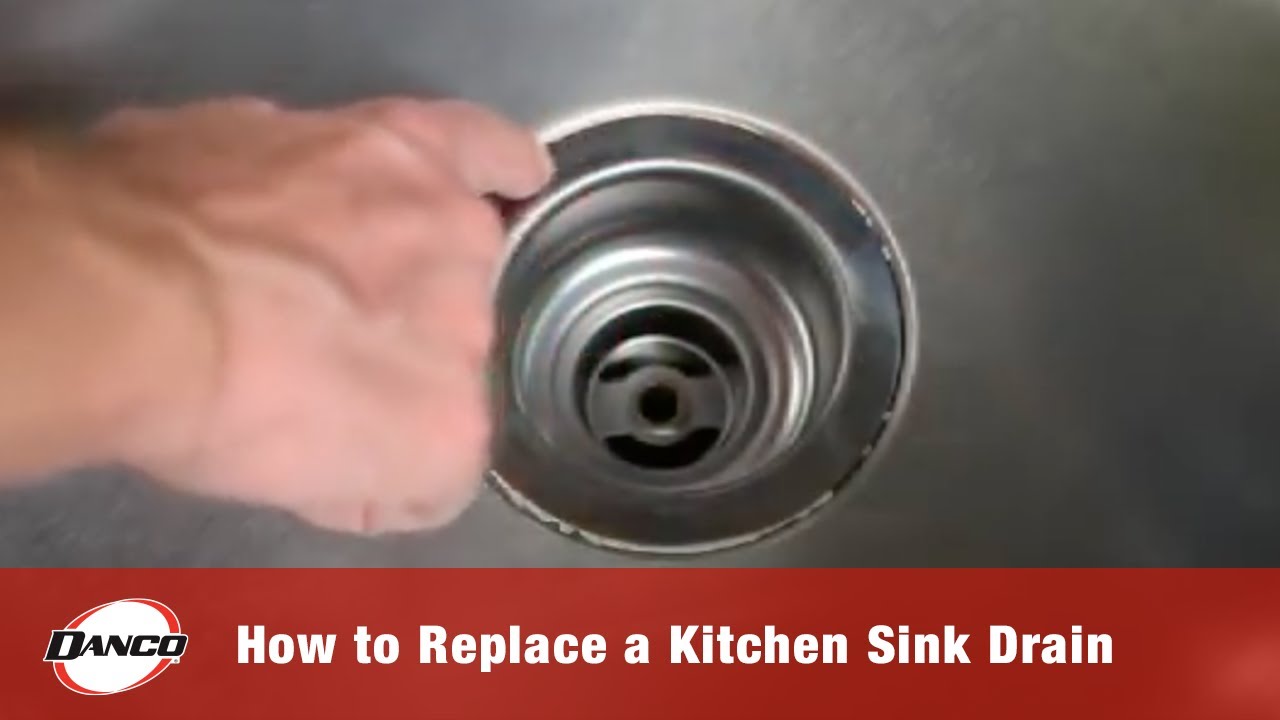
Step 4: Removing the Kitchen Sink Strainer (Drain Flange)
With the locknut removed, the drain assembly should come apart.
- From Above the Sink: Go back to the sink basin. You should now be able to lift the entire kitchen sink strainer (also known as the drain flange) straight up and out of the sink drain opening. If it’s stuck, it might be sealed with old plumber’s putty or caulk. You may need to gently pry it loose with a putty knife or a flathead screwdriver from the edge, being careful not to scratch the sink surface.
- From Below the Sink: As you lift the strainer from above, the rest of the drain body should be free from below. It might still be attached to the tailpiece, or it might come out as a separate piece.
Step 5: Final Cleaning and Inspection
Once the old drain is out, it’s time to clean up.
- Clean the Sink Opening: Scrape away any old plumber’s putty, caulk, or debris from the sink opening. A putty knife or a plastic scraper works well. Ensure the surface is clean and smooth for a new seal.
- Clean the Pipes: Wipe down the tailpiece and any accessible parts of the drain pipe.
- Inspect for Damage: While everything is apart, check the sink basin itself and the pipes for any signs of corrosion, cracks, or other damage. This is also a good time to consider if you need a drain flange replacement or if your existing one is still in good condition.
Why Would You Need to Remove a Kitchen Sink Drain?
There are several common reasons homeowners decide to remove their kitchen sink drain assembly:
- Replacing a Worn-Out Strainer: The kitchen sink strainer can become damaged, rusted, or clogged beyond repair. Replacing it can improve drainage and appearance.
- Installing a New Sink or Countertop: When undertaking renovations, the old drain often needs to be removed to properly install new fixtures.
- Fixing a Leaky Drain: If you have leaks around the drain opening or from the drain body itself, removing and resealing the drain flange is often the solution. This ties into clogged sink drain repair if the clog is causing pressure that leads to leaks.
- Upgrading the Drain Assembly: You might want to switch to a different type of drain, perhaps one with a built-in garbage disposal flange or a more decorative strainer.
- Deep Cleaning: Sometimes, the drain assembly gets so grimy or corroded that the best way to clean it thoroughly is to remove it entirely. This is especially relevant if you’re dealing with persistent odors or buildup.
- Obstructions Beyond the P-Trap: While this guide focuses on removing the drain itself, if you have a deep clog that the P-trap doesn’t catch, you might need to disassemble further. For situations like a basement sink drain removal, the principles are similar, but access might differ.
Common Issues and Troubleshooting During Removal
Even with easy steps, you might encounter a few hurdles.
Stubborn Locknuts
If the locknut won’t budge, try these tricks:
- Penetrating Oil: Apply a generous amount of penetrating oil (like WD-40) to the locknut and threads. Let it sit for 15-30 minutes, or even longer for heavily corroded parts.
- Gentle Tapping: Lightly tap the locknut with the handle of your wrench or a small hammer. This vibration can help break the corrosion bond.
- Heat (Use with Extreme Caution): In very rare cases, a heat gun can be used to expand the metal slightly. Be extremely cautious with heat around plastic pipes and flammable materials. This is generally a last resort for very stubborn metal fittings.
Corroded or Broken Parts
If a part breaks during removal, you might need to replace it. Don’t force rusted metal parts if they are severely degraded, as you could damage the sink itself.
Sticking Strainer
If the kitchen sink strainer is difficult to lift out:
- Gentle Tapping: Tap around the edges of the flange with a rubber mallet or the handle of your screwdriver.
- Prying Carefully: Use a flathead screwdriver or a putty knife to carefully work around the edge and break the seal of old putty or caulk.
Reinstalling the Drain or Installing a New One
Once the old drain is out and the area is clean, you’re ready to put it back together or install a new one. The process for installing a new drain flange replacement is very similar to removal, but in reverse.
- Apply Plumber’s Putty or Caulk: Roll a rope of plumber’s putty or apply a bead of silicone caulk around the underside of the new drain flange. This creates a watertight seal against the sink basin.
- Insert the New Flange: Press the new flange firmly into the sink drain opening from above.
- Assemble from Below: From under the sink, slide the rubber gasket, then the metal washer, and finally the locknut onto the drain body threads.
- Tighten the Locknut: Use your basin wrench to tighten the locknut securely against the gasket and washer. Make sure the flange in the sink remains straight as you tighten.
- Reattach Tailpiece and P-Trap: Connect the tailpiece and P-trap using their slip nuts, tightening them with your adjustable wrench.
- Test for Leaks: Run water into the sink and check all connections for leaks. Tighten any that are dripping.
Special Considerations for Different Sink Types
While the basic process remains the same, there can be slight variations depending on your sink material and design.
- Stainless Steel Sinks: Generally durable and easy to work with. Be mindful of scratching the surface when prying.
- Porcelain or Ceramic Sinks: More prone to chipping or cracking. Use extra care when prying or applying force.
- Undermount Sinks: Access to the drain assembly can be more challenging as there’s no cabinet space directly behind it. You might need a helper or more specialized tools.
- Garbage Disposals: If your sink has a garbage disposal, the drain assembly will be integrated with it. Removal involves detaching the disposal unit first, which often requires a specific mounting bracket release tool. This is a more involved process than just removing a standard drain.
Frequently Asked Questions (FAQ)
Q: How do I remove a kitchen sink plug that’s stuck?
A: A stuck kitchen sink plug (or stopper) usually has a simple mechanism. For pop-up stoppers, there’s often a lever at the back of the faucet that controls it. If the plug itself is just stuck in the drain opening due to grime, try gently wiggling it while pulling upwards. Sometimes, a bit of penetrating oil applied around the edges can help. For pop-up stoppers, you might need to reach under the sink and disconnect a rod that controls the stopper.
Q: What if my drain is completely clogged? Can I still remove it?
A: If you have a clogged sink drain repair situation, removing the drain might be part of the solution, especially if the clog is near the opening. You can attempt removal, but be prepared for water and debris to come out. If the clog is severe, you might need to use a plumbing snake or auger before or after removing the drain assembly to clear the blockage in the main pipe.
Q: Do I need to remove the entire drain assembly or just the strainer?
A: This depends on your goal. If you’re replacing a damaged kitchen sink strainer, you might only need to unscrew the strainer part if it detaches separately. However, most strainers are integral to the drain body, meaning you’ll need to remove the entire assembly by loosening the locknut underneath. If you’re experiencing leaks or want to install a new garbage disposal, removing the whole unit is usually necessary.
Q: Can I reuse my old drain flange?
A: You can often reuse an old drain flange if it’s in good condition, free from significant corrosion or damage, and the seals are intact. However, if you notice any signs of wear, rust, or if you’re installing a new sink, it’s generally recommended to use a new drain flange replacement to ensure a watertight seal and a fresh look.
Q: What is a sink stopper removal process if it’s a twist-and-lock type?
A: Some sink stoppers are designed to twist and lift out. If yours is a twist-and-lock, gently try turning it counterclockwise. If it feels resistant, there might be buildup causing it to stick. A little gentle wiggling while turning can help break it free. Always check if there’s a linkage rod underneath the sink that needs to be disconnected first.
Q: How do I deal with a rusted nut when trying to unscrew sink drain components?
A: For a rusted nut when you’re trying to unscrew sink drain components, use penetrating oil. Apply it generously, let it soak, and then try to loosen the nut with a wrench. Sometimes, gently tapping the nut with a hammer can help break the rust bond. If it’s severely rusted, you might need to use a hacksaw or a rotary tool to carefully cut the nut off, being extremely careful not to damage the sink or the pipe.
Q: I’m renovating my basement and need to remove the sink drain there. Are there differences for a basement sink drain removal?
A: The process for a basement sink drain removal is largely the same as for a kitchen sink. The main differences might be in the type of sink (utility sinks are common in basements) and potentially older plumbing materials. Ensure you have good lighting and access, and always have your bucket and towels ready for any unexpected water.
Q: Is plumber’s putty or silicone caulk better for sealing the drain flange?
A: Plumber’s putty is traditionally used for sealing drain flanges in sinks that do not have a separate gasket on the underside of the flange. It’s pliable and forms a good seal. Silicone caulk is often used when the flange has a built-in rubber gasket, or as an alternative if you prefer its durability and resistance to mold and mildew. Always follow the manufacturer’s recommendations for your specific drain assembly.
By following these detailed steps, you should be well-equipped to handle the removal of your kitchen sink drain with confidence. Remember to work patiently, use the right tools, and prioritize safety.