
Image Source: www.delineateyourdwelling.com
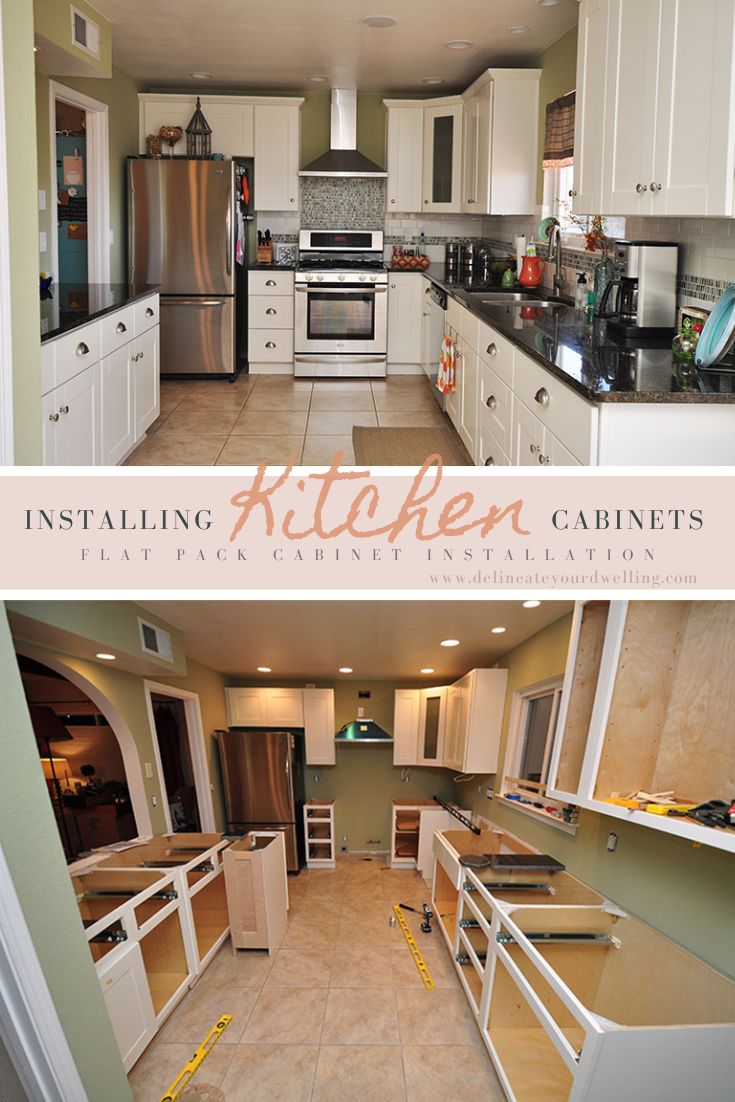
DIY: How to Install Kitchen Units Like a Pro
Can you install kitchen units yourself? Yes, with careful planning and the right tools, you can absolutely install kitchen units yourself, transforming your kitchen on a budget. This comprehensive guide will walk you through every step of the DIY kitchen installation process, from initial preparation to the final touches, ensuring a professional-looking result. We’ll cover everything you need to know about kitchen cabinet installation, fitting kitchen cabinets, and the overall DIY kitchen installation.
Getting Ready: The Foundation of a Flawless Fit
Before you even think about attaching kitchen units, thorough preparation is key. This stage determines the success of your entire project.
Planning Your Kitchen Layout
This is perhaps the most crucial step. Think about how you use your kitchen. Where do you prep food? Where do you store appliances? Where will the sink and hob be?
- Measure Twice, Cut Once: Accurately measure your kitchen space, including wall lengths, ceiling height, and the locations of windows, doors, and existing plumbing and electrical points.
- Create a Layout Plan: Sketch out your ideal kitchen layout. Consider the workflow, ensuring a practical and efficient space. Many kitchen manufacturers offer free design services or online planning tools.
- Cabinet Sizes and Types: Decide on the types and sizes of cabinets you need: base cabinets, wall cabinets, and any specialized units like corner cabinets or appliance housings. Ensure you have enough storage.
- Appliance Placement: Factor in the dimensions of your appliances (fridge, oven, dishwasher, etc.) when planning your cabinet layout.
Gathering Your Tools and Materials
Having the right tools makes the job significantly easier and safer. For a successful DIY kitchen installation, you’ll need:
- Measuring Tools: Tape measure, spirit level (laser level is ideal), pencil.
- Cutting Tools: Jigsaw, circular saw (for any custom cuts or modifications).
- Drilling and Driving Tools: Cordless drill/driver, various drill bits, screwdriver set.
- Fasteners: Wood screws (appropriate lengths and gauges), wall plugs if needed, construction adhesive.
- Marking Tools: Chalk line, builder’s square.
- Support and Alignment: Cabinet clamps, temporary support props, shims.
- Safety Gear: Safety glasses, work gloves, dust mask.
- Finishing Touches: Caulking gun, silicone sealant, filler.
- Kitchen Units: Ensure your chosen kitchen units are delivered and that you have all the necessary components for kitchen unit assembly.
Preparing the Kitchen Space
Clear the area where you’ll be working. Remove existing cabinets, appliances, and anything else that might be in the way.
- Protect Flooring: Cover your floors with drop cloths or cardboard to prevent scratches and damage.
- Check Walls: Ensure your walls are sound and capable of supporting the weight of mounted kitchen cupboards. If installing wall cabinets on plasterboard, you’ll need to locate wall studs or use heavy-duty plasterboard fixings.
- Electrical and Plumbing: If you’re moving plumbing or electrical points, this is the time to do it. Consult with professionals if you’re unsure.
Fitting Base Cabinets: The Solid Groundwork
Installing base cabinets is the first major step in kitchen carcass installation. They provide the stable platform for your countertops.
Marking the Cabinet Lines
Accurate marking is essential for straight and level base cabinets.
- Level Line: Use a spirit level or laser level to draw a perfectly horizontal line on the wall where the top of your base cabinets will sit. This line is your guide.
- Plumb Lines: Mark vertical lines to indicate the front edge of each base cabinet.
Securing the First Cabinet
Typically, you start with a corner cabinet.
- Positioning: Place the first base cabinet in its designated corner, ensuring its front edge aligns with your plumb line and its top aligns with your level line.
- Levelling: Use shims under the cabinet if necessary to ensure it’s perfectly level front-to-back and side-to-side. This is crucial for the overall alignment of all cabinets.
- Attaching to the Wall:
- Locate Studs: For maximum stability, aim to screw the cabinet carcass directly into wall studs.
- Drill Pilot Holes: Drill pilot holes through the back of the cabinet carcass and into the wall studs.
- Secure with Screws: Use long, sturdy wood screws to attach the cabinet firmly to the wall.
Connecting Adjacent Cabinets
Once the first cabinet is secure, you can move on to the next.
- Cabinet to Cabinet: Place the next cabinet alongside the first, aligning their fronts and tops. Use cabinet clamps to hold them snugly together.
- Joining: Drill pilot holes through the side panels of the adjacent cabinets and join them together using appropriate screws. This creates a solid, continuous run of base cabinets.
- Check for Level and Plumb: Continuously check that each cabinet is level and plumb as you install it.
Working Around Obstacles
- Pipes and Wires: If pipes or wires protrude from the wall, you may need to cut notches in the back of the cabinet carcasses to accommodate them. Ensure these are sealed afterwards.
- Uneven Walls: Use shims between the back of the cabinet and the wall to compensate for unevenness, ensuring the cabinet remains plumb.
Installing Wall Cabinets: Reaching New Heights
Mounting kitchen cupboards requires precision and a firm understanding of wall support. This is where a second person is invaluable.
Preparing for Wall Cabinets
- Marking Lines: Use your spirit level to draw a horizontal line on the wall where the bottom of your wall cabinets will sit. This is often determined by the desired height above the base cabinets (typically 18-24 inches).
- Locating Studs: This is critical for secure mounting. Use a stud finder to mark the location of wall studs. Your wall cabinets should ideally be screwed into these studs.
- Temporary Supports: For heavier cabinets, or if you’re working alone, consider using temporary support props or a cabinet hanging bracket.
Hanging the First Wall Cabinet
- Positioning: Lift the first wall cabinet into position, aligning its bottom edge with your marked line.
- Levelling: Ensure the cabinet is perfectly level and plumb.
- Temporary Securing: If using a hanging bracket, secure the cabinet to it. If not, you might need a helper to hold it while you start screwing.
- Attaching to the Wall:
- Pilot Holes: Drill pilot holes through the back of the cabinet carcass into the marked wall studs.
- Screws: Use appropriate screws to securely attach the cabinet to the wall. Start with one or two screws to hold it in place, then add more for full support.
Connecting Adjacent Wall Cabinets
Similar to base cabinets, adjacent wall cabinets need to be joined for stability.
- Alignment: Place the next wall cabinet next to the first, ensuring their fronts and bottoms are perfectly aligned.
- Clamping: Use cabinet clamps to hold them together.
- Joining: Drill pilot holes through the side panels and screw them together.
- Check Alignment: Make sure the cabinets are flush with each other and perfectly level.
Important Considerations for Wall Cabinets
- Weight: Always account for the weight of the cabinets and their contents when choosing fixings and mounting them.
- Plasterboard Walls: If you cannot hit studs, you must use heavy-duty plasterboard fixings like toggle bolts or toggle anchors. Ensure they are rated for the expected load.
- Kitchen Unit Assembly: Ensure that the kitchen carcass installation is solid before you start fitting doors and drawers.
Kitchen Unit Assembly: Bringing it All Together
Once the carcasses are in place, it’s time to assemble the working parts of your kitchen units.
Fitting Drawers and Runners
- Runner Installation: Attach the drawer runners to the inside of the cabinet carcasses according to the manufacturer’s instructions. Pay close attention to the spacing and orientation.
- Drawer Box Assembly: Assemble the drawer boxes, typically by screwing or slotting the sides, front, and back together.
- Attaching Drawer Fronts: Once the drawer boxes are assembled, attach the drawer fronts. Often, there are pilot holes on the inside of the drawer front that align with the drawer box.
- Inserting Drawers: Slide the assembled drawers onto their runners in the cabinets.
Installing Shelves
- Shelf Supports: Insert shelf supports into the pre-drilled holes inside the cabinets at your desired heights.
- Placing Shelves: Rest the shelves on the supports.
Attaching Doors
- Hinge Installation: Attach the hinges to the cabinet doors first, then to the cabinet carcasses. Most modern hinges allow for adjustment to ensure doors hang straight and align correctly.
- Alignment: Adjust the hinges so that the doors are plumb, level, and have even gaps between them. This is a crucial step for a professional finish.
The Final Touches: Elevating Your DIY Kitchen Installation
With the main units in place, it’s time to add the details that make a kitchen functional and beautiful.
Installing Worktops
Worktops sit on top of your fitted base cabinets.
- Cutting Worktops: If your worktops need cutting to size or shape (e.g., for a hob or sink cutout), use appropriate tools and follow the manufacturer’s instructions carefully.
- Securing Worktops: Most worktops are secured from underneath by screwing through the top edge of the base cabinets into the underside of the worktop.
- Joints: If you have multiple worktop pieces, ensure joints are made precisely and sealed with adhesive or biscuits as recommended by the manufacturer.
Fitting Kickboards and Plinths
These cover the base of the cabinets, giving a neat, finished look.
- Cutting to Size: Cut kickboards to the required lengths and trim to fit any corner angles.
- Attaching: Kickboards are typically attached to the front of the base cabinets using clips or screws.
Installing Handles and Knobs
The final flourish!
- Marking: Measure and mark the precise positions for handles or knobs on your doors and drawer fronts.
- Drilling: Drill pilot holes for screws.
- Attaching: Screw on the handles or knobs.
Sealing and Finishing
- Sealing Gaps: Use silicone sealant to fill any small gaps between the worktop and the wall, or between cabinets and the wall.
- Cleaning: Clean all surfaces thoroughly.
Table: Essential Tools for Fitting Kitchen Cabinets
| Tool Category | Specific Tool | Purpose |
|---|---|---|
| Measuring & Marking | Tape Measure | Accurate measurement of spaces and components. |
| Spirit Level / Laser Level | Ensuring cabinets are perfectly horizontal and vertical. | |
| Pencil | Marking lines on walls and cabinets. | |
| Builder’s Square | Ensuring right angles during cabinet alignment. | |
| Cutting | Jigsaw / Circular Saw | Custom cuts for cabinets, worktops, or trimming plinths. |
| Drilling & Driving | Cordless Drill/Driver | Drilling pilot holes, driving screws, and inserting fixings. |
| Drill Bit Set | Various sizes for pilot holes and different materials. | |
| Screwdriver Set | For manual screw driving and adjustments. | |
| Fastening | Wood Screws | Securely attaching cabinet carcasses to walls and to each other. |
| Wall Plugs / Anchors | For securing cabinets to walls where studs are not accessible. | |
| Construction Adhesive | For some types of joints and securing plinths. | |
| Support & Alignment | Cabinet Clamps | Holding cabinets together while joining them. |
| Temporary Support Props | Holding wall cabinets in place before they are fully secured. | |
| Shims | Adjusting cabinets to be perfectly level and plumb against uneven walls. | |
| Safety | Safety Glasses | Protecting eyes from dust and debris. |
| Work Gloves | Protecting hands. | |
| Dust Mask | Protecting lungs from dust during cutting and drilling. | |
| Finishing | Caulking Gun | Applying sealant to fill gaps. |
| Silicone Sealant | Waterproofing and sealing gaps. | |
| Wood Filler | Filling small holes or imperfections. |
Frequently Asked Questions (FAQ)
Q1: What is the most important step in fitting kitchen cabinets?
A1: The most crucial step is meticulous planning and accurate measurement. Without precise measurements and a clear layout, you’ll face significant challenges during installation.
Q2: Can I install kitchen units on my own?
A2: Yes, you can install kitchen units yourself. However, it is a demanding job that requires patience, accuracy, and often a second pair of hands, especially for mounting kitchen cupboards.
Q3: How do I ensure my kitchen cabinets are level?
A3: Use a spirit level or laser level at every stage. Ensure your initial guideline marks are perfectly level, and shim base cabinets as needed to make them plumb and level before screwing them in. Continuously check as you connect cabinets.
Q4: What if my walls are not straight?
A4: Use shims between the back of the cabinet and the wall to compensate for unevenness. The goal is to have the cabinet itself perfectly plumb and level, regardless of the wall’s shape.
Q5: How do I find wall studs for mounting kitchen cupboards?
A5: Use a stud finder. For older homes, you might need to tap the wall to listen for a solid sound, indicating a stud, or carefully drill small exploratory holes.
Q6: What type of screws should I use for kitchen cabinet installation?
A6: Use sturdy wood screws that are long enough to penetrate the cabinet carcass and securely anchor into wall studs. For plasterboard, use heavy-duty plasterboard fixings rated for the load.
Q7: Do I need to install base cabinets before wall cabinets?
A7: Yes, it is standard practice to install the base cabinets first. They provide a stable reference point and help ensure your wall cabinets are installed at the correct height and alignment.
Q8: How do I handle sink or hob cutouts in my worktop?
A8: If your worktop doesn’t come with pre-cut holes, you’ll need to measure carefully, mark the cutout, and use a jigsaw with a fine-tooth blade. Follow the worktop manufacturer’s instructions for best results, often sealing cut edges.
Q9: How do I ensure doors hang straight?
A9: Modern kitchen cabinet hinges are adjustable. After fitting the doors, use the adjustment screws on the hinges to move the doors up, down, left, right, and in/out until they are perfectly aligned and have even gaps.
Q10: What is the best way to join cabinets together?
A10: Use cabinet clamps to hold them tightly together, then drill pilot holes through the side panels and secure them with appropriate wood screws. This creates a strong, unified cabinet run.
By following these steps and paying attention to detail, your DIY kitchen installation can rival that of a professional. Take your time, work safely, and enjoy the satisfaction of a beautifully installed kitchen!