
Image Source: contentgrid.homedepot-static.com
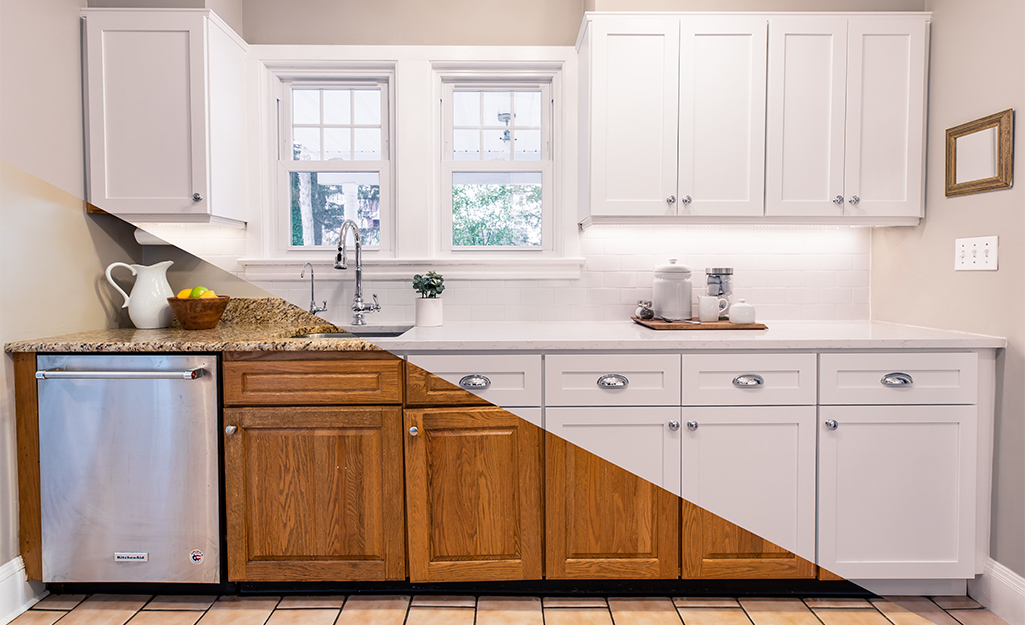
How to Replace Kitchen Cabinets: Step-by-Step
Can you replace kitchen cabinets yourself? Yes, with careful planning and the right tools, you can successfully replace your kitchen cabinets as a DIY project. Replacing your kitchen cabinets can dramatically transform the look and functionality of your kitchen. Whether your current cabinets are worn out, outdated, or you simply crave a fresh style, this guide will walk you through the entire process, from initial planning to the final touches. We’ll cover everything you need to know, including what to consider before you start, how to remove old cabinets, and the crucial steps for installing new ones. We’ll also touch upon factors like cabinet replacement cost, the difference between cabinet refacing vs replacement, and even the smaller, but impactful, kitchen cabinet hardware replacement.
Step 1: Planning Your Kitchen Cabinet Makeover
Good planning is the cornerstone of any successful renovation project, especially when it comes to something as significant as replacing kitchen cabinets. Skipping this step can lead to costly mistakes and frustrating delays.
Deciding on Your New Cabinets
The first major decision is choosing your new cabinets. This involves more than just picking a style and color.
Types of Cabinets
- Stock Cabinets: These are pre-made cabinets available in standard sizes. They are generally the most affordable and readily available, with quicker delivery times.
- Semi-Custom Cabinets: These offer more flexibility than stock cabinets, with a wider range of sizes, styles, and finishes. You can often customize dimensions and storage options.
- Custom Cabinets: These are built to your exact specifications, allowing for unparalleled design freedom and unique solutions for any kitchen layout. They are typically the most expensive and have longer lead times.
Cabinet Materials
The material of your cabinets significantly impacts their durability, appearance, and cost.
- Solid Wood: Offers a classic, durable, and premium look. Common woods include maple, oak, cherry, and hickory. Each has its own grain pattern and color.
- Plywood: A strong and stable material, often used for cabinet boxes. It’s less prone to warping than solid wood.
- MDF (Medium-Density Fiberboard): An engineered wood product made from wood fibers, resin, and wax. It’s smooth and stable, making it ideal for painted finishes. However, it can be susceptible to moisture damage.
- Particleboard: The least expensive option, made from wood chips and a binder. It’s less durable and susceptible to moisture than MDF or plywood.
Cabinet Styles
- Shaker: Characterized by a simple, clean design with a flat center panel and raised frame. It’s a versatile style that fits many kitchen aesthetics.
- Slab (or Flat Panel): Features a sleek, minimalist design with a completely flat door and drawer front. Great for modern and contemporary kitchens.
- Raised Panel: Has a center panel that is raised, creating a more traditional and ornate look.
- Recessed Panel: Similar to Shaker but with a slightly indented center panel, offering a softer look.
Measuring Your Kitchen
Accurate measurements are crucial for ordering the correct cabinet sizes. You’ll need to measure:
- The length of each wall where cabinets will be installed.
- The height from the floor to the ceiling or any obstructions like soffits.
- The depth of existing cabinets if you want similar dimensions.
- The location and size of windows, doors, and appliance openings.
- The placement of plumbing and electrical outlets.
Tip: Draw a detailed floor plan of your kitchen, marking all dimensions and existing features. This will help you visualize the layout and ensure your new cabinets fit perfectly.
Budgeting for Your Project
The cabinet replacement cost can vary significantly. Consider these factors when creating your budget:
- Cabinet Purchase Price: This is the biggest expense and depends on the type, material, and brand of cabinets you choose.
- Hardware: Hinges, drawer slides, and knobs/pulls.
- Countertops: If you’re also replacing countertops, factor in their cost.
- Tools and Supplies: Screws, shims, level, measuring tape, caulk, paint, etc.
- Professional Help (Optional): If you decide to hire professionals for any part of the job, add their labor costs.
- Contingency Fund: It’s wise to set aside 10-15% of your budget for unexpected expenses.
Estimating Cabinet Replacement Cost:
| Cabinet Type | Estimated Cost per Linear Foot (Cabinets Only) |
|---|---|
| Stock | $100 – $300 |
| Semi-Custom | $300 – $600 |
| Custom | $600 – $1,200+ |
Note: These are estimates and can vary widely based on brand, materials, and customization.
Step 2: Gathering Your Tools and Materials
Before you start tearing out your old cabinets, ensure you have all the necessary tools and materials.
Essential Tools for Cabinet Replacement
- Safety Gear: Safety glasses, work gloves, dust mask.
- Measuring Tools: Tape measure, level (4-foot and torpedo), carpenter’s square.
- Demolition Tools: Pry bar, putty knife, utility knife, hammer, screwdriver set (Phillips and flathead).
- Installation Tools: Drill/driver, drill bits, screwdriver bits, stud finder, clamps, caulk gun.
- Cutting Tools: Hand saw or circular saw (if you need to trim anything).
- Miscellaneous: Painter’s tape, drop cloths, shop vacuum, pencil.
Materials You’ll Need
- New Cabinets: Base cabinets, wall cabinets, and any specialty units.
- Cabinet Screws: Specifically designed for cabinet installation (often 1 1/4″ or 1 5/8″ wood screws).
- Shims: Essential for leveling and securing cabinets.
- Wood Glue: For any minor repairs or securing joints.
- Caulk: For sealing gaps around cabinets and countertops.
- Paint or Stain: If you plan to finish any unfinished cabinet parts.
- Cabinet Hardware: Hinges, drawer slides, knobs, and pulls.
Step 3: Removing Your Old Kitchen Cabinets
This is the part where you say goodbye to your old kitchen. Properly remove kitchen cabinets to avoid damaging your walls or plumbing.
Preparing the Work Area
- Clear the Kitchen: Remove all items from countertops, inside cabinets, and appliances.
- Protect the Floor: Lay down drop cloths to protect your flooring from dust and debris.
- Shut Off Utilities: Turn off the water supply to any sinks and the electricity to outlets and lighting in the cabinet area. Use a voltage tester to confirm power is off.
- Remove Doors and Drawers: This makes cabinets lighter and easier to handle. Label them if you plan to reuse them or sell them.
Detaching the Cabinets
- Remove Countertops: If you’re replacing countertops, remove them first. They are often secured to the cabinets with screws from underneath or with adhesive.
- Disconnect Plumbing and Electrical: Carefully disconnect any plumbing lines or electrical wiring that runs through or behind the cabinets. Cap off water lines and secure electrical wires safely.
- Locate Mounting Screws: Cabinets are typically secured to wall studs through the back or through a cleat at the top. Look for screw heads along the top and bottom edges of the cabinet boxes.
- Unscrew Cabinets: Using a drill/driver or screwdriver, carefully remove all mounting screws.
- Pry Cabinets Loose: For stubborn cabinets, gently use a pry bar between the cabinet and the wall to loosen them. Work slowly and carefully to avoid damaging the wall.
- Support and Remove: Have a helper support the cabinet as you remove the last screws. Carefully pull the cabinet away from the wall.
- Repeat for All Cabinets: Continue this process until all cabinets are removed.
Important: If you plan on doing a diy cabinet swap and are unsure about disconnecting plumbing or electrical, it’s best to hire a professional for these specific tasks.
Step 4: Preparing the Walls and Floor
Once the old cabinets are out, you’ll likely see areas that need attention before installing new ones.
Wall Preparation
- Inspect Walls: Check for any damage, holes, or worn areas.
- Repair Damage: Fill any holes with spackle or joint compound and sand smooth once dry.
- Locate Studs: Use a stud finder to mark the locations of wall studs. New cabinets will be screwed directly into these studs for secure mounting. Mark these lines lightly with a pencil.
- Clean Walls: Wipe down the walls to remove any dust or debris.
Floor Preparation
- Clean the Floor: Vacuum and mop the floor where the cabinets will be installed.
- Check for Levelness: Use a long level to check if the floor is even. Any significant slopes will need to be addressed during cabinet installation using shims.
Step 5: Installing New Kitchen Cabinets
This is the most critical phase, requiring precision and patience for a professional-looking finish. The kitchen cabinet installation process requires careful alignment and securing.
Laying Out the Cabinet Placement
- Start with a Corner: It’s usually easiest to begin with a corner cabinet.
- Mark Cabinet Lines: Use your level and pencil to draw faint lines on the wall indicating the top and bottom of your base cabinets. For wall cabinets, mark the desired height (typically 54 inches from the floor to the bottom of the wall cabinet, allowing 36 inches for the countertop and backsplash).
- Dry Fit: Before permanently attaching anything, place the cabinets in their intended positions to ensure they fit and align correctly.
Installing Base Cabinets
- Position the First Cabinet: Place the first base cabinet in its corner location, against the wall.
- Level and Shim: Use your level to ensure the cabinet is perfectly plumb (vertical) and level (horizontal). Insert shims between the cabinet and the wall, or under the cabinet feet, to achieve this.
- Secure to Studs: Once leveled, screw the cabinet to the wall studs through the back of the cabinet box. Use at least two screws per stud, drilling through the cabinet’s hanging rail or directly through the back panel into the stud.
- Connect Adjacent Cabinets: Position the next base cabinet next to the first one. Ensure they are flush at the front and perfectly level with each other. Shim as needed.
- Screw Cabinets Together: Clamp the two cabinets together and screw them to each other through their adjoining faces. Use cabinet screws for a strong connection.
- Continue Installation: Repeat the process for all base cabinets, working your way around the kitchen.
Installing Wall Cabinets
- Start with a Corner (Again): Similar to base cabinets, start with a corner wall cabinet.
- Mark Cabinet Location: Using your marked lines and level, hold the cabinet in place.
- Shim and Level: Shim the cabinet against the wall so it’s plumb and level.
- Secure to Studs: Drill through the cabinet’s hanging rail (or the back panel) directly into wall studs. Use at least two screws per stud.
- Attach Next Cabinet: Position the next wall cabinet. Ensure it’s level and aligned with the first cabinet. Clamp them together.
- Screw Together: Screw the wall cabinets to each other through their adjoining faces.
- Continue Installation: Install all wall cabinets, ensuring they are securely fastened and perfectly aligned.
Pro Tip for DIY Cabinet Swap: For heavy wall cabinets, consider using temporary cabinet support jacks or having a helper to prevent strain and accidents.
Step 6: Installing Cabinet Doors and Drawers
With the cabinet boxes securely in place, it’s time to add the finishing touches.
Attaching Cabinet Doors
- Install Hinges: Attach the hinges to the cabinet doors according to the manufacturer’s instructions.
- Mount Doors: Align the doors with the cabinet boxes and attach the hinges to the cabinet frame.
- Adjust Doors: Most modern hinges have adjustment screws that allow you to fine-tune the door alignment, ensuring they are straight, level, and have even gaps. This is crucial for a polished look.
Installing Cabinet Drawers
- Install Drawer Slides: Attach the drawer slides to the inside of the cabinet boxes and to the sides of the drawer boxes. Pay close attention to the manufacturer’s instructions for proper alignment.
- Insert Drawers: Slide the completed drawer boxes onto their respective slides within the cabinets.
If you are only looking to update the appearance without a full cabinet replacement, kitchen cabinet doors replacement can be a cost-effective way to refresh your kitchen. Similarly, kitchen cabinet drawers replacement can solve functional issues or update the interior organization.
Step 7: Kitchen Cabinet Hardware and Finishing Touches
These final steps elevate the look and functionality of your new cabinets.
Kitchen Cabinet Hardware Replacement
This is one of the easiest and most impactful ways to update your kitchen.
- Choose Hardware: Select knobs or pulls that complement your cabinet style and your personal taste.
- Measure and Mark: Decide on the placement of your hardware. For drawers, often the center of the drawer front is ideal. For doors, the placement can vary, but usually near the top or side. Use a tape measure and pencil to mark the hole locations.
- Drill Holes: Use a drill with an appropriately sized drill bit to create the screw holes. For consistency, you can use a template or jig.
- Install Hardware: Screw the knobs or pulls into place from the inside of the door or drawer.
Installing Under Cabinet Lighting
Under cabinet lighting installation can add both task lighting and ambient mood to your kitchen.
- Plan Layout: Decide where you want the lights (e.g., along the front edge of the shelves).
- Connect Fixtures: Follow the manufacturer’s instructions for wiring the lights. This often involves connecting them in a series or using a central power supply.
- Mount Fixtures: Secure the lighting fixtures under the cabinets using the provided screws or adhesive.
- Connect to Power: Plug in the transformer or connect the wiring to a junction box or switched outlet. Test the lights.
Final Touches
- Fill Nail/Screw Holes: If you used any finishing nails, fill the holes with wood filler.
- Caulk Gaps: Apply a bead of caulk along the top edges of the cabinets where they meet the wall or backsplash to seal any small gaps.
- Clean Up: Thoroughly clean your new cabinets and the surrounding area.
Cabinet Refacing vs Replacement: A Comparison
When considering a kitchen update, you might wonder about cabinet refacing vs replacement. Here’s a breakdown to help you decide:
| Feature | Cabinet Refacing | Cabinet Replacement |
|---|---|---|
| What it involves | New doors, drawer fronts, and a veneer over existing boxes. | Complete removal and installation of new cabinet boxes, doors, and drawers. |
| Cost | Generally less expensive than full replacement. | Can be more expensive, especially for custom options. |
| Time | Can be quicker if cabinet boxes are in good condition. | Takes longer due to demolition and full installation. |
| Customization | Limited to door styles and finishes. | Full range of customization in size, style, and layout. |
| Structural Issues | Does not address issues with cabinet box integrity. | Allows for fixing or upgrading the entire cabinet structure. |
| Impact on Layout | Does not change the kitchen layout. | Allows for significant layout changes and improved functionality. |
For a simple aesthetic update and if your existing cabinet boxes are sturdy and well-positioned, refacing can be a good option. However, if you desire a new layout, improved storage, or your current boxes are damaged, full replacement is the better choice.
Frequently Asked Questions (FAQ)
Q1: How long does it take to replace kitchen cabinets?
A: For a DIYer, replacing kitchen cabinets can take anywhere from a few days to a week or more, depending on your experience, the size of your kitchen, and how much time you can dedicate. Hiring professionals typically speeds up the process.
Q2: Do I need to remove the countertop before replacing cabinets?
A: Yes, in most cases, you will need to remove the countertop to properly detach and install new cabinets. If your new cabinets are the same size and placement, you might be able to leave existing countertops attached to the wall, but it can make the process more difficult and increase the risk of damage.
Q3: What is the average cost of replacing kitchen cabinets?
A: The average cabinet replacement cost can range from $3,000 to $15,000 or more, depending on the size of your kitchen, the quality and type of cabinets you choose, and whether you hire professionals.
Q4: Can I reuse my old kitchen cabinet hardware?
A: Yes, if your old hardware is still in good condition and you like its style, you can definitely reuse it. This is a simple way to save money and contribute to a more sustainable renovation.
Q5: What if my walls aren’t plumb or level?
A: This is a common issue. You’ll use shims during the installation process to make your cabinets appear plumb and level. It’s crucial to shim securely, as cabinets need to be stable and properly supported.
Q6: How do I ensure my new cabinets are securely mounted?
A: The most critical step is to screw cabinets directly into wall studs. Always locate studs using a stud finder and use appropriate cabinet screws. Ensure cabinets are level and plumb before driving screws.