
Can you remove a kitchen sink drain yourself? Yes, with the right tools and a little patience, you can successfully remove a kitchen sink drain without needing to call a plumber. This guide will walk you through the process step-by-step, helping you tackle everything from routine cleaning to more complex repairs.
Dealing with a clogged or damaged kitchen sink drain can be a real hassle. Sometimes, the best solution is to remove the drain assembly altogether. This might be necessary for thorough kitchen drain cleaning, to remove sink stopper mechanisms that are stuck, or to carry out kitchen sink drain repair. Whether you’re facing a stubborn clog that a kitchen sink drain plunger or kitchen sink drain snake couldn’t conquer, or you’re planning a kitchen sink drain replacement, this DIY guide will equip you with the knowledge you need. We’ll cover how to clear kitchen sink blockage and even touch upon what to do if you have a kitchen sink drain disposal.
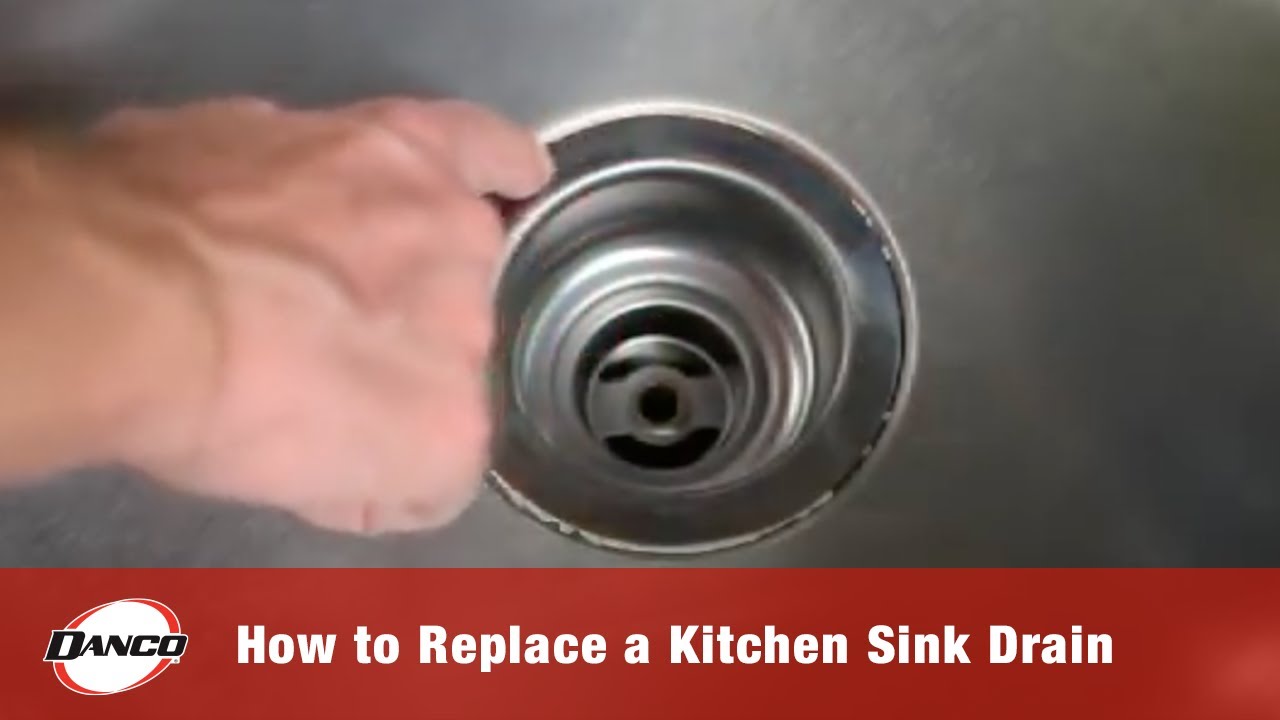
Image Source: i.ytimg.com
Why You Might Need to Remove Your Kitchen Sink Drain
Several common issues can prompt you to consider removing your kitchen sink drain.
Common Drainage Problems
- Persistent Clogs: If you’ve tried various methods like using a kitchen sink drain plunger or a kitchen sink drain snake to fix clogged kitchen drain issues without success, the blockage might be deeper or more compacted than these tools can reach. Removing the drain assembly allows for direct access to the pipe and potential removal of the obstruction.
- Slow Draining: A consistently slow drain, even after cleaning, can indicate buildup within the drain pipe or a partially blocked P-trap. Removing the drain allows you to inspect and clean these areas thoroughly.
- Bad Odors: Lingering foul smells from the drain often stem from accumulated food particles and grease that have decomposed. A complete drain removal allows for a deep clean, eliminating the source of the odor.
Repair and Replacement Needs
- Damaged Drain Components: Over time, parts of the drain assembly, such as the strainer basket or the tailpiece, can corrode, crack, or become loose, leading to leaks or inefficient drainage. Replacing these parts often requires removing the entire drain.
- Leaky Connections: Leaks under the sink, particularly around the drain flange or pipe connections, can be a sign of a worn-out gasket or improperly sealed joints. Removing the drain allows for a fresh seal.
- Upgrading Fixtures: If you’re renovating your kitchen and replacing your sink or faucet, you’ll likely need to remove the old drain assembly to install a new one.
- Garbage Disposal Issues: If you have a kitchen sink drain disposal, problems with the unit or its connection to the drainpipe might necessitate its removal.
Gathering Your Tools and Supplies
Before you start, having the right tools makes the job much smoother and safer.
Essential Tools
- Adjustable Wrench or Pipe Wrench: You’ll need this to loosen and tighten the large nuts connecting the drain pipes. A pipe wrench provides a better grip on round pipes.
- Plumber’s Putty or Silicone Sealant: This is crucial for creating a watertight seal between the drain flange and the sink.
- Bucket or Towels: To catch any residual water left in the pipes.
- Screwdriver (Phillips and Flathead): May be needed for some drain assembly types or to remove the strainer basket.
- Pliers (Channel Locks or Slip-Joint): Useful for gripping and turning various parts.
- Safety Glasses: To protect your eyes from debris or water.
- Work Gloves: To protect your hands from grease and grime.
- Putty Knife or Scraper: To remove old plumber’s putty or sealant.
- Trash Bag: For disposing of old parts and debris.
Optional but Helpful Tools
- Drain Strainer Wrench: Specifically designed to grip and remove strainer baskets, making the job easier.
- Utility Knife: Can be helpful for cutting through old sealant if it’s very stubborn.
- Flashlight or Headlamp: To see clearly under the sink.
- Old Toothbrush or Small Wire Brush: For cleaning pipe threads.
Step-by-Step Guide to Removing Your Kitchen Sink Drain
This guide assumes you are removing the entire drain assembly from the sink downwards, including the strainer basket within the sink itself.
Step 1: Prepare the Work Area
- Clear Under the Sink: Remove everything from the cabinet below your kitchen sink. This gives you ample space to work and prevents items from getting damaged or dirty.
- Place a Bucket: Position a bucket directly beneath the P-trap (the U-shaped pipe under the sink). This will catch any water that remains in the pipes when you start disconnecting them. Have some old towels or rags ready as well, as some water is inevitable.
- Turn Off Water Supply: Although you’re not disconnecting the faucet itself, it’s a good habit to turn off the hot and cold water supply valves under the sink. These are usually small knobs or levers. Turn on the faucet to drain any remaining water in the lines.
Step 2: Remove the Strainer Basket (Top Side)
This is the part you see inside the sink.
- Remove Any Stopper: If your drain has a removable remove sink stopper, take it out first. This might involve simply lifting it or twisting it.
- Loosen the Strainer: The strainer is usually held in place from underneath by a large locknut. However, if you can’t access it easily or the strainer itself is spinning, you might need to grip the strainer from above. Some strainers have tabs that allow a kitchen sink drain plunger or a specialized strainer wrench to grip them. For many, especially if they’re corroded or stuck, you might need to use a screwdriver or a putty knife to carefully pry it up and out. Be gentle to avoid scratching the sink.
Step 3: Disconnect the P-Trap and Tailpiece
This is where you’ll need your wrench.
- Locate the P-Trap: The P-trap is the curved section of pipe directly below the drainpipe coming from the sink. It’s designed to hold water, which prevents sewer gases from entering your home.
- Loosen the Slip Nuts: There will be two large plastic or metal slip nuts connecting the P-trap to the vertical drainpipe and the horizontal tailpiece (the pipe coming straight down from the sink drain). Place your adjustable wrench or pipe wrench on these nuts and turn them counter-clockwise to loosen. You may only need to loosen them a few turns until they can be unscrewed by hand.
- Remove the P-Trap: Once the nuts are loose, carefully pull the P-trap away. Be prepared for residual water to drain into your bucket.
- Disconnect the Tailpiece: The tailpiece is the pipe that goes from the sink drain flange down to the P-trap. It’s usually connected to the drain assembly’s tailpiece with another slip nut. Loosen this nut with your wrench and pull the tailpiece away.
Step 4: Loosen the Drain Flange Nut (Underneath the Sink)
This is the critical step that separates the drain assembly from the sink.
- Identify the Drain Flange: Look up at the drain opening inside the sink. The metal or plastic piece you see is the drain flange. Directly underneath it, on the underside of the sink, you’ll see a larger nut or a set of mounting screws holding the drain assembly to the sink.
- Access the Nut/Screws: Depending on your sink and drain type, this can be the trickiest part. You’ll need to get your wrench or screwdriver up between the pipes under the sink to reach this nut or screws.
- Loosen the Locknut: For most standard drain assemblies, there’s a large locknut that secures the drain flange to the sink. Use your adjustable wrench or pipe wrench to turn this locknut counter-clockwise. It might be tight, especially if it has been sealed with plumber’s putty for a long time.
- Alternative Mounting Systems: Some older or different drain types might have screws that tighten a clamping ring. In this case, you’ll need a screwdriver to loosen these. If you have a special tool for kitchen sink drain replacement, it might be useful here.
Step 5: Remove the Drain Assembly
- Lift the Drain Assembly: Once the locknut or mounting screws are completely removed, the entire drain assembly, including the flange inside the sink and the tailpiece extending below, should be free. You might need to wiggle it slightly to break the seal from the old plumber’s putty.
- Remove from Above: Go back to the top of the sink and lift the drain flange and its attached strainer right out of the sink drain opening.
Step 6: Clean Up and Prepare for New Installation (If Applicable)
- Clean the Sink Opening: Use your putty knife or scraper to remove any old plumber’s putty or sealant from the sink’s drain opening. Clean the area thoroughly with a rag.
- Clean Pipe Threads: If you’re reusing any existing pipes or the new drain assembly has threaded connections, clean the threads with a wire brush to ensure a good seal.
- Dispose of Old Parts: Properly dispose of the old drain assembly.
Troubleshooting Common Issues During Removal
Sometimes, things don’t go as smoothly as planned. Here are some common problems and how to address them.
Stubborn Locknuts
- Penetrating Oil: If the locknut is heavily corroded and won’t budge, spray it with a penetrating oil (like WD-40). Let it sit for 15-30 minutes (or longer for very stubborn rust) and try again.
- Heat: In extreme cases, a hairdryer or heat gun (used cautiously to avoid damaging the sink or pipes) can sometimes help expand the metal slightly, making it easier to turn.
- Pipe Wrench Grip: Ensure your pipe wrench is gripping the nut as tightly as possible. Sometimes a better grip is all that’s needed.
Stuck Strainer Basket
- Plunger Technique: Try using a kitchen sink drain plunger against the strainer from the top. The suction might help dislodge it.
- Specialized Wrench: A drain strainer wrench is designed to grip the strainer from above and can provide the leverage needed.
- Gentle Prying: If there are small gaps, a flathead screwdriver or putty knife can be used to carefully pry around the edges while simultaneously trying to turn it from below.
Leaks from the Faucet Supply Lines
- Water Shut-Off Check: If you still have water dripping from the faucet supply lines, ensure the shut-off valves are fully closed. If they’re old or faulty, you might need to shut off the main water supply to the house.
Kitchen Sink Drain Disposal Complications
If you’re removing a drain that’s connected to a kitchen sink drain disposal, the process is slightly different.
- Disconnecting the Disposal: Before you can remove the drain from the sink itself, you’ll need to disconnect the garbage disposal unit. This usually involves:
- Unplugging the Disposal: Ensure it’s completely disconnected from power.
- Disconnecting the Dishwasher Hose: If your dishwasher drains into the disposal, detach the hose.
- Detaching the Disposal: Most disposals are attached to the sink flange with a mounting ring and several screws. You’ll need to loosen these screws, and often support the weight of the disposal as you detach it from the sink flange. This is a two-person job if possible, as disposals are heavy and awkward.
- Removing the Drain: Once the disposal is disconnected, you can proceed with removing the drain assembly as described above, from the sink flange nut downwards.
Reinstalling a New Drain Assembly
If you’re replacing the drain, follow these general steps:
- Apply Plumber’s Putty: Roll a rope of plumber’s putty and press it around the underside of the new drain flange.
- Insert the New Drain: Push the new drain flange through the sink opening.
- Secure from Below: From under the sink, thread the locknut onto the drain assembly and tighten it firmly with your wrench. Wipe away excess putty that squeezes out around the flange inside the sink.
- Reconnect Pipes: Reattach the tailpiece and P-trap, ensuring all gaskets are in place and tighten the slip nuts snugly.
- Test for Leaks: Turn the water back on and run water through the drain, checking all connections for leaks.
Frequently Asked Questions (FAQ)
Q1: How do I unclog my kitchen sink if I can’t remove the drain?
A1: If you can’t remove the drain, focus on using other methods to unclog kitchen sink blockages. Start with a kitchen sink drain plunger. If that fails, try a kitchen sink drain snake or kitchen sink drain cleaning chemicals (use with caution). Pouring boiling water down the drain can also help dissolve grease. For more severe clogs, consider using a plumber’s auger.
Q2: My kitchen sink drain is leaking. Do I need to remove the entire drain?
A2: Not necessarily. First, try tightening the slip nuts on the P-trap and tailpiece connections. If the leak is from the drain flange itself, you might only need to remove the P-trap and tailpiece, loosen the flange nut, reseal the flange with new plumber’s putty or silicone sealant, and reassemble. This is a common part of kitchen sink drain repair.
Q3: What is plumber’s putty, and why is it used?
A3: Plumber’s putty is a pliable, clay-like compound used to create a watertight seal between plumbing fixtures, like the drain flange, and the sink surface. It prevents water from seeping into the gap between the two.
Q4: How often should I clean my kitchen sink drain?
A4: It’s a good idea to perform basic kitchen drain cleaning regularly. Once a month, you can pour a mixture of baking soda and vinegar down the drain, followed by hot water, to help prevent grease buildup and odors.
Q5: My sink has a garbage disposal. Does that change how I remove the drain?
A5: Yes, if you have a kitchen sink drain disposal, you must first safely disconnect and remove the disposal unit itself before you can access and remove the sink drain assembly. Make sure the power is off to the disposal before starting.
Q6: What if I strip the nut while trying to remove it?
A6: If you strip a nut, it becomes very difficult to grip with a wrench. You might need to use locking pliers (like Vise-Grips) to clamp onto the stripped nut, or in some cases, you might have to cut the nut off using a hacksaw or a reciprocating saw with a metal-cutting blade. Be extremely careful not to damage the sink or surrounding pipes.
Q7: How do I remove a sink stopper that is stuck?
A7: If you need to remove sink stopper that is stuck, try using a bit of penetrating oil around its base. Wait for it to work, then try wiggling it gently. Some stoppers have a screw at the top that you can loosen. If it’s a pop-up stopper, the linkage underneath might be jammed. You may need to reach under the sink to disconnect the linkage and then try removing the stopper from above. If all else fails, you might need to carefully pry it out.
Q8: My sink drain is completely blocked, and I can’t even get water to go down slowly. What should I do?
A8: This indicates a severe clog. You will likely need to remove the drain assembly to gain direct access to the blockage. Once the drain is out, you can try to clear kitchen sink blockage by using a stiff wire or a kitchen sink drain snake directly into the pipe. If the clog is in the main drainpipe, you might need a longer auger.
This comprehensive guide should empower you to tackle kitchen sink drain removal with confidence. Remember to always prioritize safety and take your time.