
Wondering if you can reface kitchen cabinets yourself? Yes, you absolutely can! Refacing kitchen cabinets is a fantastic way to update your kitchen’s look without the hefty cost of a full replacement. This guide will walk you through the entire cabinet refacing process, offering budget-friendly ideas and step-by-step instructions for a successful DIY cabinet refacing project. Whether you’re aiming for a subtle refresh or a dramatic kitchen cabinet makeover, this comprehensive guide will help you achieve stunning results.
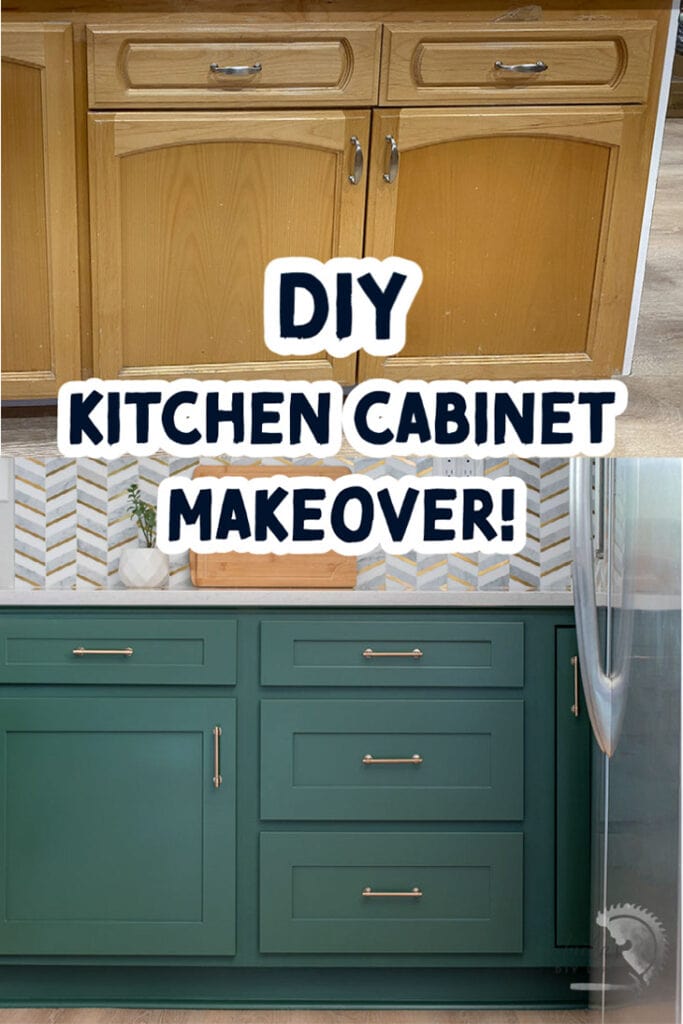
Image Source: www.anikasdiylife.com
Why Reface Your Kitchen Cabinets?
Replacing your kitchen cabinets can be incredibly expensive. Refacing offers a smart alternative, allowing you to revitalize your kitchen’s appearance for a fraction of the cost. Here’s why it’s such a popular choice for updating kitchen cabinets:
- Cost-Effectiveness: This is the primary driver for most homeowners. Refacing is significantly cheaper than a full cabinet replacement.
- Less Disruption: You don’t need to remove existing cabinet boxes, which means less mess and less time your kitchen is out of commission.
- Customizable Look: You can choose from a wide range of materials, colors, and styles to perfectly match your desired aesthetic.
- Durability: When done correctly, refaced cabinets can last for many years, just like new ones.
- Environmental Friendliness: By keeping the existing cabinet boxes, you reduce waste and the demand for new materials.
Refacing vs. Replacing vs. Refinishing: What’s the Difference?
It’s important to know the distinctions between these common kitchen cabinet updates:
- Cabinet Refacing: This involves keeping your existing cabinet boxes but replacing the doors, drawer fronts, and applying a new veneer or laminate to the visible parts of the cabinet frames.
- Cabinet Replacement: This means completely removing your old cabinets and installing entirely new ones. It’s the most expensive option.
- Cabinet Refinishing (or Refacing): This refers to sanding down the existing cabinet boxes and doors, then repainting or staining them. This is a good option if your current cabinet boxes and doors are in good condition but you dislike the current color or finish. It’s a different process than refacing with new materials.
Key Components Involved in Cabinet Refacing
When you decide to reface, you’re essentially giving your cabinets a facelift by updating the exterior elements. The main components you’ll be working with are:
- Cabinet Doors: These are the most visible part of your cabinets. Refacing means replacing these with new ones.
- Drawer Fronts: Similar to cabinet doors, these are replaced to match the new style.
- Cabinet Boxes (Frames): The “boxes” that hold your shelves and drawers. In refacing, these are kept. The visible sides of these boxes will be covered with veneer or laminate.
- Cabinet Veneer Application: This is the process of covering the visible surfaces of the existing cabinet boxes with thin sheets of wood veneer or laminate to give them a new look.
- Cabinet Hardware: While not part of the “refacing” itself, replacing handles and knobs is an integral part of the overall kitchen cabinet makeover and a great way to complement your new doors and drawer fronts.
Your Guide to DIY Cabinet Refacing
Embarking on a DIY cabinet refacing project can seem daunting, but with careful planning and execution, it’s very achievable. This section breaks down the essential steps.
Step 1: Planning and Preparation
This is arguably the most crucial step. Thorough planning prevents costly mistakes.
Assessing Your Current Cabinets
- Structural Integrity: Check if the existing cabinet boxes are sturdy and in good condition. If they are warped, water-damaged, or structurally unsound, refacing might not be the best option.
- Style Compatibility: Consider the overall style of your kitchen. Will new doors and hardware complement your countertops and backsplash?
- Measurements: Accurately measure all your existing cabinet doors and drawer fronts. You’ll need these dimensions for ordering new ones. For cabinet boxes, measure the height, width, and depth of each face frame where you’ll be applying veneer.
Choosing Your Materials
-
Doors and Drawer Fronts: You have several options here:
- Solid Wood: Offers a premium look and feel. Can be painted or stained.
- MDF (Medium-Density Fiberboard): A cost-effective option, excellent for painting.
- Thermofoil: A vinyl film applied over MDF, offering a smooth, consistent finish. It’s durable and easy to clean but can be susceptible to heat damage.
- Veneered Plywood: Offers the look of real wood at a lower cost.
-
Veneer/Laminate: This is what you’ll use to cover the cabinet boxes.
- Wood Veneer: Thin sheets of real wood. Available in various wood species and cuts to match your new doors or create a contrast. This requires a good cabinet finishing technique for a seamless look.
- Laminate: A synthetic material that can mimic wood grain or other textures. It’s very durable and often easier to apply than wood veneer.
-
Adhesives and Finishes:
- Contact Cement: Often used for applying laminate and some veneers.
- Wood Glue: For stronger bonds with wood veneer.
- Primer and Paint/Stain: If you plan to paint or stain your cabinet boxes or new doors.
- Topcoat/Sealer: To protect the finish.
-
Cabinet Hardware: Select new hinges, knobs, and pulls that fit the style and finish of your new doors and drawer fronts.
Tools and Supplies Checklist
- Measuring tape
- Screwdriver set (Phillips and flathead)
- Utility knife or heavy-duty scissors
- Sanding block or orbital sander
- Wood filler (if needed)
- Primer and paintbrushes/rollers (if painting)
- Wood stain and rags (if staining)
- Contact cement or wood glue
- Contact cement applicator or putty knife
- Veneer scraper or smoother
- Drill with appropriate bits
- Safety glasses
- Gloves
- Dust mask
- Painter’s tape
Step 2: Removing Existing Doors and Drawer Fronts
This is the first physical step in the cabinet refacing process.
- Label Everything: As you remove each door and drawer front, label it clearly with its corresponding cabinet location (e.g., “Upper Left,” “Drawer 1”). This is crucial for reassembly.
- Remove Doors: Unscrew the hinges from the doors and set them aside. Some people prefer to leave hinges attached to the cabinet boxes to maintain alignment, especially if they plan to reuse them. However, if you’re installing new hinges, remove them from both the door and the box.
- Remove Drawer Fronts: Drawer fronts are usually attached to the drawer box with screws from the inside of the drawer. Remove these screws.
Step 3: Preparing the Cabinet Boxes for Veneer
This stage is all about creating a smooth, clean surface for your new veneer or laminate.
- Clean Thoroughly: Wipe down all exposed cabinet box surfaces with a degreaser or mild soap and water. Ensure they are completely dry.
- Fill Imperfections: Use wood filler to patch any holes, gouges, or dents in the cabinet frames. Let the filler dry completely, then sand it smooth.
- Sand Surfaces: Lightly sand all surfaces where you will be applying the veneer. This helps the adhesive adhere better. If there’s existing laminate or veneer, ensure it’s well-adhered. If it’s peeling, you may need to remove it.
- Remove Old Hardware: Unscrew and remove any existing hinges or hardware from the cabinet boxes. Fill these holes if you’re installing new hardware in a different location.
Step 4: Applying Cabinet Veneer or Laminate to the Boxes
This is where your cabinets start to transform. Patience is key here.
Working with Wood Veneer
- Measure and Cut: Measure the dimensions of each cabinet face frame section and cut your wood veneer to size, adding a little extra for trimming.
- Apply Adhesive: Apply a thin, even coat of wood glue or contact cement to both the cabinet box surface and the back of the veneer, following the adhesive manufacturer’s instructions. Allow the adhesive to become tacky (this is crucial for contact cement).
- Position and Apply: Carefully align the veneer with one edge of the cabinet frame and press it down firmly. Work from one side to the other, smoothing out any air bubbles as you go. A veneer scraper or roller is very helpful here.
- Trim Edges: Once the veneer is adhered, use a sharp utility knife or a router with a flush-trim bit to carefully trim away any excess veneer from the edges.
- Repeat: Continue this process for all exposed cabinet box surfaces.
Working with Laminate
- Measure and Cut: Measure and cut your laminate sheets to size, including an overlap for the edges.
- Apply Adhesive: Apply contact cement to the cabinet box surface and the back of the laminate. Let it tack up.
- Position and Apply: Carefully lay the laminate onto the cabinet box, starting from one edge and pressing down firmly. Use a laminate roller or scraper to ensure a smooth, bubble-free finish.
- Trim Edges: Use a sharp utility knife or a router with a flush-trim bit to trim the excess laminate. For clean edges, you can sometimes score and snap laminate.
Pro Tip: When applying veneer or laminate to cabinet faces, it’s often easiest to work in sections. Apply to the stiles (vertical pieces) first, then the rails (horizontal pieces).
Step 5: Installing New Cabinet Doors and Drawer Fronts
Now for the exciting part – attaching your new doors and drawer fronts!
- Install Hinges: If you’re using new hinges, attach them to the new doors and drawer fronts according to the manufacturer’s instructions. If you are reusing existing hinges, ensure they are clean and in good working order.
- Attach Doors to Boxes: Align the doors with the cabinet boxes and screw the hinges into the pre-drilled holes in the cabinet frames. Adjust the hinges as needed to ensure doors hang straight and close properly.
- Attach Drawer Fronts: Most drawer fronts are attached to the drawer boxes with screws from the inside. Align the drawer front precisely on the drawer box and secure it with screws.
Step 6: Cabinet Hardware Replacement
This is the finishing touch that truly elevates the look of your updated kitchen cabinets.
- Mark Drill Holes: If your new hardware requires different hole placements than the old ones, use a template or carefully measure to mark the exact locations for drilling.
- Drill Holes: Drill pilot holes for the screws. Ensure you drill straight to avoid crooked handles.
- Install Hardware: Attach the knobs and pulls to the doors and drawer fronts.
Step 7: Final Touches and Cleaning
- Inspect Your Work: Check all doors and drawers for proper alignment and smooth operation. Make any necessary adjustments to hinges.
- Clean Up: Remove any painter’s tape, wipe down surfaces, and clean up any debris.
Professional Cabinet Refacing: When to Call in the Experts
While DIY cabinet refacing is a rewarding project, there are times when professional cabinet refacing is the better choice.
- Time Constraints: If you have a busy schedule, a professional service can complete the job much faster.
- Complex Designs: If you’re opting for custom door styles or intricate veneer patterns, a professional has the expertise and tools.
- Lack of Experience: If you’re not comfortable with woodworking, precise measurements, or using adhesives, hiring a professional ensures a high-quality finish.
- Desired Warranty: Professional services often come with a warranty, giving you peace of mind.
A professional cabinet refacing service typically handles all the measuring, ordering, and installation, ensuring a seamless and durable result. They are experienced in various cabinet finishing techniques and have access to high-quality materials.
Budget-Friendly Ideas for Your Kitchen Cabinet Makeover
Refacing doesn’t have to break the bank. Here are some cost-saving tips for your kitchen cabinet makeover:
Creative Material Choices
- Laminate Over Wood Veneer: Laminate is generally less expensive than real wood veneer, offering a durable and attractive finish at a lower price point.
- MDF for Doors: If you plan to paint your doors, MDF is a more budget-friendly option than solid wood and provides a smooth surface for painting.
- Standard Door Styles: Opt for simpler, more common door styles rather than highly intricate or custom designs.
DIY Savings Strategies
- Order Pre-drilled Doors: Many companies offer doors and drawer fronts pre-drilled for hinges and hardware, saving you time and ensuring accuracy.
- Buy Materials in Bulk: If you have a larger project or know others who need cabinet materials, buying in bulk can sometimes lead to discounts.
- Focus on Visible Areas: If budget is extremely tight, consider prioritizing refacing the most visible cabinet faces and doors.
Smart Hardware Selection
- Shop Sales and Clearance: Look for sales on cabinet hardware at big box stores or specialty shops.
- Consider Basic Finishes: While trendy finishes can be appealing, classic finishes like brushed nickel or oil-rubbed bronze are often more affordable and timeless.
- Mix and Match (Carefully): Sometimes, mixing different styles or finishes for knobs and pulls can create a unique look, but do this thoughtfully to avoid a cluttered appearance.
Popular Cabinet Refacing Styles and Finishes
The choices you make for your doors, drawer fronts, and veneer will define your kitchen’s new look.
Door Styles
- Shaker: A timeless, versatile style featuring a simple, flat center panel with a raised frame.
- Slab (Flat Panel): A modern, minimalist look with a completely flat surface.
- Raised Panel: Features a center panel that is raised higher than the surrounding frame, adding depth and a traditional feel.
- Recessed Panel: Similar to Shaker, but the center panel is set back into the frame.
Finishes
- Painted: Offers a clean, modern look. White, gray, and navy are popular choices. Proper priming and multiple thin coats are key for a durable finish.
- Stained: Highlights the natural beauty of wood grain. Various shades are available, from light and airy to deep and rich.
- Natural Wood: Allows the inherent character of the wood species (e.g., maple, cherry, oak) to shine through.
- Two-Tone: Combining different colors or finishes for upper and lower cabinets, or for doors and drawer fronts, can add visual interest.
Veneer Application Techniques
The cabinet veneer application is crucial for the final appearance.
- Grain Matching: For a professional look, try to match the wood grain direction across different cabinet faces and doors.
- Seam Placement: Position seams in veneer where they are least noticeable, such as at corners or edges.
- Edge Banding: For laminate, consider edge banding to cover the exposed core material for a clean finish.
Frequently Asked Questions About Cabinet Refacing
Here are answers to some common questions homeowners have about refacing their kitchen cabinets:
Q1: How long does cabinet refacing take?
A1: A DIY refacing project can take anywhere from a few days to a couple of weeks, depending on your experience, the size of your kitchen, and the complexity of the job. Professional services typically complete a refacing project in 3-5 days.
Q2: Can I reface cabinets that have a lot of damage?
A2: It depends on the type and severity of the damage. Minor dents or scratches can be repaired with wood filler. However, severe structural damage, warping, or extensive water damage means you should consider full replacement rather than refacing.
Q3: What is the best material for cabinet doors?
A3: The “best” material depends on your budget, desired look, and durability needs. Solid wood offers the most premium feel and can be painted or stained. MDF is excellent for painted finishes. Thermofoil is durable and easy to clean but can be sensitive to heat.
Q4: Can I paint over existing cabinet veneer?
A4: Yes, you can paint over existing cabinet veneer or laminate, but proper preparation is crucial. You’ll need to clean, degrease, lightly sand, and apply a good primer before painting.
Q5: What’s the difference between refacing and refinishing cabinets?
A5: Refacing involves replacing the doors and drawer fronts and applying new veneer or laminate to the cabinet boxes. Refinishing involves sanding and repainting or restaining the existing cabinet doors and boxes.
Q6: How much does professional cabinet refacing cost compared to replacement?
A6: Professional cabinet refacing typically costs 50-70% less than a full cabinet replacement. Costs can vary widely based on material choices and the size of your kitchen.
Q7: Do I need to remove my countertops to reface cabinets?
A7: No, you generally do not need to remove your countertops for cabinet refacing. The process focuses on the doors, drawer fronts, and the visible faces of the cabinet boxes, which are independent of the countertops.
Q8: What are good cabinet finishing techniques for DIYers?
A8: For DIYers, using high-quality brushes and rollers for painting, applying thin, even coats, and practicing with stain on scrap pieces are essential cabinet finishing techniques. For veneer, ensuring good adhesion with the correct adhesive and proper trimming techniques are key.
Refacing your kitchen cabinets is a significant undertaking, but it’s a highly rewarding one. By carefully planning, choosing the right materials, and following these steps, you can achieve a stunning kitchen cabinet makeover that breathes new life into your home without the expense of a complete overhaul. Happy renovating!