
Can you reattach a kitchen side sprayer thumb control yourself? Yes, you absolutely can! This guide will show you how to easily reattach your kitchen side sprayer’s thumb control, saving you time and money on professional repairs. We’ll walk through the steps, common issues, and how to get your faucet spray head working like new again.
Fixing a loose or detached thumb control on your kitchen sprayer can seem daunting, but it’s often a straightforward DIY task. Many homeowners encounter this problem, and the good news is that replacing or reattaching the sprayer parts is usually quite manageable. This often involves dealing with the sprayer hose connection or securing the actual thumb control mechanism.
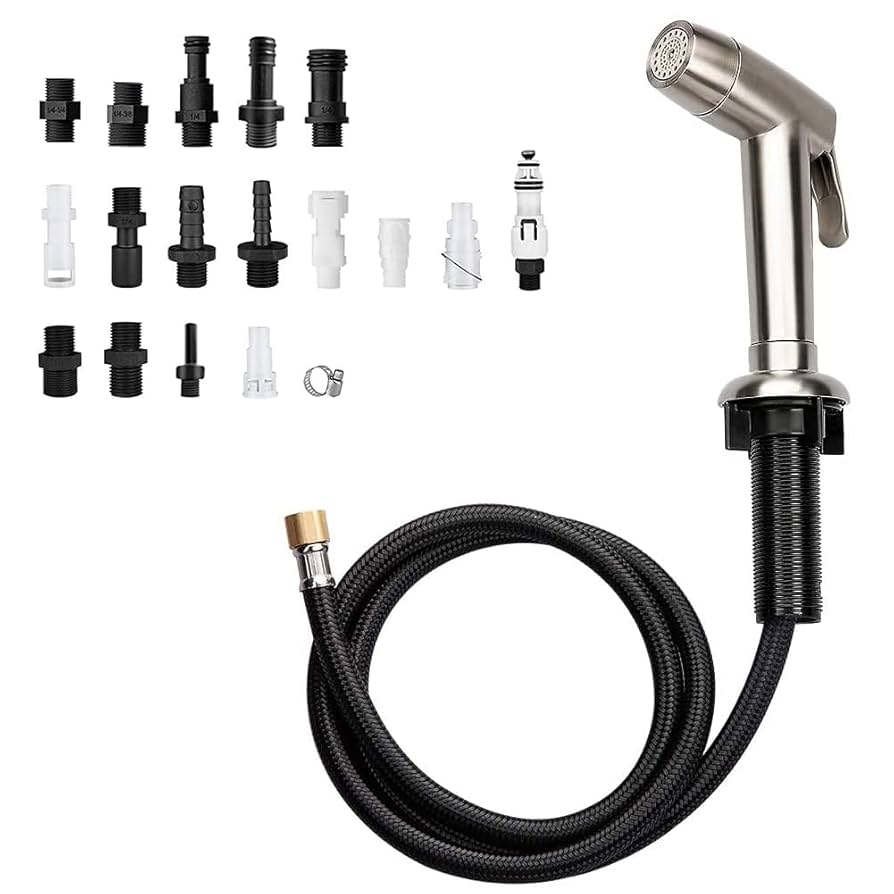
Image Source: m.media-amazon.com
Why Your Thumb Control Sprayer Might Be Loose
Several things can cause your kitchen sprayer’s thumb control to become loose or detach entirely. Most commonly, it’s due to wear and tear on the small plastic or rubber components that hold it in place. Over time, the constant use of turning the water on and off, plus the pressure from the water itself, can weaken these parts.
Here are some common culprits:
- Worn O-rings or Seals: Inside the thumb control mechanism, small rubber O-rings and seals keep everything watertight and tight. When these wear out, they lose their grip, allowing parts to loosen.
- Cracked Plastic Housing: The plastic housing that surrounds the thumb control can develop small cracks, especially if the sprayer has been dropped or bumped. These cracks compromise the structural integrity, leading to looseness.
- Loose Retaining Clip or Screw: Many thumb controls are secured by a small clip or screw. These can sometimes vibrate loose over time, especially in older plumbing systems.
- Corrosion: In some cases, mineral buildup or corrosion can affect the threads or connection points, making it difficult to keep parts tight.
- Improper Installation: If the sprayer was not attached correctly in the first place, it might be prone to loosening. This is especially true if the sprayer hose connection wasn’t tightened sufficiently.
Tools You’ll Need for Kitchen Sprayer Repair
Before you start, gather the right tools. Having everything ready makes the job much smoother. For most kitchen sprayer repair jobs, especially reattaching a thumb control, you won’t need specialized plumbing tools.
Here’s a basic list:
- Adjustable Wrench or Pliers: Useful for loosening or tightening the sprayer hose connection under the sink.
- Screwdriver Set: You might need a Phillips head or flathead screwdriver depending on the design of your sprayer’s thumb control.
- Soft Cloth or Towel: To protect surfaces and wipe away any excess water or debris.
- Small Bowl or Container: To hold small parts like screws or clips so you don’t lose them.
- Penetrating Oil (Optional): If parts are stuck due to mineral buildup, a little penetrating oil can help.
- Replacement Parts (If Necessary): If O-rings or clips are damaged, you’ll need specific replacements.
Step-by-Step Guide to Reattaching Your Thumb Control Sprayer
Let’s get your faucet spray head back in working order! This guide focuses on the common methods for reattaching a thumb control.
Step 1: Identify the Problem Area
First, take a close look at your sprayer. Where is the looseness originating?
- Is the entire spray head wobbly? This might indicate an issue with the sprayer hose connection under the sink or where the spray head attaches to the hose.
- Is just the thumb lever loose or detached? This usually means the problem is within the spray head itself.
Carefully try to manipulate the thumb control. Does it feel like a specific part has come undone? This initial assessment will guide your repair efforts.
Step 2: Disconnect the Sprayer from the Faucet
For most repairs involving the spray head itself, you’ll need to detach it from the faucet hose.
- Turn off the Water Supply: This is crucial! Look under your sink for the hot and cold water shut-off valves connected to your faucet. Turn them clockwise until they are fully closed.
- Relieve Water Pressure: Turn on the faucet in its normal position to drain any remaining water in the lines.
- Locate the Sprayer Hose Connection: Under the sink, you’ll see where the sprayer hose connects to the main faucet line or a diverter valve. This connection is usually a threaded fitting.
- Disconnect the Hose: Use your adjustable wrench or pliers to carefully unscrew the sprayer hose from the faucet. Be prepared for a little residual water to drip out. Place your cloth or bowl underneath to catch it.
Step 3: Examine and Reattach the Thumb Control Mechanism
This is where we focus on the thumb control itself. The exact procedure can vary slightly depending on your sprayer’s brand and model.
For Sprayers with a Detached Lever:
If the thumb lever has completely come off, you’ll need to see how it was originally attached.
- Look for a retaining clip or pin: Many sprayers have a small metal clip or a pin that goes through the base of the thumb lever and into the spray head body. If this has slipped out, simply push it back into place.
- Check for a screw: Some models might have a small screw that holds the thumb lever in. If this screw has loosened, tighten it gently with the appropriate screwdriver. Don’t overtighten, as you could strip the threads.
- Inspect for internal parts: Sometimes, the lever might be attached to an internal plastic mechanism that has broken or come loose. If this is the case, you might need to carefully pry open the spray head casing (if possible without breaking it) to resecure these internal parts. This often involves snapping a plastic piece back into place or reinserting a small spring.
For Sprayers with a Loose Lever:
If the lever is still attached but feels wobbly, the issue is likely with the internal connection.
- Tighten any visible screws: As mentioned, check for any small screws around the thumb control area.
- Check the housing: Gently try to wiggle the outer plastic housing of the spray head. If the housing itself is loose, it might be held in place by clips or a threaded ring. Try to tighten any visible fasteners or gently twist the housing to see if it secures itself.
- Consider replacement sprayer parts: If the plastic housing is cracked, or if internal components like springs or clips are broken, you may need to purchase replacement sprayer parts. Many manufacturers offer repair kits for their faucet spray head models.
Step 4: Reconnect the Sprayer Hose
Once you’ve addressed the thumb control issue, it’s time to put everything back together.
- Reattach the Sprayer Hose: Screw the sprayer hose back onto the faucet fitting or diverter valve. Make sure the threads are aligned properly to avoid cross-threading.
- Tighten Securely: Use your wrench or pliers to tighten the connection. It should be snug, but avoid overtightening, which can damage the fitting or the hose.
- Check the Sprayer Hose Connection: Ensure the sprayer hose itself is not kinked or damaged, as this can affect water flow and pressure.
Step 5: Test the Faucet and Sprayer
Now for the moment of truth!
- Turn on the Water Supply: Slowly turn the hot and cold water shut-off valves back on.
- Check for Leaks: Carefully inspect the sprayer hose connection under the sink for any drips.
- Test the Sprayer: Turn on the faucet and engage the thumb control sprayer. Check that it operates smoothly and that there are no leaks from the spray head. Test the water flow and the control lever.
Troubleshooting Common Issues with Kitchen Sprayer Repair
Even with the best intentions, you might run into a few snags. Here’s how to handle common problems encountered during kitchen sprayer repair.
Leaks After Reattachment
- Problem: You notice a drip from the sprayer hose connection after reconnecting it.
- Solution:
- Check Tightness: The connection might not be tight enough. Turn off the water and gently tighten the fitting again.
- Inspect Washer/Seal: There’s usually a rubber washer or seal inside the fitting that ensures a watertight seal. This might be missing, damaged, or misaligned. Carefully unscrew the hose, check the seal, and reassemble if necessary. If the seal is worn, you’ll need to replace it with a new one.
Sprayer Not Working Correctly
- Problem: The thumb control works, but the water flow is weak or erratic, or it leaks from the spray head itself.
- Solution:
- Blocked Aerator/Nozzle: Mineral deposits can clog the small holes in the faucet spray head. Try unscrewing the spray head (if possible) and soaking it in vinegar to dissolve the buildup. You might also be able to clean the individual nozzles with a small brush or toothpick.
- Internal Sprayer Parts: If the thumb control feels stiff or the spray pattern is off, internal components within the spray head might be worn or damaged. This is a good indicator that you might need to replace the entire faucet spray head unit. You can often find replacement parts by searching for your faucet’s brand and model number.
Difficulty Disconnecting or Reconnecting the Hose
- Problem: The sprayer hose connection is stuck or difficult to unscrew.
- Solution:
- Penetrating Oil: Apply a small amount of penetrating oil to the threads and let it sit for 15-20 minutes. This can help break down mineral deposits or corrosion.
- Gentle Force: Use a wrench for better grip, but apply steady, gentle pressure. Avoid using excessive force, which can strip the threads or damage the fitting. If it’s still stubborn, it might be time to consider professional help or explore options for replacing the entire hose assembly.
When to Call a Professional for Your Kitchen Faucet
While many kitchen sprayer repairs are DIY-friendly, there are times when it’s best to call in a plumber.
- Persistent Leaks: If you’ve tried tightening connections and replacing seals, and leaks persist, there might be a larger issue with the faucet body or internal plumbing.
- Damaged Faucet Body: If the threads on the faucet body itself are stripped or damaged, reattaching parts will be impossible without professional repair or replacement of the entire faucet.
- Lack of Confidence: If you’re not comfortable working with plumbing or are unsure about any step, it’s always safer to hire a professional. They have the tools and expertise to diagnose and fix the problem correctly.
- Complex Sprayer Designs: Some high-end or uniquely designed faucets have more complex sprayer mechanisms that might require specialized knowledge.
Replacing the Sprayer Hose Entirely
If your thumb control sprayer is beyond repair, or if the hose itself is damaged (cracked, kinked, or leaking), you might need to replace the entire sprayer hose assembly. This is a common type of kitchen sprayer repair.
The process is similar to reattaching:
- Turn off water supply.
- Disconnect the old sprayer hose from the faucet under the sink.
- Unscrew the old spray head from the other end of the hose.
- Attach the new spray head to the new hose.
- Connect the new sprayer hose to the faucet under the sink, ensuring a secure and leak-free connection.
- Turn water back on and test.
When buying a replacement hose, make sure it’s compatible with your faucet model. You can usually find the model number on the faucet itself or in your owner’s manual.
Popular Faucet Brands and Their Sprayer Attachments
Different faucet brands often have distinct ways their sprayers attach and their thumb control mechanisms are designed. Knowing your brand can help you find specific replacement sprayer parts or repair guides.
Here’s a look at how some popular brands handle their sink sprayer attachment:
| Faucet Brand | Typical Sprayer Hose Connection | Common Thumb Control Attachment Method | Notes on Sprayer Parts |
|---|---|---|---|
| Moen | Threaded fitting | Often a clip system or internal screws within the spray head housing. | Moen is known for its user-friendly designs, making parts often easy to find and replace. |
| Delta | Quick-connect or threaded | Varies, but many use small screws or a snap-in mechanism. | Delta offers a good range of replacement parts for their faucets. |
| Kohler | Threaded fitting | Can involve retaining rings, clips, or small screws holding the lever. | Kohler parts can sometimes be more specific, so checking the model number is important. |
| Pfister | Threaded fitting | Often uses screws or a simple press-fit design for the thumb lever. | Pfister parts are generally accessible and reasonably priced. |
| American Standard | Threaded fitting | Similar to other brands, with screws or clips securing the control. | American Standard provides robust parts for their kitchen faucets. |
Always refer to your faucet’s manual or the manufacturer’s website for specific instructions related to your model. This is especially important when dealing with specialized sprayer parts.
Frequently Asked Questions (FAQ)
Here are some common questions people have when dealing with a loose kitchen side sprayer thumb control.
Q1: How often should I expect to maintain my kitchen sprayer?
A: Regular maintenance isn’t usually required for the thumb control itself unless you notice looseness or wear. However, keeping the faucet and sprayer clean can prevent mineral buildup that might affect performance.
Q2: Can I use a universal repair kit for my faucet spray head?
A: Universal kits can work for some basic repairs, like O-rings, but it’s always best to try and get parts specific to your faucet brand and model. This ensures a proper fit and function.
Q3: My thumb control sprayer is leaking from the spout. What should I do?
A: This usually indicates a worn washer or seal within the spray head itself, or sometimes the connection where the spray head meets the hose. Try to tighten the connection first. If that doesn’t work, you may need to disassemble the spray head to replace internal seals or the entire spray head if it’s damaged.
Q4: Is it normal for the sprayer hose to feel a little loose under the sink?
A: No, the sprayer hose connection under the sink should be snug. A loose connection can lead to leaks. Make sure it’s tightened properly, and check the seal or washer within the fitting.
Q5: How do I find the model number for my faucet?
A: The model number is often stamped on the faucet body itself, usually on the underside or back. If you can’t find it there, check your original purchase receipt or packaging, or the manufacturer’s website if you know the brand.
By following these steps, you should be able to successfully reattach your kitchen side sprayer thumb control and enjoy a fully functional faucet once again! Remember to work carefully and have patience. Happy fixing!