
Can I hang kitchen cabinets myself? Yes, with careful planning, the right tools, and a bit of patience, you can absolutely hang kitchen cabinets yourself. This guide will walk you through the entire process of kitchen cabinet installation, from preparation to the final touches, making diy kitchen cabinet hanging achievable for most homeowners.
Hanging kitchen cabinets might seem daunting, but it’s a rewarding DIY project that can dramatically transform your kitchen’s look and functionality. This comprehensive guide will cover everything you need to know to successfully mount kitchen cabinets, ensuring they are level, secure, and perfectly aligned. We’ll delve into installing base cabinets and hanging upper cabinets, covering essential tips and techniques for a professional-looking finish.
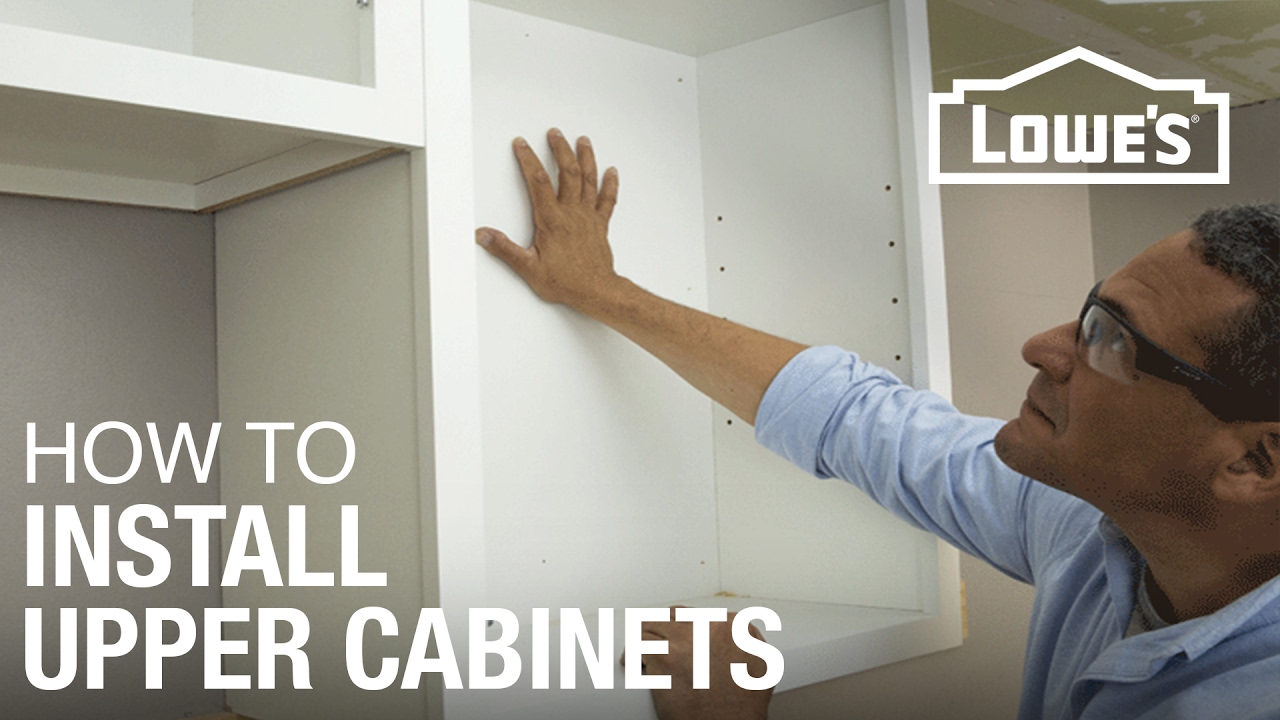
Image Source: i.ytimg.com
Getting Started: Planning and Preparation
Before you pick up a drill, proper planning and preparation are crucial for a smooth kitchen cabinet installation. This stage ensures your cabinets are hung correctly, securely, and aesthetically pleasing.
1. Design Your Kitchen Layout
The first step in diy kitchen cabinet hanging is to finalize your kitchen layout. Measure your kitchen space accurately. Consider the placement of appliances, windows, doors, and plumbing. Sketch out your desired cabinet arrangement, noting the exact locations and dimensions of each cabinet. This plan will be your roadmap throughout the installation process.
- Measure everything: Walls, existing cabinets, appliances, windows, doors.
- Consider workflow: Think about how you use your kitchen and position cabinets for easy access.
- Draw it out: Create a floor plan with cabinet placements.
2. Gather Your Tools and Materials
Having the right tools is essential for successful mounting kitchen cabinets. Ensure you have everything before you start.
Essential Tools:
- Tape Measure: For accurate measurements.
- Level (4-foot recommended): Crucial for leveling kitchen cabinets.
- Stud Finder: To locate wall studs for securing kitchen cabinets.
- Pencil: For marking.
- Drill/Driver: For pre-drilling and driving screws.
- Safety Glasses: Protect your eyes.
- Work Gloves: For grip and protection.
- Screwdriver Set: Phillips and flathead.
- Circular Saw or Miter Saw: For cutting filler strips or modifying cabinets if needed.
- Orbital Sander: For smoothing edges.
- Caulking Gun: For sealing gaps.
- Putty Knife: For applying wood filler.
- Hammer: For gentle persuasion.
- Safety Harness (if working at heights): For safety when hanging upper cabinets.
- Optional: Cabinet Clamps: To hold cabinets in place while you secure them.
- Optional: Laser Level or Chalk Line: For drawing precise horizontal lines.
Necessary Materials:
- Kitchen Cabinets: Your chosen cabinets.
- Cabinet Mounting Screws: Heavy-duty screws specifically designed for cabinet installation (e.g., 2.5-inch or 3-inch wood screws).
- Shims: For leveling kitchen cabinets and filling small gaps.
- Wood Glue: For joining cabinet pieces or filler strips.
- Wood Filler: For patching holes or imperfections.
- Paint or Stain: To match your existing decor.
- Wall Anchors (if studs are not available): Heavy-duty toggle bolts or similar anchors.
- Screws for Cabinet Hardware: Typically included with hardware.
- Optional: Filler Strips: Wood pieces to fill gaps between cabinets and walls.
- Optional: Cabinet Mounting Brackets: For additional support, especially in specific situations.
3. Locate Wall Studs
This is a critical step for securing kitchen cabinets. Cabinets must be anchored to wall studs for stability and safety.
- Use a stud finder: Scan the wall where you plan to install cabinets. Mark the center of each stud.
- Verify stud locations: After marking with a stud finder, drill a small pilot hole in the drywall to confirm you’ve hit a stud. The drill bit will meet resistance when it hits the wood.
- Mark stud lines: Draw vertical lines on the wall at the center of each stud. These lines will guide your cabinet placement.
4. Prepare the Installation Area
Clear the work area. Protect your floors with drop cloths. Remove any old cabinets or appliances if this is a full renovation.
Installing Base Cabinets: The Foundation of Your Kitchen
Installing base cabinets provides the stable foundation for your countertops and the lower storage of your kitchen. Proper installation here makes hanging upper cabinets much easier.
1. Mark the Cabinet Height Line
This is where your level comes into play. The height of your base cabinets, including the countertop, is typically 36 inches from the finished floor.
- Find the finished floor height: If your floors aren’t installed yet, measure to where the finished floor will be.
- Mark the top of the cabinet: Use your level and tape measure to draw a perfectly horizontal line on the wall, 34.5 inches from the finished floor. This line represents the top of your base cabinets (assuming a standard 1.5-inch countertop thickness). If your countertop thickness differs, adjust accordingly. This line is crucial for leveling kitchen cabinets.
2. Install the Base Cabinet Support Cleat (Optional but Recommended)
A sturdy support cleat along the marked line provides an extra layer of support and makes mounting kitchen cabinets significantly easier.
- Cut a 1×4 or 2×4 to length: This cleat should run the length of where your base cabinets will be.
- Locate studs: Ensure the cleat is screwed into wall studs using long screws. This cleat will support the front of the cabinets, taking some of the weight off the back.
- Level the cleat: Use your level to ensure the cleat is perfectly horizontal.
3. Position and Level the First Base Cabinet
Start with a corner cabinet or a cabinet that doesn’t rely on another cabinet for support.
- Place the cabinet: Position the first base cabinet against the wall, resting on the floor or the support cleat.
- Check for level: Use your level to ensure the cabinet is plumb (vertically straight) and level (horizontally straight) from front to back and side to side.
- Use shims: Insert shims behind the cabinet where needed to achieve perfect level and plumb. You’ll likely need shims at the top and bottom, especially if your wall isn’t perfectly straight.
4. Secure the First Base Cabinet
Now it’s time for securing kitchen cabinets to the wall.
- Pre-drill pilot holes: Drill pilot holes through the back of the cabinet and into the wall studs.
- Drive cabinet mounting screws: Use long, heavy-duty wood screws (at least 2.5 inches) to attach the cabinet to the studs. Drive screws through the cabinet’s hanging rails or directly through the cabinet back into the studs. If using a support cleat, drive screws through the cleat into the studs, and also through the cabinet into the studs.
5. Install Subsequent Base Cabinets
Work your way along the wall, cabinet by cabinet.
- Position the next cabinet: Place the adjacent cabinet against the wall, ensuring its front face is flush with the front face of the previous cabinet.
- Check for alignment: Use your level and tape measure to ensure the top of this cabinet aligns with the top of the previous one. Also, check that the front faces are perfectly flush for good kitchen cabinet alignment.
- Shim and level: Use shims as needed to ensure the cabinet is level and plumb.
- Secure together: Once the cabinet is positioned and leveled, temporarily clamp it to the adjacent cabinet. Drill pilot holes through the adjoining cabinet faces (at the stile – the vertical frame piece) and drive screws to connect them. This ensures they stay aligned.
- Secure to the wall: Drill pilot holes into studs and drive screws to secure the second cabinet to the wall.
6. Install Corner Base Cabinets
Corner base cabinets often require filler strips or special corner connectors. Follow the manufacturer’s instructions for your specific corner cabinet.
Hanging Upper Cabinets: Reaching New Heights
Hanging upper cabinets requires extra care and often an extra pair of hands. The process is similar to base cabinets but involves working at height.
1. Mark the Cabinet Mounting Line
This line determines the height of your upper cabinets. The standard distance between the top of your base cabinets and the bottom of your upper cabinets is 18 inches.
- Measure from the top of the base cabinets: Use your tape measure and level to draw a horizontal line on the wall 18 inches above the top of your installed base cabinets. This line is crucial for accurate kitchen cabinet alignment.
- Locate studs: Using your stud finder, mark the stud locations along this line. Draw vertical lines to indicate the stud centers.
2. Install an Upper Cabinet Support Cleat (Highly Recommended)
This cleat will support the cabinets while you secure them, preventing them from dropping.
- Cut a 1×4 or 2×4: This cleat should be slightly shorter than the length of your upper cabinets.
- Mount the cleat: Screw the cleat securely into the wall studs along your marked line. Use your level to ensure it’s perfectly horizontal.
3. Prepare the First Upper Cabinet
Many upper cabinets come with a built-in hanging rail. If not, you might need to attach a ledger board or use cabinet mounting brackets for support.
4. Position and Level the First Upper Cabinet
This is the most challenging part of kitchen cabinet installation for DIYers.
- Get help: Have a second person help you lift and hold the cabinet in place, resting it on the support cleat.
- Check for level and plumb: Use your level to ensure the cabinet is perfectly level and plumb.
- Shim as needed: Insert shims behind the cabinet to correct any inaccuracies in the wall or to ensure perfect positioning.
5. Secure the First Upper Cabinet
- Pre-drill pilot holes: Drill pilot holes through the cabinet’s hanging rail or cabinet back into the wall studs.
- Drive cabinet mounting screws: Use appropriate screws to attach the cabinet securely to the studs. Ensure the screws are long enough to penetrate well into the studs.
6. Install Subsequent Upper Cabinets
- Position the next cabinet: Lift the next cabinet into place, resting it on the support cleat and butting it against the first cabinet.
- Check alignment: Ensure the front faces are flush for proper kitchen cabinet alignment. Use your level to confirm it’s plumb.
- Shim and secure together: Shim as needed. Clamp the cabinets together at the stiles. Drill pilot holes and drive screws to join them.
- Secure to the wall: Drill pilot holes into studs and drive screws to attach the cabinet to the wall.
7. Remove Support Cleats
Once all upper cabinets are secured and the glue on the stile connections has dried, you can carefully remove the support cleat.
Fine-Tuning and Finishing Touches
With the cabinets hung, it’s time for the details that make the installation look professional.
1. Final Cabinet Alignment and Leveling
Double-check all cabinets to ensure they are perfectly aligned and level. Make any minor adjustments by tightening or loosening screws, or by adding or removing shims.
- Use a long level: Place it across the tops of multiple cabinets to check for a consistent line.
- Check doors: Ensure cabinet doors hang straight and are properly aligned. Adjust hinges if necessary.
2. Install Cabinet Doors and Drawers
Attach the cabinet doors and drawers according to the manufacturer’s instructions.
3. Install Cabinet Hardware
Install handles, knobs, and drawer pulls. This is where you add your personal style.
- Measure carefully: Mark the exact location for each piece of kitchen cabinet hardware. Use a template if provided.
- Drill pilot holes: Drill pilot holes through the cabinet doors and drawer fronts before attaching the hardware.
- Secure hardware: Use the screws provided with the kitchen cabinet hardware to attach them.
4. Fill and Touch Up
Fill any visible screw holes or imperfections with wood filler. Once dry, sand smooth and touch up with paint or stain to match your cabinets.
5. Install Kick Plates and Trim (Optional)
Install kick plates at the bottom of base cabinets and any decorative trim pieces to give your kitchen a finished look.
Common Challenges and Solutions in Cabinet Hanging
Even with careful planning, you might encounter a few snags. Here’s how to address them:
| Challenge | Solution |
|---|---|
| Uneven Walls | Use shims generously behind cabinets to compensate for wall irregularities. Ensure shims are placed at stud locations for secure mounting. This is critical for leveling kitchen cabinets. |
| No Studs Where Needed | If you can’t hit a stud, use heavy-duty wall anchors specifically rated for the weight of your cabinets. Toggle bolts or molly bolts are good options. Always check anchor weight ratings. |
| Cabinet Doors Don’t Align | Most cabinet hinges are adjustable. Consult your cabinet manufacturer’s instructions for adjusting hinge screws to correct door alignment and achieve perfect kitchen cabinet alignment. |
| Cabinets Don’t Feel Secure | Re-check your connections to studs. Ensure you are using appropriate cabinet mounting screws and that they are driven deep into the studs. Consider adding cabinet mounting brackets for extra support if needed, especially for heavy cabinets or those in high-traffic areas. |
| Working with Heavy Cabinets | Always have a helper when lifting and positioning cabinets, especially upper cabinets. Use a sturdy ladder or scaffolding and consider a cabinet lifting tool if available. |
| Gaps Between Cabinets and Walls | Use filler strips cut to size and glued or screwed into place. You can then caulk or paint the seams for a seamless look. |
Frequently Asked Questions About Hanging Kitchen Cabinets
Q: How far apart should I space my cabinets?
A: For installing base cabinets, they typically sit directly next to each other, with minimal gaps. For hanging upper cabinets, ensure they are also installed contiguously, with filler strips used to close any gaps between cabinets and walls or adjacent cabinets if your layout requires it. Proper kitchen cabinet alignment is key.
Q: What kind of screws should I use for cabinet installation?
A: Use long, sturdy wood screws. Typically, 2.5-inch or 3-inch screws are recommended for securing kitchen cabinets to wall studs. These are often referred to as cabinet mounting screws.
Q: Can I hang kitchen cabinets without hitting studs?
A: It is strongly advised to always anchor cabinets to wall studs. If studs are not conveniently located, use heavy-duty wall anchors rated for the weight of the cabinets and their contents. This is vital for safety and the longevity of your kitchen cabinet installation.
Q: How do I ensure my cabinets are level?
A: Use a long level on the top and sides of each cabinet. Insert shims behind the cabinet where needed to achieve a perfectly level and plumb installation. This is a critical part of leveling kitchen cabinets.
Q: What is the standard height for upper kitchen cabinets?
A: The standard distance between the countertop and the bottom of upper cabinets is 18 inches. This spacing is important for workflow and ergonomics.
Q: Do I need special hardware for hanging upper cabinets?
A: While many cabinets have integrated hanging rails, cabinet mounting brackets can provide additional support and ease of installation, especially for heavier items or when dealing with less-than-ideal wall conditions.
Q: How do I achieve perfect kitchen cabinet alignment?
A: Precise measurement, consistent use of your level, shimming, and securely fastening cabinets to each other at the stiles are crucial for achieving good kitchen cabinet alignment. Take your time during the positioning and securing phases.
Q: What is a cabinet support cleat?
A: A cabinet support cleat is a horizontal strip of wood (often a 1×4 or 2×4) securely attached to wall studs. It provides a temporary resting surface and support for cabinets during installation, making mounting kitchen cabinets, especially upper ones, much easier and safer.
By following these detailed steps, you’ll be well on your way to a successful and satisfying diy kitchen cabinet hanging project. Enjoy your beautifully installed new kitchen cabinets!