
Can you clean a stainless steel sink with baking soda? Yes, absolutely! Baking soda is a fantastic natural cleaner for your stainless steel sink. This guide will show you the best way to clean your stainless steel sink, tackle stubborn water spots, and even offer tips for removing minor scratches. We’ll delve into natural cleaning methods and how to polish your sink to a brilliant shine, ensuring your stainless steel sink maintenance is a breeze.
A gleaming stainless steel sink can be the crown jewel of your kitchen, reflecting light and adding a touch of modern elegance. However, stainless steel, while durable, can be prone to water spots, fingerprints, and dullness if not cleaned and maintained properly. Fear not! Achieving that showroom sparkle is entirely possible with the right techniques and a little know-how. This comprehensive guide will walk you through everything you need to know for effective stainless steel sink cleaning.
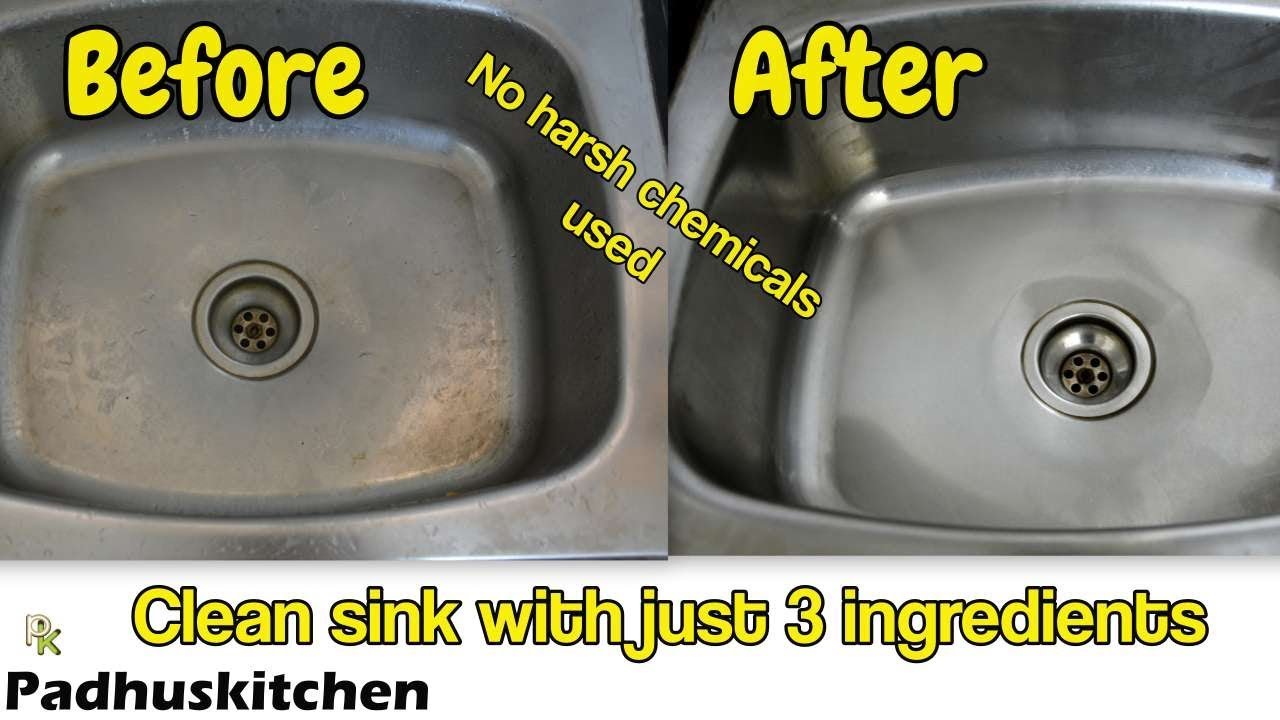
Image Source: i.ytimg.com
The Basics of Stainless Steel Sink Cleaning
Before we dive into specific cleaning agents and methods, let’s cover some fundamental principles of stainless steel sink care. This will help prevent damage and ensure your efforts are always fruitful.
What is Stainless Steel?
Stainless steel is an alloy, meaning it’s a mixture of metals. Its primary component is iron, but it also contains chromium. The chromium forms a thin, invisible layer of chromium oxide on the surface. This layer is what protects the metal from rust and corrosion. It’s crucial to clean your sink in a way that preserves this protective layer.
Why Proper Cleaning Matters
- Aesthetics: A clean sink simply looks better and makes your entire kitchen feel more inviting.
- Hygiene: Sinks can harbor bacteria. Regular cleaning keeps your kitchen sanitary.
- Longevity: Proper care prevents rust, staining, and dullness, extending the life of your sink.
- Preventing Damage: Using the wrong cleaning tools or chemicals can scratch or dull the finish.
Identifying Your Sink’s Finish
Most stainless steel sinks have one of two finishes:
- Brushed/Satin Finish: This is the most common. It has a visible grain or directional lines. Always clean and polish with the grain to avoid scratching.
- Polished/Mirror Finish: This is less common and has a high-gloss, reflective surface. It shows fingerprints and smudges very easily but is generally more resistant to minor scratches.
Your Go-To Guide for Stainless Steel Sink Cleaning
Now, let’s get down to the nitty-gritty of cleaning. We’ll start with everyday cleaning and then move on to tackling tougher issues.
Everyday Cleaning: Keeping It Fresh
The best approach to stainless steel sink cleaning is regular, gentle upkeep.
Daily Routine
- Rinse Thoroughly: After each use, rinse your sink with hot water. This helps to wash away food particles and residue before they can dry and stick.
- Wipe Down: Use a soft cloth or sponge to wipe the sink dry. This is the most crucial step for preventing water spots and mineral buildup. A microfiber cloth is ideal.
Weekly Cleaning: A Deeper Clean
Once a week, or as needed, you’ll want to give your sink a more thorough cleaning.
What You’ll Need:
- Mild dish soap
- Soft sponge or microfiber cloth
- Baking soda (for tougher jobs)
- White vinegar (optional, for shine and disinfection)
- Soft polishing cloth (microfiber is best)
Steps for a Sparkling Sink:
- Clear the Sink: Remove all dishes, racks, and strainers.
- Rinse: Rinse the sink thoroughly with warm water.
- Apply Mild Soap: Squirt a small amount of mild dish soap onto a damp sponge or microfiber cloth.
- Scrub Gently: Scrub the entire sink, working with the grain if you have a brushed finish. Pay attention to corners and around the drain.
- Rinse Again: Rinse the sink completely with warm water, ensuring all soap residue is gone.
- Dry Thoroughly: This is key! Use a clean, soft cloth (microfiber is excellent) to dry the sink completely. This prevents water spots and streaks.
Tackling Common Sink Problems
Even with regular cleaning, you might encounter specific issues. Here’s how to address them.
How to Remove Water Spots from Stainless Steel Sink
Water spots are caused by mineral deposits left behind after water evaporates.
Natural Stainless Steel Sink Cleaning for Water Spots:
-
White Vinegar Method:
- Soak a paper towel or soft cloth in white vinegar.
- Lay the soaked cloth over the water-spotted areas.
- Let it sit for 5-10 minutes. The acidity of the vinegar will help dissolve the mineral deposits.
- Remove the cloth and gently scrub the area with a soft sponge.
- Rinse the sink thoroughly with water.
- Dry the sink completely with a microfiber cloth.
-
Baking Soda Paste: For more stubborn spots, a baking soda paste can be effective.
- Mix baking soda with a little water to form a thick paste.
- Apply the paste directly to the water spots.
- Let it sit for a few minutes.
- Gently scrub with a soft sponge, following the grain.
- Rinse thoroughly and dry completely.
How to Clean Stainless Steel Sink with Baking Soda
Baking soda is a mild abrasive and a natural deodorizer, making it an excellent choice for cleaning stainless steel sink baking soda applications.
DIY Stainless Steel Sink Cleaner:
- Baking Soda Scrub:
- Sprinkle a generous amount of baking soda all over the damp sink surface.
- Use a damp sponge or cloth to gently scrub the sink. Work in the direction of the stainless steel grain.
- For stubborn grime or stains, you can make a paste by mixing baking soda with a small amount of water and applying it directly. Let it sit for a few minutes before scrubbing.
- Rinse the sink thoroughly with warm water.
- Dry the sink completely with a soft cloth.
Removing Rust Stains from Stainless Steel
While stainless steel is resistant to rust, it’s not rust-proof. Rust stains can occur from prolonged contact with iron objects (like cast iron pans or steel wool pads).
What to Use:
- Baking soda
- Lemon juice or white vinegar
- Soft cloth or sponge
- A non-abrasive nylon brush (if needed)
Steps to Remove Rust:
- Make a Paste: Mix baking soda with a little lemon juice or white vinegar to create a thick paste.
- Apply and Wait: Apply the paste directly to the rust stain. Let it sit for 15-30 minutes.
- Gentle Scrubbing: Gently scrub the area with a soft sponge or cloth, always moving in the direction of the grain. If the stain is persistent, a non-abrasive nylon brush can be used carefully.
- Rinse and Dry: Rinse the sink thoroughly with water and dry it completely with a soft cloth.
- Repeat if Necessary: For very stubborn rust, you might need to repeat the process.
Important Note: Never use steel wool or abrasive scouring pads, as these can scratch the surface and even cause new rust spots.
Dealing with Stubborn Grease and Grime
Sometimes, everyday dish soap isn’t enough for tough grease buildup.
Natural Stainless Steel Sink Cleaning for Grease:
- Hot Water and Dish Soap: The simplest method is often the best. Use plenty of hot water and a good degreasing dish soap. Scrub with a soft sponge.
- Baking Soda and Vinegar Combination: The fizzing action of baking soda and vinegar can help lift grease.
- Sprinkle baking soda in the sink.
- Spray or pour white vinegar over the baking soda. It will fizz.
- Let it sit for a few minutes.
- Scrub with a soft sponge and rinse thoroughly.
Making Your Stainless Steel Sink Sparkle and Shine
Beyond just cleaning, you might want to restore that brilliant shine to your sink.
How to Polish Stainless Steel Sink
Polishing not only makes your sink look great but also adds a protective layer against fingerprints and water spots.
What You’ll Need:
- Mild dish soap
- Baking soda (optional, for pre-cleaning)
- White vinegar (optional, for pre-cleaning)
- Mineral oil, olive oil, or a specialized stainless steel polish
- Soft, lint-free cloths (microfiber is ideal)
Polishing Process:
- Clean Thoroughly: Start by cleaning your sink thoroughly using one of the methods described above. Ensure it’s completely dry. Any dirt or debris can be smeared around during polishing.
- Apply Polish:
- Mineral Oil/Olive Oil: Put a few drops of mineral oil or olive oil onto a clean, soft cloth.
- Stainless Steel Polish: Follow the instructions on the product packaging.
- Polish with the Grain: Apply the polish to the cloth and then rub it onto the sink surface, always moving with the grain of the stainless steel. Apply it evenly.
- Buff to a Shine: Use a clean, dry cloth to buff the surface until it shines. This removes any excess polish and creates a smooth, glossy finish.
Frequency: You can polish your sink weekly or whenever it starts to look dull.
How to Shine Stainless Steel Sink
Achieving a great shine is a combination of effective cleaning and proper drying.
Tips for Maximum Shine:
- Always Dry: We can’t stress this enough! A thorough drying with a microfiber cloth after every cleaning is the secret to preventing streaks and water spots, which dull the shine.
- Vinegar Rinse: After your regular cleaning and rinsing, a final rinse with diluted white vinegar can help remove any lingering mineral deposits and add extra shine. Rinse with water afterwards.
- Gentle Buffing: After drying, a final buff with a dry microfiber cloth can enhance the shine significantly.
Stainless Steel Sink Maintenance: Long-Term Care
Consistent stainless steel sink maintenance will keep your sink looking its best for years to come.
What to Avoid: The Don’ts of Stainless Steel Care
- Abrasive Cleaners: Avoid gritty cleaners, steel wool, abrasive sponges, or scouring pads. These will scratch the surface.
- Harsh Chemicals: Do not use bleach, oven cleaners, or ammonia-based cleaners. They can damage the protective chromium oxide layer.
- Leaving Wet Sponges or Cloths: This can lead to water spots and discoloration.
- Leaving Metal Cans or Other Metal Objects: Prolonged contact with iron or steel can cause rust stains.
- Scraping with Sharp Objects: Knives or other sharp utensils can easily scratch the surface.
Protecting Your Sink
- Sink Grids or Mats: Consider using a sink grid or protective mat. These create a barrier between your dishes and the sink basin, preventing scratches and dents.
- Drain Boards: Use a drain board for drying dishes instead of letting them pile up in the sink.
Removing Scratches from Stainless Steel Sink
While it’s best to prevent scratches, minor ones can often be buffed out or made less noticeable.
Can You Remove Scratches from Stainless Steel Sink?
Yes, to a degree, particularly for light scratches on brushed finishes. Deep gouges are much harder to fix. The key is to work with the grain and use a very fine abrasive.
Methods for Reducing Scratches:
-
Specialized Stainless Steel Scratch Removal Kits: These kits are specifically designed for this purpose and often contain a series of fine abrasive pads and a polishing compound. Always follow the kit’s instructions carefully, working with the grain.
-
Non-Abrasive Polishing Compounds: Products like Bar Keepers Friend (often used as a cleaner, but its oxalic acid can help with minor surface abrasions) or specific stainless steel polishing compounds can help blend minor scratches.
- Clean the Area: Thoroughly clean the scratched area and the surrounding sink surface.
- Apply Compound: Apply a small amount of the polishing compound to a soft cloth.
- Rub Gently: Rub the compound onto the scratch in the direction of the grain. Use light pressure.
- Wipe and Inspect: Wipe away the residue with a clean cloth and inspect. Repeat if necessary, but be gentle to avoid creating more scratches.
- Rinse and Dry: Rinse the sink and dry it completely.
-
Toothpaste (for very minor scratches): In a pinch, a non-gel white toothpaste (which contains mild abrasives) can be used for very light surface scratches. Apply a small amount to a soft cloth, rub gently in the direction of the grain, rinse, and dry.
Important Considerations for Scratch Removal:
- Test First: Always test any scratch removal method on an inconspicuous area of the sink first to ensure it doesn’t damage the finish.
- Work with the Grain: This is paramount. Rubbing against the grain will create visible new scratches.
- Patience: Be patient. It might take several applications of a gentle method to see results.
- Deep Scratches: Deep scratches are difficult to remove completely without professional refinishing. Focus on preventing them in the first place.
Frequently Asked Questions (FAQ)
Q1: Can I use bleach to clean my stainless steel sink?
A1: No, it is highly recommended to avoid bleach. Bleach can corrode stainless steel and damage its protective layer, potentially leading to staining and rust.
Q2: Is it okay to use my stainless steel sink for washing dishes with abrasive cleaners?
A2: It’s best to avoid abrasive cleaners and scouring pads like steel wool. These can scratch the surface of your sink and dull its finish. Stick to soft sponges or microfiber cloths.
Q3: How often should I polish my stainless steel sink?
A3: You can polish your sink whenever it starts to look dull, typically once a week or every few weeks, depending on usage and water conditions. Regular drying after each use is more important for daily maintenance.
Q4: My sink has a hard water buildup. What’s the best way to remove it?
A4: White vinegar is an excellent natural cleaner for hard water spots. Soak a cloth in vinegar and lay it over the affected areas for 5-10 minutes, then gently scrub and rinse. Baking soda paste can also be effective.
Q5: Can I use lemon juice on my stainless steel sink?
A5: Yes, lemon juice is a natural, mild acid that can help clean and brighten stainless steel. It can be used in combination with baking soda for cleaning or as a final rinse for shine. However, don’t leave it on for too long, and always rinse thoroughly afterward.
By following these simple yet effective methods, you can easily keep your stainless steel kitchen sink clean, sparkling, and looking like new. Regular cleaning and proper stainless steel sink maintenance are your keys to a beautiful and functional kitchen.