
Are Stand Mixer Attachments Universal? What to Know Before You Buy
No, stand mixer attachments aren’t universal, so you should confirm fit before you buy. Check your mixer’s mounting system, shaft size, and lock type, and match torque and wattage needs for heavy tasks like pasta or grinding. Materials, safety certifications, and warranty rules matter too—third-party parts can void coverage. Inspect specs, compare part numbers, and test seating to avoid motor stress or damage. Keep going and you’ll find practical checks and brand-specific tips.
Who This Guide Is For And How To Use It
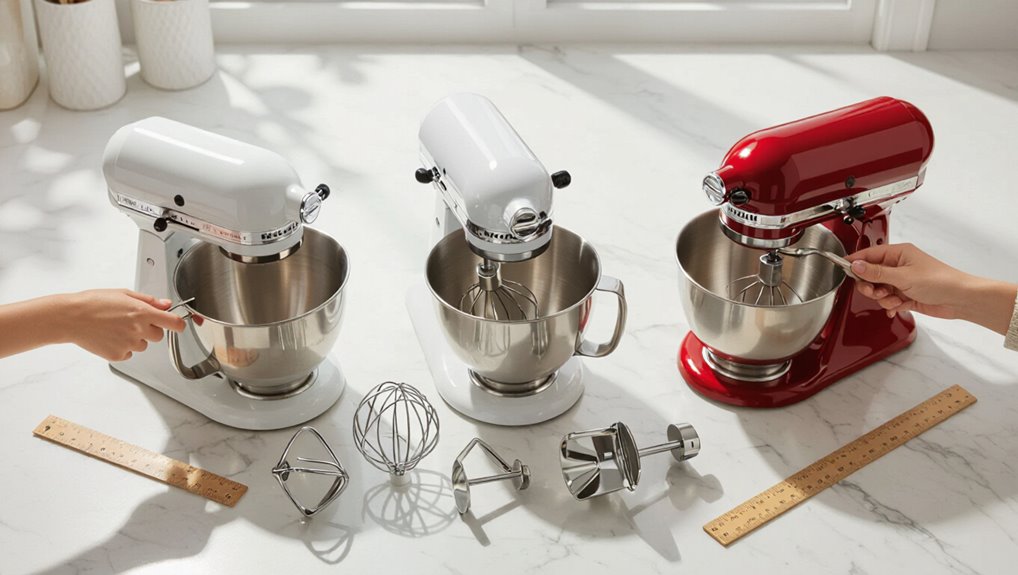
Whether you’re a home cook upgrading your kitchen or a professional baker expanding your toolkit, this guide helps you pick and use the right stand mixer attachments.
You’ll learn which attachments suit your recipes, how to match them to mixer models, and practical tips for swapping and cleaning.
Use the quick checks and examples to decide confidently and avoid costly mismatches.
Quick Answer: Are Stand Mixer Attachments Universal?
Short answer: not exactly — compatibility usually depends on your mixer’s brand and model, since mounting systems and power hubs vary.
You’ll also need to match an attachment’s power requirements to your mixer to avoid strain or damage.
In some cases adapters or third-party accessories can bridge gaps, but you should check fit and motor capacity before you buy.
Mixer Brand Compatibility
Because stand mixers come from many manufacturers with different hub sizes and attachment fittings, attachments aren’t universally interchangeable.
You should check brand-specific compatibility lists or fit guides before buying. Some third-party makers produce multi-fit adapters, but they can void warranties or reduce performance.
Stick with manufacturer-approved attachments or verified cross-brand options to guarantee secure fit and reliable results.
Attachment Power Requirements
If you expect every attachment to work the same on every mixer, you’ll be disappointed—attachments differ not just in fit but in power demands, and your mixer’s motor may not handle them all.
Check wattage and torque requirements for heavy tasks like pasta or meat grinding. Low-power models can overheat or stall; high-power attachments need stronger motors.
Match specs before buying to avoid damage.
Adapter And Accessory Options
While many mixers look similar, attachments aren’t universal—you’ll need to check the brand, model, and hub type before swapping parts.
You can buy adapters for some hubs, but they vary in fit and torque limits. Check compatibility lists, verify motor capacity, and read reviews.
Third-party accessories exist, yet they may void warranties or reduce performance, so choose carefully.
Quick Decision Flow: Will This Attachment Work For Me?
Wondering whether a particular stand mixer attachment will fit your needs? Check your mixer model and hub type, confirm attachment compatibility or adapter availability, verify power and size limits, and read user reviews for real-world fit.
If it matches model specs, motor capacity, and planned tasks, you’re good. If not, seek alternatives or adapters before buying to avoid returns or damage.
Why Mixer Attachment Compatibility Matters
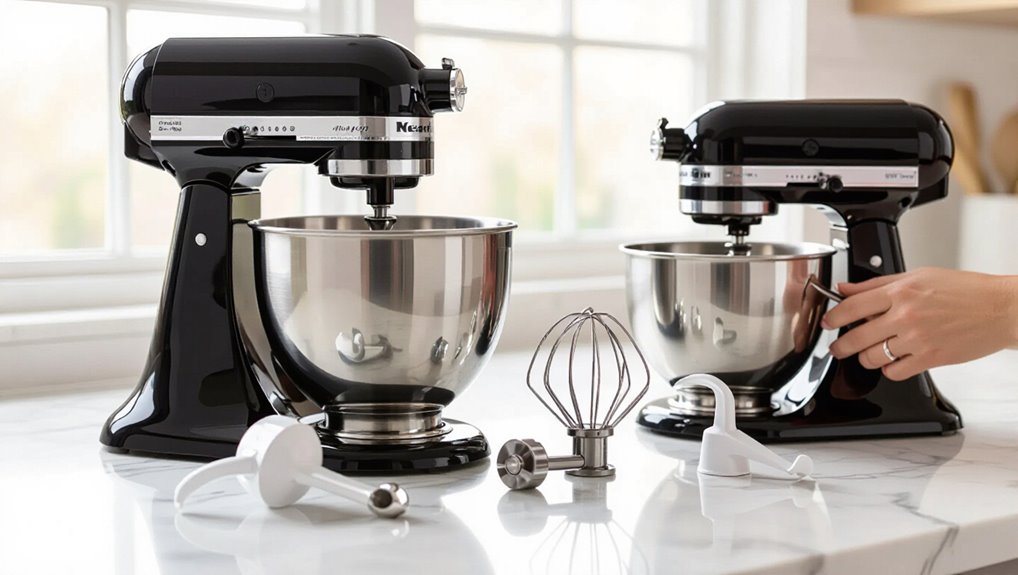
You need to check how the attachment mounts to your mixer—different brands use hub, hubless, or proprietary mounts that won’t all fit.
Also consider your mixer’s motor power, since heavy tasks or high-torque attachments can overload a weaker motor.
Matching mount type and power rating keeps attachments safe and effective.
Mounting Mechanism Types
Because mixers use different mounting systems, knowing the type your machine accepts is key to picking compatible attachments.
Check whether yours uses a pin-and-socket hub, a bayonet lock, a threaded spindle, or a proprietary connector.
Measure shaft size and alignment, inspect locking mechanisms, and compare part numbers.
That prevents fit issues and protects both attachment and mixer from damage.
Motor Power Limits
When matching attachments to your stand mixer, remember that each accessory draws a specific amount of torque and current, and exceeding the mixer’s motor limits can strain or burn out the motor.
Check your mixer’s wattage and recommended accessory list, avoid heavy-duty attachments on low-power units, and use shorter duty cycles for demanding tasks to prevent overheating and premature failure.
Mixer Attachment Systems Used By Major Brands
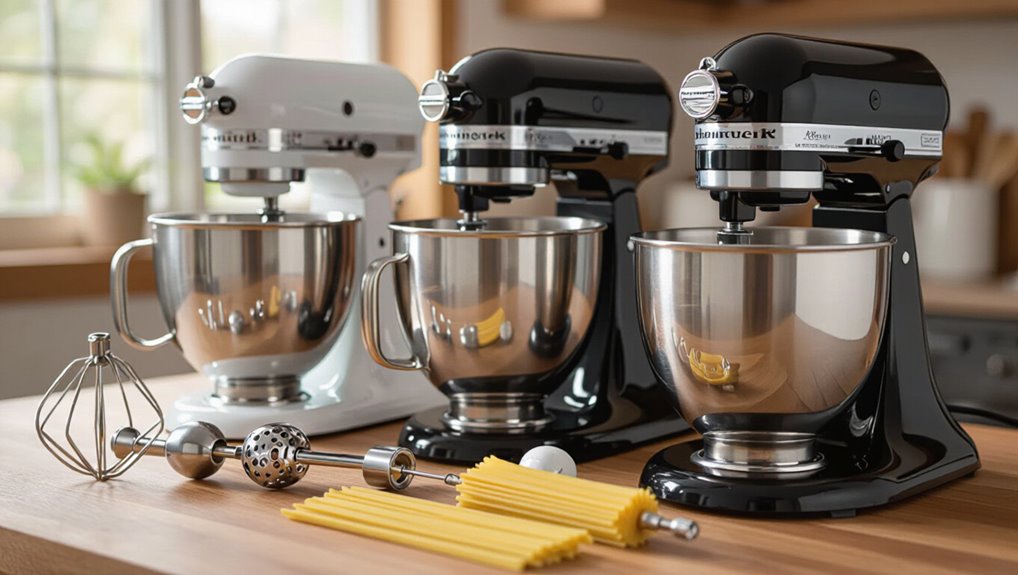
Although the core idea—powering a range of tasks from pasta to grinding—stays the same, major brands take different approaches to mixer attachment systems. Knowing those differences helps you choose the right machine for your needs.
You’ll find brand-specific mounts, proprietary fittings, and varied accessory ranges; compatibility often depends on model lines, generation updates, and whether adapters exist. So check specifications before buying.
External Vs. Internal Hubs : Which Do You Have?
If you’re checking which type of hub your stand mixer has, focus on where attachments connect: external hubs sit on the mixer’s front and accept bolt-on accessories, while internal hubs hide inside the head and drive attachments from within.
Identify your mixer model or inspect the head: a visible nose/port means external; a recessed or covered opening indicates an internal hub.
Hub Vs. Power Take‑Off: How They Differ
Because the hub and the power take-off serve different roles on a stand mixer, it helps to know which one you’re dealing with: the hub is the visible connection point for bolt-on accessories (usually on the mixer’s front), while the power take-off is the drive mechanism that transfers motor torque to internal or hidden attachments.
You’ll check the hub for external tools and the take-off for internal functions; they’re not interchangeable.
Standard Hub Sizes And Why Brands Vary
Now that you can tell a hub from a power take-off, the next practical question is whether an accessory will actually fit—hub diameters and mounting patterns aren’t universal.
You should check brand specs, measure hub diameter and pin spacing, and note proprietary locks. Consider adapters but expect limits.
- Measure diameter
- Check pin/bolt pattern
- Verify manufacturer compatibility
Motor Torque And Attachment Compatibility
Torque, not speed, determines whether an attachment will actually do the job you expect—your mixer’s motor needs enough twisting force to overcome an implement’s load without stalling or overheating.
Check wattage and torque ratings, match heavy-duty attachments to higher-torque models, and heed manufacturer limits.
Using an underpowered motor risks poor performance and damage, so choose attachments suited to your mixer’s rated capacity.
How Gear Ratios Change Attachment Speed
When you attach an accessory, the mixer’s internal gears change how fast the tool turns relative to the motor, so understanding gear ratios tells you what to expect from speed and power at the attachment head.
You’ll notice different RPMs and torque at the tool versus motor. Consider these effects:
- Higher ratio = slower head, more torque for heavy tasks.
- Lower ratio = faster head, less torque for light jobs.
- Gear changes affect perceived speed settings and performance.
How Materials Affect Performance And Wear
Because the materials in a stand mixer’s attachments determine how they handle stress, you’ll see clear differences in performance and wear over time. You’ll prefer stainless steel for durability, aluminum for lightness, and plastic for occasional use. Match material to tasks and maintenance to extend life.
| Material | Best Use |
|---|---|
| Stainless steel | Heavy mixing |
| Plastic | Light tasks |
Safety Features Built Into OEM Attachments
When you compare OEM attachments, look for manufacturer safety standards that set performance and testing expectations.
You’ll also want built-in overload protection so the motor and attachment shut down before damage occurs.
Finally, check for food-safe material certification to guarantee parts that touch ingredients meet regulatory requirements.
Manufacturer Safety Standards
Although you mightn’t notice them at first glance, OEM attachments incorporate specific safety features designed to prevent misuse, protect your hands, and keep the mixer operating within safe limits.
You’ll rely on tested materials, precise fit, and clear warnings.
Consider these manufacturer standards:
- Certified materials and rounded edges.
- Secure locking mechanisms.
- Clear labeling and usage instructions.
Built‑In Overload Protection
If an attachment starts drawing too much current or binding against dense dough, the mixer’s built-in overload protection steps in to prevent motor damage and reduce fire risk.
You’ll hear the motor slow or trip a thermal cutoff; some models restart automatically after cooling, others need manual reset.
Always use OEM attachments sized for your mixer and don’t bypass safety mechanisms.
Food‑Safe Material Certification
Think of food‑safe certification as the paperwork that guarantees an OEM attachment won’t leach harmful substances into your batter or sauce.
You should check for FDA, LFGB, or NSF marks, plus nonreactive finishes and BPA‑free plastics. Certified parts resist corrosion and odors.
Verify documentation and serial numbers when buying replacements or knockoffs.
- Material standards
- Testing labs
- Traceable labeling
When Non‑OEM Attachments Can Void Your Warranty
When you attach a third‑party bowl, beater, or motorized accessory, you may be risking your stand mixer’s warranty—manufacturers often specify that only OEM parts and approved attachments should be used, and they can deny coverage for damage caused by incompatible or modified accessories.
Check your warranty terms, keep receipts, and document approved part numbers; if a repair’s linked to a non‑OEM item, expect denial of service or chargeable repairs.
Reading Your Mixer’s Model And Generation
Curious how to tell which model and generation your stand mixer is? Check the mixer’s underside or back for a stamped model number and serial; that usually reveals generation.
Compare that to manufacturer guides or online forums for visual cues like tilt-head vs. bowl-lift. Note cosmetic changes and attachment collars.
- Find stamped model/serial
- Match to official guide
- Compare physical features
Which Spec Sheet Details To Check Before Buying
Before you buy attachments, check the spec sheet for bowl size compatibility so parts fit and clearances work.
Confirm the attachment hub type matches your mixer’s coupling, and note the power and torque ratings to ascertain the motor can handle heavy tasks.
These three details prevent mismatches and performance issues down the line.
Bowl Size Compatibility
If you plan to buy a mixer attachment, check the bowl diameter, rim shape, and mounting clearances on the spec sheet so you know the accessory will fit and move freely.
Manufacturers often list compatible bowl sizes, maximum fill capacity, and any required adapter rings that affect fit. You’ll avoid clearance issues and overfilling.
- Match diameter and depth
- Verify rim/profile
- Confirm max fill volume
Attachment Hub Type
Now that you’ve checked bowl fit and clearance, look at the mixer’s attachment hub specifications to make sure the accessory will actually connect and operate.
Check hub size, mounting pattern, drive pin or spline type, and whether the hub is front- or rear-mounted.
Verify manufacturer compatibility lists and required adapter models so you don’t buy an attachment that won’t physically mate with your mixer.
Power And Torque Ratings
Think of power and torque as the muscle behind each attachment: they determine whether an accessory will perform heavy tasks or stall under load.
You should check wattage/HP, torque ratings, and recommended max bowl or ingredient weight. Compare attachment requirements to mixer specs before buying.
- Motor wattage/horsepower
- Peak and continuous torque
- Manufacturer weight/load limits
Measuring Your Mixer’s Hub And Shaft For Fit
Want to be sure an attachment will fit? Measure the hub diameter, shaft length, and shaft diameter with calipers, noting any keyway or threaded recess.
Record outer dimensions to match manufacturer specs and attachment openings. Check clearance inside the hub and whether the shaft protrudes enough for secure coupling.
Compare measurements before buying to avoid mismatches and returns.
Identifying Spline, Pitch, And Coupling Types
Now you’ll learn how to recognize common spline types so attachments fit your mixer’s hub.
You’ll see how to measure pitch accurately and what those numbers mean for compatibility.
Finally, you’ll get practical coupling tips to match parts and avoid play or damage.
Spline Types Explained
Splines are the small but essential features that let your stand mixer attachments mate securely with the motor shaft.
You’ll spot straight, involute, and serrated splines; each controls torque transfer and alignment. Match shape and coupling type—female hub or keyed sleeve—to avoid wobble or wear.
- Straight: simple slots, low torque
- Involute: smooth load distribution
- Serrated: high grip, precise indexing
Pitch Measurements Guide
1 clear measurement lets you identify the spline type, pitch, and coupling so you can pick the right attachment without guesswork.
Measure the number of splines and the distance between adjacent peaks (pitch) with calipers. Note tooth profile—rounded or square—and record diameter where the shaft seats.
Compare these values to manufacturer specs to confirm fit before buying, avoiding mismatches.
Coupling Compatibility Tips
When you’re matching a mixer attachment to its drive, identify the spline count, measure the pitch between adjacent peaks, and note the tooth profile—rounded or square—so you can determine the coupling type precisely.
Then inspect fit, clearance, and wear before buying to avoid wobble or stripping.
- Count splines visually or with calipers.
- Measure pitch across peaks.
- Match tooth profile to hub.
Adapters That Enable Cross‑Brand Mixer Attachment Compatibility
If your stand mixer came with a limited set of attachments or you want to use a favorite accessory from another brand, adapters let you bridge the mechanical gap so tools fit and work safely.
You can buy simple coupler adapters or multi-piece kits that convert hub shapes and sizes.
Check fit, drive orientation, and materials, and expect modest performance changes with non‑original parts.
How To Choose An Adapter Without Risking Damage
Because adapters change how torque and alignment transfer between your mixer and an accessory, you need to pick one that matches both mechanical and material specs to avoid damage.
Inspect fit, tolerances, and rated torque. Choose heat‑treated metal over plastic for high load. Prefer manufacturer‑approved or well‑reviewed third‑party adapters. Verify return policy before buying.
- Measure shaft/profile
- Check torque rating
- Confirm materials
When Adapters Reduce Performance Or Increase Wear
When you use the wrong adapter, you can see reduced power transfer that makes attachments work less efficiently.
That mismatch also raises mechanical stress on the motor and gears, shortening their lifespan.
If the adapter doesn’t align properly, a misaligned attachment fit will amplify vibration and wear.
Reduced Power Transfer
Though adapters can make more attachments fit your stand mixer, they often cut the power that actually reaches the tool head.
So you’ll notice slower performance and heavier strain on the motor and gears. You’ll see limp mixing, slower grinders, and reduced torque.
Consider compatibility, planned load, and whether your mixer’s warranty covers adapter use.
- Limp mixing speed
- Weaker grinding torque
- Longer task times
Increased Mechanical Stress
If you fit an adapter that doesn’t match your mixer’s design, you’ll quickly put extra strain on bearings, gears, and the motor shaft.
That added stress raises operating temperatures, accelerates wear, and can loosen fasteners. You’ll notice wobble, noise, or burning smells sooner.
Using correct, well-fitted adapters preserves drivetrain alignment and lifespan; cheap or forced adapters shorten service intervals and risk costly repairs.
Misaligned Attachment Fit
Because a slightly off-center adapter can shift how forces travel through the head, a misaligned attachment will make your mixer work harder and wear faster.
You’ll notice noise, wobble, and slower mixing. Check fit and stop using adapters that rock.
- Increased vibration stresses gears.
- Uneven ingredient processing.
- Faster bearing and seal failure.
Attachments That Demand The Most Power
When you attach heavy-duty tools like meat grinders, pasta extruders, or spiralizers, your mixer has to deliver far more torque than when it’s just whisking egg whites.
Those attachments pull sustained power and can stall weaker motors. Check your mixer’s wattage and motor type, follow manufacturer limits, and avoid prolonged runs.
Use lower speeds for resistance and let the motor cool between heavy batches.
Low‑Risk Swaps: Which Attachments Are Safe To Change?
You can swap several everyday attachments without stressing the motor: flat beaters, dough hooks for light bread, and wire whisks for most whipping tasks are low-risk changes that run easily on standard motors.
You should still match hub fittings and avoid oversized batches. Check speed recommendations and stop if strain appears.
- Light dough with hook
- Cake batter with flat beater
- Egg whites with whisk
KitchenAid Attachment Ecosystem: What To Know
You’ll want to check KitchenAid attachment compatibility before you buy, since not every model fits every accessory.
The brand’s proprietary hub design means many attachments are tailored to its machines, so adapters or third‑party parts can be hit or miss.
Start by matching your mixer model and hub type to the attachment specs to avoid surprises.
KitchenAid Attachment Compatibility
Although KitchenAid mixers share a common hub and attachment drive, not every accessory fits every model—so it helps to know the differences.
You’ll check model series, power rating, and shaft size before buying. Consider compatibility charts and manufacturer notes to avoid mismatches.
- Model series
- Motor power
- Shaft/drive size
Proprietary Hub Design
Knowing model series, motor power, and shaft size helps you pick compatible attachments, but the hub itself determines what really works and how well it performs.
KitchenAid uses a proprietary hub with unique drive fittings and firmware-aware strain limits, so third-party parts may fit poorly or void warranties.
You should verify official compatibility or choose reputable makers that match hub specs for safe, reliable performance.
Bosch And Kenwood Approaches To Attachments
When comparing Bosch and Kenwood, you’ll notice they take particularly different paths with attachments:
- Bosch centers on powerful motor-driven external attachments, so you’ll get robust capacity and unique accessories that match the motor platform.
- Kenwood favors an integrated hub with many proprietary metal attachments, giving you a broad, durable accessory ecosystem.
- Both limit cross-brand interchangeability, so check fit and power requirements before buying.
Smaller & Import Mixers: Compatibility Quirks
Because smaller and import stand mixers often target different markets, their attachment systems can feel idiosyncratic and frustrating if you assume parts are interchangeable.
You’ll find varied hub sizes, unique locking methods, and proprietary fittings. Measure shafts, compare mounting shapes, and check manufacturer specs before buying extras.
Don’t assume adapters exist; compatibility often requires model-specific research to avoid wasted purchases.
Pros And Cons Of Third‑Party Attachment Makers
If you’re looking to expand your mixer’s capabilities without paying brand-name prices, third‑party attachment makers can be a smart, budget-friendly option—though they come with trade‑offs you should weigh carefully.
- Lower cost: you’ll get more tools for less.
- Variety: unique or niche attachments may be available.
- Fit and durability: some parts may wear faster or require adaptations.
How To Spot Low‑Quality Aftermarket Attachments
Picking a budget-friendly third‑party attachment can be great, but you’ll want to know how to spot low‑quality pieces before you buy.
Check cheap materials, rough finishes, loose tolerances, and flimsy connectors.
Look for missing safety features, poor welds or plastic seams, and vague compatibility claims.
If fit feels sloppy or instructions are sparse, walk away—those often fail or damage your mixer.
Reviews And Tests That Predict Real‑World Fit
You should look for reviews that include real-world compatibility tests to see whether an attachment actually fits and works with your mixer model.
Also check long-term durability trials that run attachments through extended use so you know how they’ll hold up over time.
Combining those two types of tests gives you a practical picture of performance and longevity.
Real-World Compatibility Tests
When you’re evaluating attachments, real‑world compatibility tests show whether pieces advertised as “universal” actually fit and perform across different mixer models. These tests go beyond specs to reveal alignment, clearance, and motor load issues that matter in daily use.
- Fit: you check hub engagement and wobble.
- Clearance: you test bowl and arm interference.
- Performance: you run typical recipes to monitor strain.
Long-Term Durability Trials
Although short-term tests show whether an attachment fits and functions, long-term durability trials reveal how it’ll hold up after months or years of regular use.
You should look for wear patterns, motor strain, loosening joints, and corrosion. Pay attention to repeated-use cycles, cleaning effects, and manufacturer warranty claims.
Choose attachments proven in extended tests to avoid replacements or kitchen downtime.
Performance Checks After Fitting An Attachment
Before you start the mixer, check that the attachment’s hub is fully seated and the locking mechanism clicks into place; this guarantees the motor transfers power efficiently and prevents wobble or slippage.
- Start at low speed and listen for smooth operation.
- Watch rotation for even movement and correct alignment.
- Briefly increase speed to confirm consistent performance under light load.
Common Fit Problems: Wobble, Binding, And Noise
1 common set of issues you’ll notice after fitting an attachment are wobble, binding, and unusual noise—each usually signals improper seating, a dirty hub, or a damaged coupling.
Check that the attachment sits flush, spin the shaft by hand to feel resistance, and inspect splines and pins for wear.
Don’t force a fit; replace bent or corroded parts to prevent further damage.
Troubleshooting Attachments That Don’t Fit
If an attachment won’t fit, start by removing debris and checking alignment—dried batter, flour, or a stray piece of dough can raise the hub just enough to block seating.
Then try these steps to resolve it:
- Inspect splines and pins for damage or buildup; clean and dry thoroughly.
- Wiggle gently while seating to align teeth.
- Swap with a known-compatible attachment to isolate the problem.
When To Contact The Manufacturer Or A Technician
If you’re unsure whether a problem is covered, check your warranty before taking further steps.
Contact the manufacturer if you notice unusual noises, burning smells, or any electrical or motor issues you can’t safely fix yourself.
For persistent fit or performance problems, a certified technician can diagnose and repair things properly.
Warranty Coverage Check
Wondering whether your stand mixer issue is something you can fix or one that needs the manufacturer’s attention?
Check your warranty terms, registration status, and excluded damages before contacting support. If covered, the manufacturer may repair or replace; otherwise a technician might be needed.
- Warranty duration and scope
- Registration and proof of purchase
- Exclusions and required servicing channels
Unusual Noise Or Smell
After checking warranty coverage and registration, you’ll want to address any unusual noise or burning smells right away—these can signal mechanical failure or electrical issues that aren’t safe to ignore.
Stop using the mixer, unplug it, and inspect attachments and housing for debris or loose parts.
If the source isn’t obvious or persists, contact the manufacturer or a qualified technician before using the appliance again.
Electrical Or Motor Issues
Electric sparks, grinding, or a motor that stalls or smells like burning are clear signs you should stop using the mixer and call the manufacturer or a qualified technician.
Don’t try improvised fixes; you risk injury or voiding warranties. Document symptoms and serial numbers before contacting support.
- Visible sparks or smoke
- Repeated stalling or failure to start
- Burning odor or hot housing
Best Practices For Heavy‑Duty Attachments
When you attach heavy-duty accessories, make sure the mixer is unplugged and the bowl is empty so you can secure fittings safely and accurately; tighten locks by hand first, then give them a final quarter turn according to the manufacturer’s torque guidance.
Use only compatible hubs and rated attachments, start on low speed to check balance, monitor for unusual noise or strain, and stop immediately if the motor bogs.
Maintenance To Keep Hubs And Attachments Working
You’ve already taken steps to fit and test heavy-duty attachments safely; now keep those hubs and accessories running smoothly with simple, regular maintenance.
- Inspect mounting posts and attachment shafts for wear or burrs; file tiny nicks and replace damaged parts.
- Lightly lubricate moving hub fittings with manufacturer‑approved grease; avoid overapplication.
- Check fasteners and couplers before each use; tighten to spec and replace stripped screws or worn adapters.
Cleaning And Storage To Preserve Fit And Seals
Keep attachments clean and dry after every use so gaskets and fit surfaces don’t trap food or corrode.
Use gentle brushes and nonabrasive cleaners to protect seals, and rinse thoroughly before drying.
Store parts in a dry, organized spot—ideally in labeled containers or on peg hooks—to prevent warping and misplacement.
Proper Cleaning Techniques
Two simple habits will extend the life of your stand mixer attachments: clean them promptly after use and store them so seals and fittings stay protected.
Rinse immediately, use mild detergent, and dry thoroughly to prevent corrosion and seal damage. Lubricate rubber gaskets sparingly with food-safe oil.
Inspect fittings before reattaching.
- Rinse
- Dry
- Inspect
Smart Storage Solutions
1 simple storage change can make a big difference: store attachments in a way that protects seals and prevents moisture buildup.
You should dry pieces thoroughly, loosen gaskets to air them, and keep metal parts separate to avoid scratches.
Use labeled, breathable containers or pegboards, and avoid stacking heavy items.
Inspect seals before use and replace worn parts to preserve fit and function.
When To Retrofit Vs. Replace Your Mixer
Deciding whether to retrofit or replace your stand mixer comes down to how well it meets your current needs and how much life it has left.
You should weigh cost, compatibility, and performance before acting.
- Retrofit: inexpensive parts, preserves a favorite unit.
- Replace: newer features, warranty, improved power.
- Hybrid: repair key parts, then upgrade attachments as needed.
How Used Or Hand‑Me‑Down Mixers Affect Choices
If you’ve inherited or bought a used stand mixer, check whether your model accepts current attachments or if it uses older, incompatible fittings.
You’ll also want to inspect for missing, worn, or nonstandard parts that can prevent certain tools from attaching securely. Knowing these limits up front helps you decide if you should hunt for vintage-compatible attachments, retrofit parts, or replace the mixer.
Compatibility With Older Models
When you inherit or buy a used stand mixer, check its model number and attachment hub before buying extras—older machines often use different hubs, shaft sizes, or locking mechanisms that make newer accessories incompatible.
- Confirm model/year and compare specs.
- Inspect hub shape, shaft diameter, and mounting method.
- Search for legacy adapters or manufacturer retrofit kits before ordering.
Missing Or Nonstandard Parts
Because used or hand‑me‑down mixers often arrive missing parts or fitted with nonstandard components, you’ll want to inspect every accessory and connection before relying on the machine for serious baking. Check drive shafts, attachment hubs, bowls and safety latches; missing or altered parts can limit compatibility, safety, and resale value.
| Part | Issue | Fix |
|---|---|---|
| Hub | Worn | Replace |
| Shaft | Bent | Straighten/replace |
| Bowl | Missing | Buy new |
| Beater | Nonstandard | Find adapter |
| Guard | Cracked | Repair/replacement |
Where To Buy Verified Compatible Attachments And Adapters
Looking for verified compatible attachments and adapters? You’ll want reliable sources to avoid fit issues and poor materials.
Check certified retailers, brand-authorized stores, and reputable third-party makers with clear compatibility listings.
- Manufacturer websites and official dealers for exact-fit parts.
- Authorized appliance retailers with warranty-backed accessories.
- Trusted aftermarket brands with detailed specs and customer reviews.
Questions To Ask Sellers Before Buying Used Parts
After checking verified sources for compatible attachments, you’ll still sometimes find better deals in the used market—just ask the right questions before committing.
Ask which model the part fits, request clear photos of wear points and serial numbers, confirm functionality (spin, lock, no cracks), inquire about cleaning history and any repairs, and verify shipping cost and return terms so you won’t get stuck with an incompatible item.
Warranty, Return, And Inspection Checklist
When you’re buying attachments—new or used—check the warranty terms, return window, and inspection steps before you pay so you can act quickly if something’s wrong.
Know who covers defects, restocking fees, and required proof. Inspect finish, fit, and moving parts immediately; document issues with photos and timestamps.
- Manufacturer warranty length and exclusions
- Seller return policy and fees
- Inspection checklist and evidence needed
DIY Modifications: Safe Fixes And Bad Ideas
Warranties and return policies cover defects, but they won’t help if you void coverage by tinkering with an attachment, so be careful before you try fixes yourself.
You can tighten screws, clean gears, and replace worn seals with OEM parts. Don’t weld, reshape cutters, or force-fit incompatible parts.
If a repair needs machining or electrical work, seek a professional to avoid damage or injury.
Real User Scenarios: Matching Attachments To Tasks
If you want consistent results without guesswork, pick attachments based on the task rather than impulse.
You’ll save time and avoid ruined batches by matching tool shape, speed range, and capacity to the job.
Consider common scenarios:
- Kneading dense doughs with a dough hook at low speed.
- Whipping creams/egg whites with a whisk at medium-high.
- Mixing batters with a paddle on medium.
Quick Checklist: Will This Attachment Likely Work?
Wondering whether an attachment will do the job? Use this quick checklist: fit, power, and purpose. Confirm model compatibility, motor capacity for heavy tasks, and whether the accessory matches the recipe. If unsure, test with small batches.
| Question | Yes/No | Action |
|---|---|---|
| Fits mount? | ||
| Motor suitable? | ||
| Intended task? |
Resources And Spec Sheets To Bookmark
Because attachments vary so much by model and task, you’ll want a small library of go-to resources and spec sheets bookmarked for quick reference.
Keep manufacturer compatibility charts, motor torque and hub size specs, and third-party adapter details handy.
Check dimensions, power limits, and warranty notes before buying.
- Manufacturer compatibility chart
- Motor torque & hub specs
- Adapter and warranty details
Frequently Asked Questions
Can Stand Mixer Attachments Be Used on Countertop Food Processors?
No, you can’t use stand mixer attachments on most countertop food processors; they use different hubs and motors, so you’ll need attachments specifically designed for your processor model to guarantee fit, safety, and proper performance.
Do Airline or International Voltage Differences Affect Electric Attachments?
Yes — voltage differences can affect electric attachments. You’ll need correct voltage or a converter; using the wrong supply can damage motors, void warranties, or create safety hazards. Check ratings, frequency, and plug compatibility before use.
Are There FDA or Food‑Safety Certifications for Attachment Materials?
Yes — many attachments meet FDA food-contact guidelines or use FDA‑approved materials; you should check manufacturer statements, look for NSF/food‑safety certifications, and avoid questionable coatings or nonfood‑grade metals that can leach.
Can Attachments Be Insured or Covered Under Homeowner Appliance Policies?
Yes — attachments can be covered if they’re listed as appliances or personal property under your homeowners or renters policy, but you’ll need receipts, proof of value, and possibly a rider for high‑value or commercial-use pieces.
How Do Firmware Updates or Smart Features Influence Attachment Compatibility?
They can matter: if your mixer’s firmware controls attachment recognition or safety, updates might add or remove compatibility. You’ll want to check release notes, guarantee firmware matches supported attachments, and avoid unofficial hardware that breaks validation.
Conclusion
So, are stand mixer attachments universal? Not really — brands and models use different hubs, gears, and sizes. Before you buy, check your mixer’s manual, hub type (power vs. non-powered), and voltage/fit specs. Consider aftermarket adapters but weigh warranty, power, and safety. Match attachments to tasks and motor capacity. When in doubt, confirm compatibility with the manufacturer or seller to avoid ruined recipes, damaged gear, or voided warranties.


