
Image Source: contentgrid.homedepot-static.com
How to Clean Kitchen Appliances Deeply
What is the best way to deep clean kitchen appliances? The best way to deep clean kitchen appliances is to use a combination of the right tools, appropriate cleaning solutions (both commercial and natural), and a consistent approach for each appliance. Regular kitchen appliance maintenance is key to keeping them running smoothly and hygienically.
Your kitchen is the heart of your home, and keeping your appliances sparkling clean not only makes them look better but also helps them last longer and work more efficiently. From the refrigerator that stores your food to the oven that bakes your favorite meals, each appliance needs special attention. Let’s dive into how to achieve a truly deep clean for every item in your kitchen.
Appliance Cleaning Tips for a Sparkling Kitchen
Getting your kitchen appliances spotless involves more than just a quick wipe-down. Deep cleaning means tackling built-up grease, grime, food particles, and potential bacteria that can accumulate over time. This comprehensive guide will walk you through the process, offering practical advice and specific methods for each of your essential kitchen companions.
Refrigerator Cleaning: Freshness from the Inside Out
A clean refrigerator is crucial for food safety and efficiency. Here’s how to tackle refrigerator cleaning thoroughly:
-
Preparation is Key:
- Unplug the refrigerator.
- Remove all food items. Discard anything expired or spoiled.
- Group remaining food by type (dairy, produce, meats) to make reloading easier.
- Gather your supplies: natural cleaning solutions (like baking soda and water), a mild dish soap, microfiber cloths, old toothbrushes, and a vacuum with a brush attachment.
-
Emptying and Initial Wipe:
- Remove all shelves, drawers, and bins. These are often the dirtiest parts and can be cleaned separately.
- Wipe down the interior walls, ceiling, and door with a damp cloth to remove loose debris.
-
Cleaning Shelves and Drawers:
- Wash removable parts in your sink with warm water and mild dish soap. For stubborn stains or sticky residue, use a paste of baking soda and water.
- Use an old toothbrush to get into crevices and corners.
- Rinse thoroughly and dry completely before returning them to the refrigerator.
-
Tackling the Interior:
- Create a cleaning solution: Mix equal parts white vinegar and water, or dissolve a few tablespoons of baking soda in warm water. These natural cleaning solutions are effective and safe for food surfaces.
- Wipe down all interior surfaces. For tough spots, let the solution sit for a few minutes before wiping.
- Pay attention to the door seals. Use a damp cloth and a mild cleaner to remove any mold or grime. A toothbrush can help here too.
- Clean the drip pan located at the bottom of the refrigerator. This often accumulates dust and mold.
-
Exterior Shine (Especially Stainless Steel):
- For stainless steel appliances, use a dedicated stainless steel cleaner. Apply it to a microfiber cloth, not directly to the appliance, and wipe in the direction of the grain.
- For other exterior surfaces, a damp cloth with mild dish soap is usually sufficient.
- Dry thoroughly with a clean, dry microfiber cloth to prevent water spots.
-
Don’t Forget the Coils:
- Locate the condenser coils, usually at the bottom or back of the refrigerator.
- Use a vacuum cleaner with a brush attachment to gently remove dust and debris. Dirty coils make the refrigerator work harder, using more energy. This is a vital part of kitchen appliance maintenance.
Oven Cleaning Hacks: Battling Baked-On Grime
Ovens can be notorious for their baked-on messes. Here are some effective oven cleaning hacks:
-
Self-Cleaning Cycle (Use with Caution):
- Many modern ovens have a self-cleaning feature. This cycle uses very high heat to incinerate food residue.
- Ensure the oven is completely empty, including racks.
- Ventilate the room well, as the process can produce smoke and odors.
- After the cycle, let the oven cool completely. Wipe away any ash residue with a damp cloth.
- Caution: Some manufacturers advise against cleaning the oven racks during the self-clean cycle, as the extreme heat can damage their finish. Check your oven’s manual.
-
The Baking Soda Paste Method (Natural & Effective):
- Make a paste using baking soda and a little water. The consistency should be like thick toothpaste.
- Spread this paste all over the interior surfaces of the oven, avoiding the heating elements.
- Let it sit for at least a few hours, or preferably overnight. The baking soda will absorb odors and loosen grime.
- Use a damp cloth or sponge to wipe away the paste and the loosened dirt. A plastic scraper or old credit card can help lift stubborn bits.
- For tougher spots, repeat the process or use a bit of white vinegar on a cloth to neutralize any remaining baking soda, creating a gentle fizz that helps lift residue.
-
Degreaser for Kitchen Appliances (for Tough Spots):
- For very stubborn, greasy buildup, a commercial degreaser specifically designed for ovens can be effective. Follow the product instructions carefully and ensure good ventilation.
- Always test in an inconspicuous area first.
-
Cleaning Oven Racks:
- Soak them in a bathtub or large sink filled with hot water and dish soap or a degreaser.
- For extra power, add some baking soda or ammonia (handle ammonia with extreme caution and ventilation).
- Scrub with a stiff brush or steel wool.
- Rinse and dry thoroughly.
-
Glass Door Care:
- Use the baking soda paste method on the inside of the glass door.
- For stubborn baked-on food, a razor blade scraper (held at a low angle) can be used carefully on the glass.
- For the outside, a glass cleaner or vinegar and water solution works well.
Microwave Cleaning Guide: Zapping Away Grime
Microwaves are prone to splatters. This microwave cleaning guide makes it simple:
-
The Steam Method:
- Fill a microwave-safe bowl with 1-2 cups of water and add a tablespoon of white vinegar or lemon juice. Lemon juice leaves a pleasant scent.
- Place the bowl in the microwave and heat on high power for 3-5 minutes, or until the water is steaming and the window is fogged up.
- Leave the door closed for another 5-10 minutes to allow the steam to loosen food particles.
- Carefully remove the hot bowl. Wipe down the interior walls, ceiling, and turntable with a damp cloth or sponge. The steam should have made the grime easy to remove.
-
Stubborn Stains:
- For dried-on splatters, make a paste of baking soda and water and apply it to the stained areas. Let it sit for a few minutes, then wipe clean.
-
Turntable Plate:
- The turntable plate can usually be removed and washed in the sink with warm, soapy water.
-
Exterior Cleaning:
- Wipe the exterior with a damp cloth and mild dish soap.
- For stainless steel exteriors, use a stainless steel cleaner.
Dishwasher Cleaning Instructions: Ensuring Sparkling Dishes
A clean dishwasher means cleaner dishes. Follow these dishwasher cleaning instructions:
- Empty the Dishwasher: Start with an empty machine.
- Clean the Filter:
- Locate the filter at the bottom of the dishwasher. It might be a cylindrical or flat mesh.
- Remove the filter and rinse it under running water, using a soft brush to remove food debris.
- Some filters can be washed with mild soap.
- Wipe Down Interior Surfaces:
- Use a damp cloth with a mixture of white vinegar and water to wipe down the interior walls, door, and seals. Pay attention to the detergent dispenser and the gasket around the door.
- Clean the Spray Arms:
- Check the spray arms for blockages. You can often remove them and use a toothpick or small wire to clear any clogged holes.
- Run a Cleaning Cycle:
- Place a dishwasher-safe bowl filled with 2 cups of white vinegar on the top rack of an empty dishwasher.
- Run a hot water cycle. The vinegar will help to break down grease, mineral deposits, and odors.
- Descaling (If Needed):
- If you have hard water, you may need to use a commercial dishwasher cleaner or descale agent periodically. Follow the product’s instructions.
- Exterior Maintenance:
- Wipe down the exterior with a damp cloth and mild dish soap. For stainless steel, use a stainless steel cleaner.
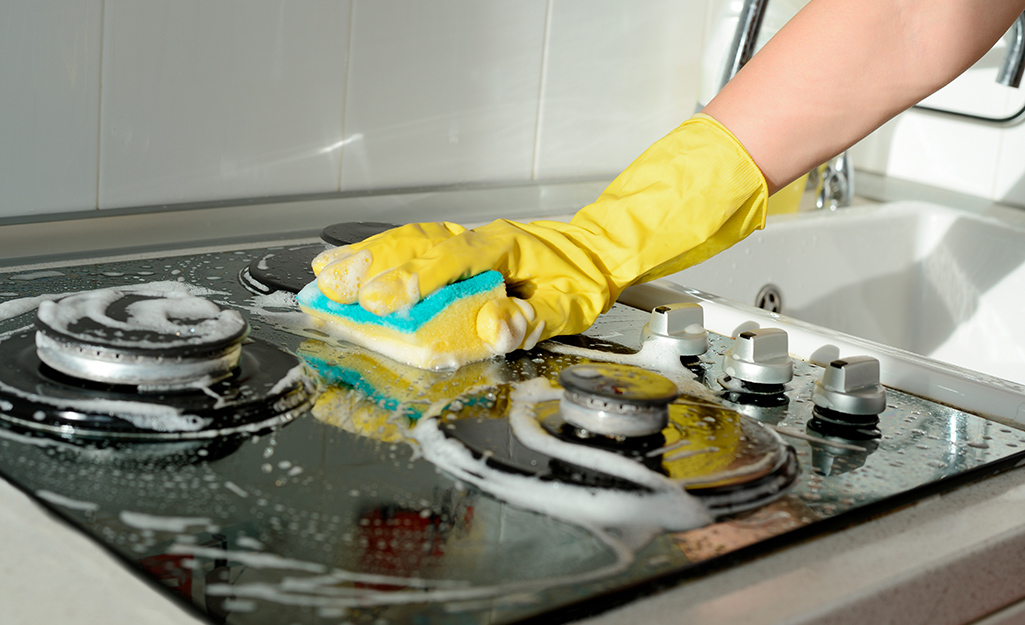
Stove Top and Cooktop Cleaning
Your stovetop is exposed to constant heat and spills, making it a prime target for deep cleaning.
Gas Stovetops
- Remove Grates and Burner Caps: Let them cool completely.
- Soak Grates and Caps: Place them in a sink filled with hot water and dish soap or a degreaser. For stubborn grease, add some baking soda. Let them soak for at least 30 minutes.
- Clean the Stovetop Surface:
- Wipe away loose debris with a damp cloth.
- For stuck-on food, use a paste of baking soda and water or a specialized cooktop cleaner.
- Use an old toothbrush to clean around the burner bases.
- For stubborn grease, a degreaser for kitchen appliances can be used sparingly.
- Scrub Grates and Caps: Use a stiff brush or steel wool to scrub the soaked grates and burner caps. Rinse thoroughly and dry completely.
- Reassemble: Once everything is dry, reassemble the burner caps and grates.
Electric Coil Stovetops
- Remove Coils and Drip Pans: Allow them to cool.
- Clean Drip Pans: Soak them in hot, soapy water or a degreasing solution. Scrub with a non-abrasive pad.
- Clean the Stovetop Surface: Wipe with a damp cloth and mild soap. For tough stains, use a baking soda paste. Avoid harsh scrubbers that can scratch the surface.
- Clean Coils: Wipe them down with a damp cloth. Avoid submerging them in water.
Smooth Ceramic or Induction Cooktops
- Cool Down Completely: This is crucial to avoid burns and cracking the glass.
- Wipe Away Loose Debris: Use a soft cloth or sponge.
- Use a Cooktop Cleaner: Apply a small amount of a specialized ceramic or glass cooktop cleaner.
- Scrub Gently: Use a non-abrasive pad or cloth to gently scrub away stains.
- For Stubborn Stains: A razor blade scraper designed for cooktops can be used at a very low angle for burnt-on residue. Be extremely careful not to scratch the glass.
- Buff to a Shine: Wipe clean with a damp cloth and then buff dry with a clean microfiber cloth.
Stainless Steel Cleaner: Restoring the Shine
Stainless steel appliances are popular for their sleek look, but they can show fingerprints and smudges easily.
- The Grain is Your Friend: Always wipe stainless steel in the direction of the grain. This prevents micro-scratches and ensures a more even finish.
- Choose the Right Cleaner:
- Dedicated Stainless Steel Cleaner: These are formulated to clean and polish without damaging the finish. Apply to a microfiber cloth, then wipe.
- Natural Options:
- Vinegar and Water: A 1:1 ratio of white vinegar and water in a spray bottle can be effective. Spray onto a cloth and wipe.
- Olive Oil or Mineral Oil: After cleaning, a tiny amount of olive oil or mineral oil on a soft cloth, buffed in the direction of the grain, can provide a protective polish and resist fingerprints.
- Avoid Abrasives: Never use steel wool, abrasive scouring pads, or harsh chemical cleaners like bleach or oven cleaners on stainless steel, as they can permanently damage the surface.
Degreaser for Kitchen Appliances: Tackling Greasy Buildup
Grease can accumulate on many kitchen surfaces, especially around the stovetop and range hood.
- Types of Degreasers:
- Commercial Degreasers: These are powerful and effective but can be harsh. Always follow instructions and ensure good ventilation.
- Natural Degreasers:
- Baking Soda Paste: Excellent for mild to moderate grease.
- Vinegar: The acidity of vinegar helps cut through grease.
- Dish Soap: Many dish soaps are excellent degreasers.
- Application:
- For stubborn grease on oven interiors or range hoods, a dedicated degreaser can be used. Apply it to a cloth and wipe.
- For less severe grease, a strong solution of dish soap and hot water, or the baking soda paste, often suffices.
- Always rinse thoroughly after using a degreaser to remove any residue.
Kitchen Appliance Maintenance: Keeping Things Running Smoothly
Regular kitchen appliance maintenance goes beyond cleaning. It’s about ensuring they function optimally and preventing costly repairs.
- Check Seals: Regularly inspect door seals on refrigerators and dishwashers for wear and tear. A good seal prevents energy loss.
- Clean Vents and Filters: Ensure air vents on refrigerators and range hoods are clear of obstructions. Clean or replace filters as recommended by the manufacturer.
- Level Appliances: Make sure your refrigerator and dishwasher are level. This ensures proper door closure and efficient operation.
- Read Your Manual: Your appliance’s user manual is a treasure trove of specific maintenance advice. It will detail recommended cleaning schedules and any special care instructions.
Frequently Asked Questions (FAQ)
Q1: How often should I deep clean my kitchen appliances?
A1: It’s recommended to perform a deep clean of your major kitchen appliances at least twice a year. However, for items like refrigerators and microwaves, a more frequent wipe-down (monthly for interiors, weekly for exteriors) is beneficial.
Q2: Can I use natural cleaning solutions on all appliances?
A2: Natural cleaning solutions like baking soda, vinegar, and lemon juice are generally safe and effective for most kitchen appliances. However, always test in an inconspicuous area first, especially on delicate finishes or electronic components. For stainless steel, specific stainless steel cleaners are often best for maintaining the finish.
Q3: What is the best way to remove burnt-on food from my oven?
A3: The baking soda paste method is highly effective for burnt-on food. Apply a thick paste of baking soda and water, let it sit for several hours or overnight, then wipe away. For very stubborn spots, a specialized oven cleaner or a careful use of a razor blade scraper on the glass may be necessary.
Q4: My dishwasher isn’t cleaning well. What could be the problem?
A4: Common causes for poor dishwasher performance include a clogged filter, blocked spray arms, or using too much or too little detergent. Ensure your filter is clean, spray arms are clear, and you’re using the correct amount of high-quality detergent. Running a vinegar rinse cycle can also help descale the machine.
Q5: How do I prevent odors in my refrigerator?
A5: Regular cleaning of the interior, including shelves and drawers, is key. Discard old food promptly. Leaving an open box of baking soda inside the refrigerator can absorb odors. You can also use natural cleaning solutions like vinegar and water to wipe down surfaces.
By following these comprehensive appliance cleaning tips, you can ensure your kitchen appliances remain clean, hygienic, and in excellent working condition for years to come. Regular kitchen appliance maintenance will save you time, money, and effort in the long run, making your kitchen a more pleasant and functional space.