
Can I sharpen my own kitchen knives? Yes, you absolutely can sharpen your own kitchen knives! With a little practice and the right tools, you can achieve razor-sharp edges that make cooking a joy and a safer experience.
A dull knife is not only frustrating but also dangerous. It requires more force to cut, increasing the chance of slipping and injuring yourself. Keeping your kitchen knives sharp is a fundamental skill for any home cook. This guide will walk you through the essential methods and pro tips to bring your blades back to life.
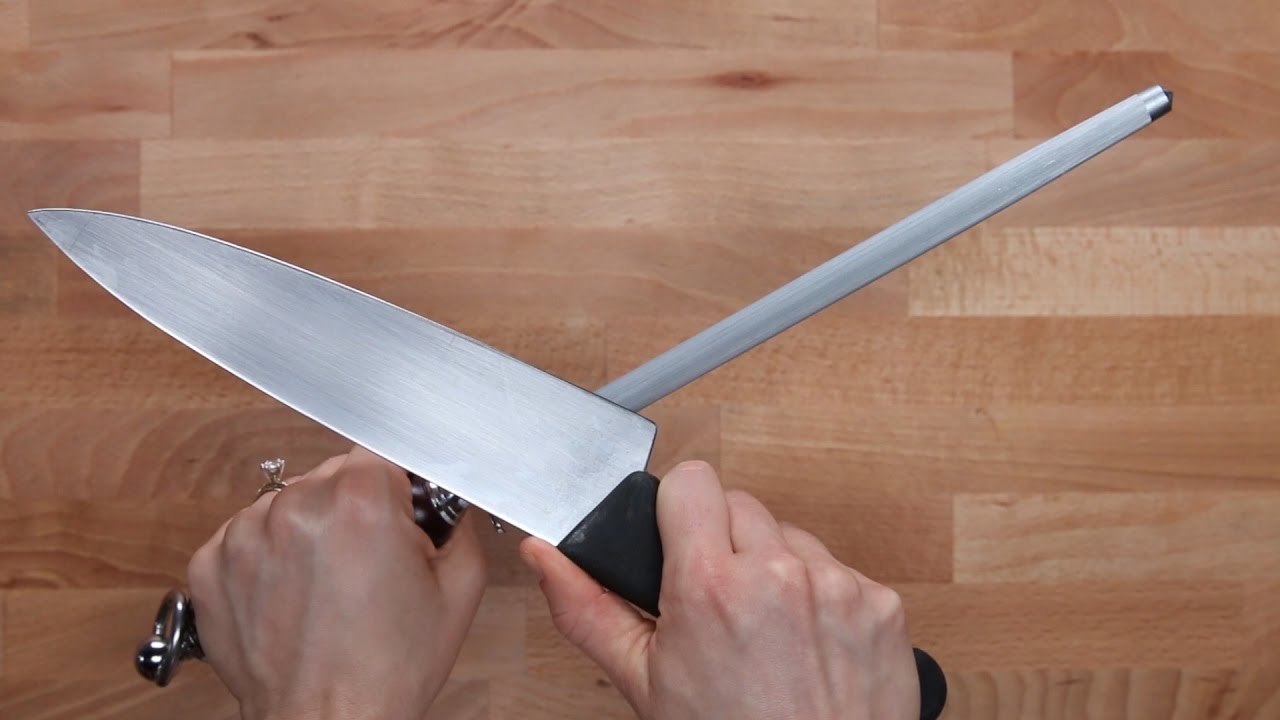
Image Source: i.ytimg.com
Why Sharp Knives Matter
Before diving into the “how,” let’s reinforce the “why.”
- Safety: A sharp knife cuts cleanly where you want it to, without requiring excessive pressure. This means less slipping and fewer accidents.
- Efficiency: Sharp knives slice through ingredients with ease, saving you time and effort in the kitchen. Chopping vegetables, slicing meat, and mincing herbs become a breeze.
- Precision: Sharp blades allow for finer, more controlled cuts, which is crucial for presentation and even cooking.
- Preservation of Food: A clean cut from a sharp knife causes less damage to the cell walls of fruits and vegetables, potentially preserving their flavor and texture for longer.
Essential Tools for Knife Sharpening
You don’t need a professional setup to sharpen knives effectively. Here are the core tools you’ll want to consider:
The Foundation: Knife Sharpening Stone
A knife sharpening stone, often called a whetstone, is the most versatile and effective tool for truly sharpening a knife. These stones come in various grits, which determine how much metal they remove and how fine the edge becomes.
- Coarse Grit (e.g., 200-600 grit): Used for repairing damaged edges, reprofiling a blade, or sharpening very dull knives.
- Medium Grit (e.g., 800-2000 grit): The workhorse grit for general sharpening and restoring a good working edge.
- Fine Grit (e.g., 3000-8000 grit): Used for refining the edge, making it incredibly sharp and polished. For most home cooks, a stone with medium and fine grits is ideal.
Types of Whetstones:
- Water Stones: These are the most common type for whetstone sharpening. They require soaking in water before use, creating a slurry that aids in sharpening. They are generally softer and cut faster than oil stones.
- Oil Stones: These stones require oil instead of water. They are typically harder and wear down slower but may not cut as aggressively as water stones.
- Diamond Stones: Coated with diamond particles, these are very durable and aggressive. They don’t require soaking and can sharpen almost any type of steel.
Maintaining the Edge: Honing Steel vs. Sharpening Steel
It’s important to distinguish between a honing steel and a sharpening steel. While both are used on knives, they serve different purposes.
-
Honing Steel (or Honing Rod): This tool realigns the microscopic teeth on the blade’s edge that have bent over during use. It doesn’t actually remove metal; it straightens what’s already there. Regular honing is key to maintaining a sharp edge between sharpenings. Honing steels are typically made of steel, ceramic, or diamond-coated materials. A ceramic rod is an excellent option for honing as it’s harder than most knife steels and can even do a light sharpening.
-
Sharpening Steel: This is less common in modern kitchens. It’s essentially a steel rod that is abrasive and does remove metal, similar to a very coarse sharpening stone. It’s best to use a proper knife sharpener or whetstone for actual sharpening.
Other Helpful Tools
- Sharpening System: For those who want a more guided experience, a sharpening system can be a good investment. These often use guided rods or clamps to help maintain a consistent sharpening angle. Examples include pull-through sharpeners (though these can be less precise) and guided rod systems.
- Sharpening Oil (or Water): Depending on the type of stone, you’ll need sharpening oil (for oil stones) or water (for water stones). This lubricates the stone, carries away metal filings, and prevents the stone from clogging.
- Towel or Rag: For wiping away slurry, oil, and metal filings.
- Non-slip Mat: To prevent your sharpening stone from sliding on the counter.
The Art of Whetstone Sharpening: A Step-by-Step Guide
Whetstone sharpening is the most traditional and effective method. It offers the most control and can produce the sharpest edges.
Step 1: Preparation
- Soak Your Whetstone: If you’re using a water stone, submerge it in water until the bubbles stop rising (usually 5-10 minutes). This ensures the stone is saturated.
- Set Up: Place a damp cloth or a non-slip mat on a stable surface. Put the soaked whetstone on top of it.
- Apply Lubricant: If using an oil stone, apply a few drops of sharpening oil. For water stones, you can use water, and a bit of slurry (the milky residue from sharpening) will form naturally.
Step 2: Finding and Maintaining the Sharpening Angle
The sharpening angle is crucial for achieving a sharp edge. Most Western-style kitchen knives benefit from an angle between 15 and 20 degrees per side. Japanese knives often use a sharper angle, around 10-15 degrees.
- How to find the angle: A common visual guide for a 20-degree angle is to place the knife on the stone with the edge flat, then lift the spine of the knife until it’s roughly the thickness of two pennies stacked. For a 15-degree angle, lift it to the thickness of one penny. Many sharpening systems have angle guides built-in.
Step 3: Sharpening on the Coarse/Medium Grit
- Positioning: Hold the knife firmly with one hand on the handle and the other hand applying light pressure to the blade near the spine.
- Initial Stroke: Place the heel of the blade on the stone at your chosen sharpening angle.
- The Motion: Push the knife forward along the stone, moving from heel to tip in a smooth, sweeping motion. Imagine you are trying to slice a thin layer off the stone. Maintain the angle consistently.
- Return Stroke: Bring the knife back, again maintaining the angle. As you bring it back, slightly pivot the blade so that the tip also makes contact with the stone.
- Repeat: Continue this heel-to-tip motion, alternating sides of the stone, for about 10-15 strokes per side. You should feel a slight “burr” form on the opposite side of the blade. This burr is a small curl of metal that indicates you’ve reached the apex of the edge.
- Check for Burr: Gently run your fingertip (carefully!) across the edge, from heel to tip, on the side opposite to where you were just sharpening. You should feel a slight roughness or catch. This is the burr.
Step 4: Sharpening on the Fine Grit
- Switch Stones: Move to your finer grit stone.
- Refine the Edge: Repeat the same sharpening motion as before, but with lighter pressure and fewer strokes (e.g., 5-10 strokes per side). The goal here is to polish the edge and remove the burr.
- Deburring Strokes: Once you’ve completed the strokes, finish with very light, alternating strokes, lifting the knife slightly off the stone at the end of each stroke. This helps to remove the burr cleanly.
Step 5: Cleaning and Testing
- Clean the Knife: Thoroughly wash and dry your knife to remove any metal filings or slurry.
- Test the Edge: The easiest way to test is to try slicing through a piece of paper held vertically. A sharp knife will slice cleanly without tearing. You can also try slicing a tomato or an onion.
Using a Honing Steel: Keeping Your Edge Keen
Honing is a maintenance task. You should hone your knives regularly, perhaps before or after each use, especially if they see a lot of action.
- Grip: Hold the honing steel vertically, tip down, resting on a stable surface (like a cutting board or a towel). Or, hold it horizontally in the air at about waist height.
- Angle: Place the heel of your knife against the steel at the correct sharpening angle (15-20 degrees).
- The Motion: Slide the knife down the steel in a smooth, controlled motion, maintaining the angle. As you slide down, pivot the blade so that the tip of the knife also makes contact with the steel.
- Alternate Sides: Repeat the process on the other side of the steel with the opposite side of the blade.
- Repeat: Perform 5-10 strokes on each side. You should feel a slight resistance as the edge is realigned.
- Clean: Wipe the knife clean with a cloth.
Pro Tip for Honing: Don’t press too hard! You are straightening the edge, not grinding it down.
Alternative Sharpening Methods
While whetstone sharpening is king, other options exist for convenience or specific needs.
Pull-Through Knife Sharpeners
These are typically V-shaped devices with abrasive slots.
- Pros: Very easy to use, require little skill, and are quick.
- Cons: Can be less precise with the sharpening angle, may remove too much metal, and can create a “saw-tooth” edge rather than a clean, sharp one. Often they offer a coarser sharpening stage and a finer honing stage. Be cautious with high-quality knives, as these can damage the edge over time.
Electric Knife Sharpeners
These machines use motorized abrasive wheels or belts to sharpen knives.
- Pros: Fast and efficient, many have guides to maintain the sharpening angle.
- Cons: Can be expensive, may remove more metal than necessary, and offer less control over the sharpening process compared to manual methods. Like pull-through sharpeners, they can be aggressive.
Guided Rod Sharpening Systems
These systems typically involve a base with angle guides and abrasive rods or stones that are drawn across the blade.
- Pros: Excellent at maintaining a consistent sharpening angle, easier to learn than freehand whetstone sharpening.
- Cons: Can be more expensive, may not be as versatile for different blade shapes as a traditional whetstone.
Maintaining Your Sharpening Tools
To ensure your sharpening tools work effectively, they also need care.
- Whetstones: Flatten your whetstones periodically using a flattening stone or diamond plate. This ensures the stone is flat and will sharpen your knife evenly.
- Honing Steels: Clean them with soap and water. If they are diamond-coated, avoid harsh abrasives.
Sharpening Different Types of Knives
- Chef’s Knives: These are your workhorses. Regular sharpening and honing are essential. Aim for a 15-20 degree angle.
- Slicing Knives: Often have longer, thinner blades. Maintain a consistent angle, usually 15-20 degrees, for clean slicing.
- Paring Knives: Smaller knives require the same care. The smaller blade might make holding the sharpening angle slightly trickier, so practice is key.
- Serrated Knives: These have a different sharpening process. You typically need a specialized serrated knife sharpener or a thin ceramic rod that fits the serrations. Sharpen only the edge of each “tooth,” not the entire blade.
Common Sharpening Mistakes to Avoid
- Incorrect Angle: Not maintaining a consistent sharpening angle is the most common mistake, leading to a weak or uneven edge.
- Too Much Pressure: Pressing too hard can damage the whetstone and the knife blade. Let the grit do the work.
- Not Sharpening Enough: A knife that’s still dull after a few strokes likely needs more work on the appropriate grit.
- Forgetting to Hone: Relying solely on sharpening will wear down your knives faster. Regular honing keeps the edge aligned.
- Using the Wrong Lubricant: Always use water for water stones and sharpening oil for oil stones.
- Not Cleaning: Metal filings left on the blade or stone can affect performance and hygiene.
Bringing it All Together: A Sharpening Routine
Here’s a suggested routine:
- Daily/Before Each Use: Use a honing steel or ceramic rod for a few strokes on each side to realign the edge.
- Weekly/As Needed: If honing isn’t restoring sharpness, it’s time for whetstone sharpening. Start with a medium grit (e.g., 1000) and progress to a fine grit (e.g., 3000-6000) for refinement.
- Infrequently/When Damaged: If a knife is very dull or has nicks, start with a coarser grit stone (e.g., 400) to repair the edge before moving to medium and fine grits.
Table: Grit Guide for Whetstones
| Grit Range | Purpose | Action |
|---|---|---|
| 200-600 | Repairing chips, reprofiling, heavy sharpening | Removes significant metal |
| 800-2000 | General sharpening, restoring edge | Removes moderate metal, forms edge |
| 3000-8000+ | Polishing, refining, razor-sharp edge | Removes minimal metal, hones and polishes |
Frequently Asked Questions (FAQ)
Q1: How often should I sharpen my kitchen knives?
A1: This depends on how often you use them and what you cut. For frequent cooks, sharpening every 1-3 months is common. Honing should be done much more frequently, even before each use. Look for signs of dullness, like needing to saw through tomatoes or vegetables.
Q2: What is the best type of knife sharpener?
A2: For the best results and control, a high-quality whetstone (water stone) is generally considered the best. For convenience, a guided rod sharpening system can be excellent. Pull-through or electric sharpeners can be used, but with caution, as they may be less precise.
Q3: Can I sharpen my knives with a regular sharpening steel?
A3: A traditional sharpening steel is abrasive and can sharpen, but it’s often less effective than a whetstone and can be aggressive. A honing steel is used for realignment, not sharpening. A ceramic rod can do light sharpening.
Q4: How do I know if my knife is sharp enough?
A4: A simple test is to hold a piece of paper vertically and try to slice it with your knife. A sharp knife will slice through it cleanly without snagging or tearing. You can also try slicing a tomato or an onion with minimal pressure.
Q5: What is sharpening oil used for?
A5: Sharpening oil is used with oil stones. It lubricates the stone, helps carry away metal filings, and prevents the stone from clogging, ensuring a smoother sharpening process. Water is used for water stones.
Q6: My knife has small chips. Can I fix it?
A6: Yes, small chips can often be fixed. You’ll need to use a coarser grit knife sharpening stone (around 200-600 grit) to grind away the damaged metal until the chip is gone, then work your way up through the finer grits to restore the edge. This process might require a bit more practice.
Q7: How do I clean my whetstones?
A7: After use, rinse your whetstone with clean water to remove slurry and metal particles. For water stones, allow them to air dry completely before storing. For oil stones, wipe them clean with a rag. Periodically, you may need to flatten your whetstones with a flattening stone to ensure an even surface for sharpening.
By mastering these techniques, you’ll not only extend the life of your beloved kitchen knives but also enhance your cooking experience, making every chop, slice, and dice a precise and enjoyable action. Happy sharpening!