
Can you sharpen a kitchen knife at home? Yes, you absolutely can, and it’s a skill worth mastering for anyone who spends time in the kitchen. A sharp knife makes cooking easier, safer, and more enjoyable. Dull knives require more force to cut, increasing the risk of slipping and injuring yourself. This guide will walk you through the process of blade sharpening with simple steps.
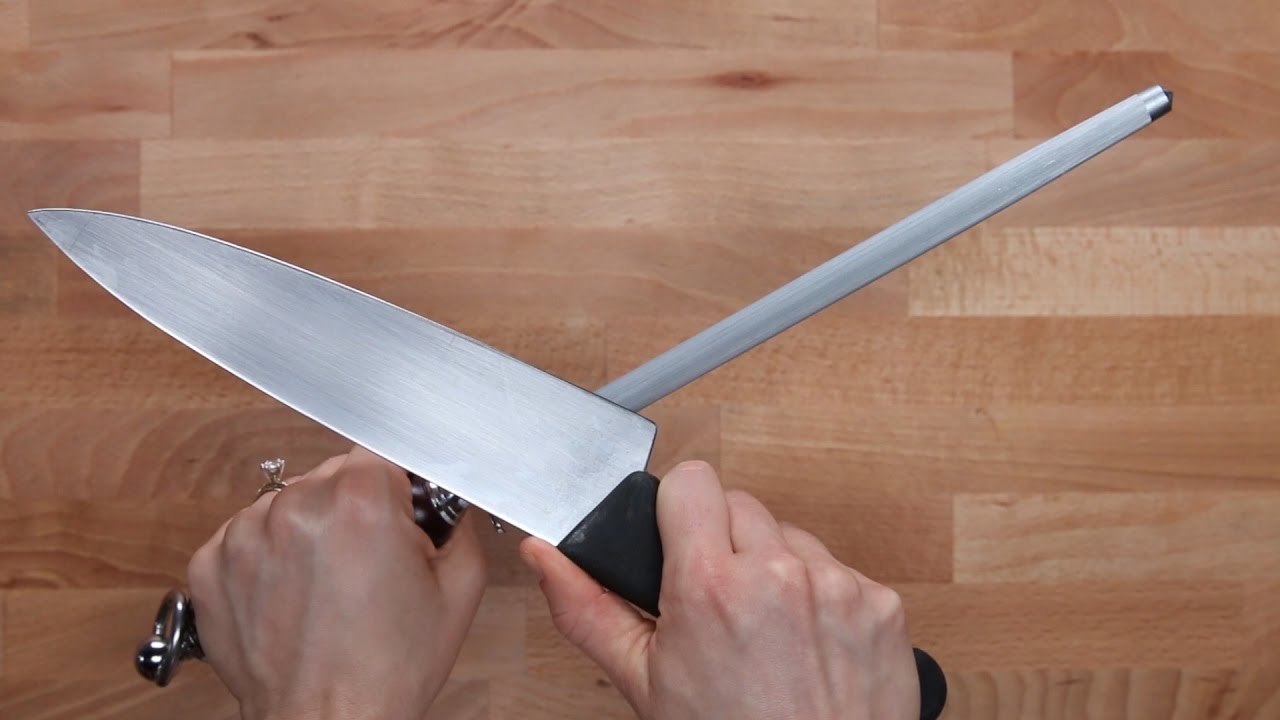
Image Source: i.ytimg.com
Why Sharpen Your Knives?
A sharp knife glides through food effortlessly. It slices vegetables thinly, carves meat cleanly, and dices onions without crushing them. Dull knives, on the other hand, tear and shred. This not only looks messy but also damages the food’s cells, affecting its texture and flavor. Beyond the culinary benefits, a sharp knife is a safety tool. When you have to push hard with a dull knife, your hand can easily slip off the blade, leading to cuts.
Regular kitchen knife maintenance is key. This includes proper washing, drying, and storage. Sharpening is a crucial part of that maintenance.
Deciphering Knife Sharpening Tools
There are several tools available for sharpening your kitchen knives. Each has its own advantages and is suited for different needs and preferences.
The Humble Whetstone (Knife Sharpening Stone)
The knife sharpening stone, often called a whetstone, is a classic and highly effective tool. It’s a block of abrasive material that you use to grind and shape the edge of your knife. Whetstones come in various grits, which measure their coarseness.
- Coarse Grit (e.g., 200-400): Used for repairing damaged edges or for very dull knives that need significant reshaping.
- Medium Grit (e.g., 600-1000): The workhorse for general sharpening, bringing a dull knife back to a good working edge.
- Fine Grit (e.g., 1500-3000): Used for refining the edge and making it exceptionally sharp and smooth.
- Extra-Fine Grit (e.g., 4000+): For polishing the edge to a razor-like finish, often used by professionals.
Whetstone Sharpening involves using water or oil as a lubricant.
The Quick Fix: Sharpening Steel and Honing Steel
It’s important to distinguish between sharpening and honing.
- Sharpening actually removes metal from the blade to create a new, sharp edge. This is done with whetstones or electric sharpeners.
- Honing realigns the microscopic teeth on the blade’s edge that get bent out of shape during normal use. A honing steel (also called a sharpening steel) does this. It doesn’t remove much metal, but it keeps an already sharp knife performing at its best between sharpenings.
A honing steel is typically a metal rod, often coated with diamond particles for a bit more abrasive action, or made of ceramic.
The Modern Approach: Electric Knife Sharpeners
An electric knife sharpener offers convenience and speed. These machines have slots with abrasive wheels or belts that automatically guide the knife at the correct angle. They often have multiple stages for sharpening and honing. While quick and easy, they can remove more metal than manual methods if not used carefully, potentially shortening the lifespan of your knives.
The Precision Aid: Sharpening Guides
For those new to whetstone sharpening, a sharpening guide can be a lifesaver. These small attachments clip onto the spine of your knife and help you maintain a consistent knife sharpening angle as you move the blade across the stone.
The Essential Lubricant: Sharpening Oil
When using oil stones (less common now for kitchen knives, more for traditional sharpening), sharpening oil is used to flush away metal particles and keep the stone from clogging. For most modern water stones, plain water is sufficient, and sometimes a spray bottle of water is all you need.
Mastering Whetstone Sharpening: A Step-by-Step Guide
Whetstone sharpening is considered the gold standard by many chefs and knife enthusiasts. It offers the most control and can achieve the sharpest edges.
What You’ll Need:
- Knife Sharpening Stone: A medium-grit stone (around 1000 grit) is a great starting point.
- Water: Or sharpening oil, depending on your stone type.
- A Stable Surface: A damp cloth or a dedicated stone holder to prevent slipping.
- Your Kitchen Knife: Clean and dry.
- A Sharpening Guide (Optional): Highly recommended for beginners.
- A Fine-Grit Stone (Optional): For finishing.
Preparation:
- Soak Your Stone: If you have a water stone, soak it in water until the air bubbles stop rising. This usually takes about 5-10 minutes. Some stones are “splash and go” and only need a bit of water on the surface. Check your stone’s instructions.
- Set Up Your Workspace: Place the damp cloth on your countertop. Put the wet stone on top of the cloth or in a stone holder. Ensure it’s stable and won’t move during sharpening.
- Determine the Knife Sharpening Angle: Most kitchen knives have an edge angle between 15 and 20 degrees per side. Japanese knives often have a sharper 15-degree angle, while Western knives might be closer to 20 degrees. A good way to find this angle is to place the blade flat on the stone, then lift the spine until you have roughly the desired angle. Imagine you’re slicing a thin layer off the stone. A sharpening guide makes this much easier.
The Sharpening Process:
-
Step 1: Sharpening One Side
- Hold the knife firmly. Place your fingers on the blade near the edge, applying gentle, even pressure.
- Position the blade against the stone at your chosen knife sharpening angle.
- With smooth, consistent strokes, move the blade across the stone from heel to tip. Imagine you are trying to shave off a thin layer of the stone.
- Lift the blade and repeat, always maintaining the same angle.
- Perform about 10-20 strokes on one side.
-
Step 2: Sharpening the Other Side
- Flip the knife over.
- Repeat the same process on the other side of the blade, maintaining the same angle and pressure.
- Aim for an equal number of strokes on both sides.
-
Step 3: Checking for a Burr
- After a number of strokes on both sides, gently run your fingertip (carefully!) across the edge from the spine towards the edge. You should feel a slight catch or “burr” on the opposite side of where you were just sharpening. This indicates that you’ve reached the apex of the edge.
-
Step 4: Refining the Edge (Optional – using a finer grit stone)
- If you have a finer grit stone, repeat steps 1-3 on that stone. This will smooth out the scratches from the coarser stone and create a sharper, more polished edge.
-
Step 5: Removing the Burr (Stropping)
- To remove the burr, alternate single strokes on each side of the blade. Use lighter pressure.
- Start with the side that had the burr, then one light stroke on the other side. Continue alternating, using lighter and lighter pressure until you’ve done several strokes. You can also use a piece of leather (like an old belt or a strop) for this final polishing step.
Cleaning Up:
- Rinse the Stone: Rinse the knife sharpening stone thoroughly with water to remove metal particles.
- Clean Your Knife: Wash and dry your knife immediately.
- Clean Your Workspace: Wipe down your sharpening area.
Using an Electric Knife Sharpener
An electric knife sharpener is a great option for those who want a quick and easy way to keep their knives sharp.
What You’ll Need:
- Electric Knife Sharpener: Ensure it’s designed for kitchen knives.
- Your Kitchen Knife: Clean and dry.
The Sharpening Process:
- Read the Instructions: Every electric sharpener is slightly different. Always read the manufacturer’s instructions before you begin.
- Select the Slot: Most electric sharpeners have multiple slots.
- Slot 1 (Sharpening): This is usually the coarsest grit and does the actual sharpening.
- Slot 2 (Honing/Finishing): This slot has finer abrasive material to refine and polish the edge.
- Sharpen the Blade:
- Turn on the sharpener.
- Insert the heel of the blade into the first slot at the recommended angle (usually indicated by the machine).
- Gently pull the knife through the slot, maintaining light and even pressure.
- Repeat this process several times (e.g., 3-5 pulls), alternating sides if the machine requires it.
- Hone the Edge:
- Move the knife to the second slot (honing).
- Repeat the pulling motion, using even lighter pressure.
- Test the Edge: Carefully test the sharpness of your knife on a piece of paper.
Important Note: Be mindful of how much pressure you apply and how many times you pull the knife through. Over-sharpening can wear down your knives faster.
The Role of the Honing Steel
A honing steel is essential for regular kitchen knife maintenance. Think of it as tuning up your knife. Every time you use your knife, the very fine edge can get slightly bent or misaligned. A honing steel straightens these microscopic “teeth” back into place, restoring the sharpness without removing significant metal.
How to Use a Honing Steel:
- Hold the Steel: Hold the honing steel vertically, point down, resting on a stable surface (like a cutting board or a damp towel).
- Position the Knife: Place the heel of your knife against the top of the steel at the correct knife sharpening angle (15-20 degrees).
- Draw the Blade: Draw the blade down the steel in a smooth, sweeping motion, maintaining consistent pressure and angle. Imagine you are trying to slice off a very thin sliver of the steel.
- Alternate Sides: Repeat the process on the other side of the blade, alternating strokes.
- Frequency: A quick hone before or after each major cooking session is beneficial. It’s a much quicker process than sharpening.
A diamond-coated sharpening steel or a ceramic rod will offer a bit more abrasive action and can help remove minor dullness, but they are still primarily for honing.
Tips for Proper Blade Sharpening
- Consistency is Key: The most crucial aspect of blade sharpening is maintaining a consistent knife sharpening angle. This ensures an even bevel along the entire edge.
- Start with Medium Grit: For most knives, starting with a medium-grit stone (around 1000 grit) is the best approach. You can always move to finer grits for a more polished edge.
- Don’t Rush: Sharpening is a skill that takes practice. Take your time and focus on smooth, controlled movements.
- Lubrication: Use water or sharpening oil as recommended for your stone to prevent the stone from clogging and to create a smooth sharpening action.
- Test Your Sharpness: A simple test is to see if your knife can cleanly slice through a piece of paper held vertically. A sharp knife will cut smoothly without snagging.
- Safety First: Always pay attention to where your fingers are. Keep your sharpening area clean and stable.
Different Types of Knives and Their Sharpening Needs
While the basic principles of blade sharpening are the same, some knife types have specific considerations:
Chef’s Knives and Utility Knives
These are the workhorses of the kitchen. They benefit from regular sharpening and honing. A 15-20 degree angle is standard.
Paring Knives
Smaller and often used for delicate tasks. They usually have a finer edge and might benefit from a slightly steeper angle for precision.
Serrated Knives
Serrated knives (like bread knives) are a bit trickier. You can’t sharpen them effectively on a flat stone. They require specialized sharpening tools that can follow the serrations, or they may need to be professionally sharpened. Many electric knife sharpeners have a specific slot for serrated blades.
Japanese Knives
These knives are often made of harder steel and have a more acute edge angle (around 10-15 degrees). They require a gentler touch and can be damaged by aggressive sharpening. Using finer grit stones and maintaining a consistent, narrow angle is important.
Common Mistakes to Avoid
- Using the Wrong Angle: Inconsistent or incorrect angles lead to a weak or uneven edge.
- Too Much Pressure: Pressing too hard can damage the edge and wear down your knives and sharpening stones faster.
- Not Using Lubricant: This can cause your stone to clog and scratch your blade.
- Sharpening Too Often: While honing should be frequent, actual sharpening (removing metal) should only be done when needed. Over-sharpening reduces the lifespan of your knives.
- Ignoring Honing: Relying solely on sharpening without regular honing means your sharp edges won’t stay sharp for long.
Frequently Asked Questions (FAQ)
Q1: How often should I sharpen my kitchen knives?
A1: This depends on how often you use them and what you cut. For heavy users, sharpening every 1-3 months is common. For lighter use, every 6-12 months might suffice. However, honing should be done much more frequently, perhaps before each significant cooking session.
Q2: Can I use a sharpening steel to sharpen a dull knife?
A2: A honing steel (or sharpening steel) primarily realigns the edge. While a diamond or ceramic steel has some abrasive properties, it’s not as effective at sharpening as a knife sharpening stone or an electric knife sharpener. It’s best for maintenance.
Q3: What is the best type of knife sharpener for a beginner?
A3: For beginners, an electric knife sharpener with guided slots can be very easy to use. If you prefer manual methods, a combination knife sharpening stone with a sharpening guide is an excellent starting point.
Q4: Is whetstone sharpening difficult to learn?
A4: It requires practice, but it’s not inherently difficult. The key is maintaining a consistent knife sharpening angle. Using a sharpening guide can significantly ease the learning curve.
Q5: How do I know if my knife is sharp enough?
A5: A simple test is to hold a piece of paper vertically and try to slice through it with the knife. A sharp knife will slice cleanly through the paper without tearing or snagging. You can also test it on a tomato or an onion; a sharp knife will slice through the skin with minimal effort.
Q6: What is the difference between a sharpening stone and a honing steel?
A6: A sharpening stone (whetstone) removes metal to create a new edge. A honing steel realigns the existing edge. Think of sharpening as repairing the edge and honing as maintaining it.
Q7: Do I need sharpening oil for all types of stones?
A7: No. Water stones typically use water as a lubricant, while oil stones use sharpening oil. Some synthetic stones are “splash and go” and require very little lubricant. Always check the manufacturer’s recommendations for your specific stone.
By following these steps and tips, you can keep your kitchen knives in peak condition, making your time in the kitchen safer and more enjoyable. Regular kitchen knife maintenance, including proper sharpening and honing, will ensure your knives perform beautifully for years to come.