
Image Source: i.ytimg.com
How to Replace Kitchen Counter Laminate DIY
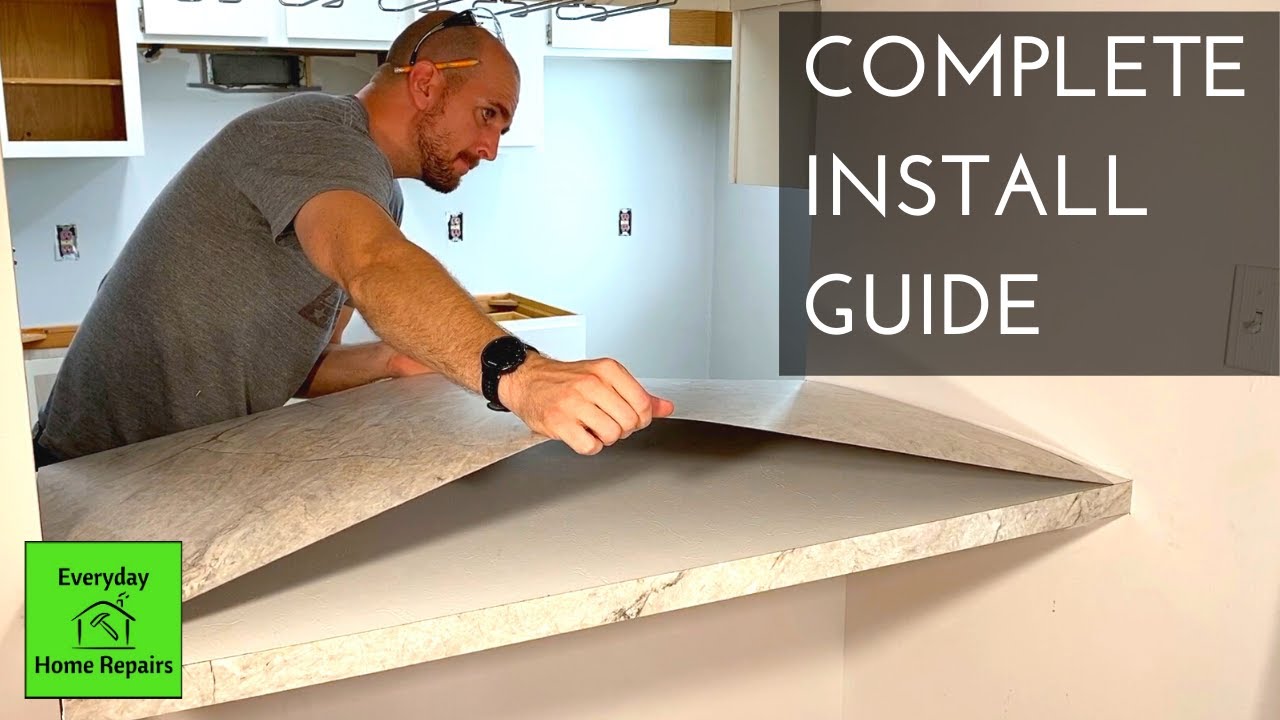
Yes, you can replace kitchen counter laminate yourself. This guide will walk you through the entire process of DIY laminate countertop installation, from preparing your space to enjoying your beautifully updated kitchen. Replacing your kitchen countertop material laminate can be a rewarding project, saving you money and giving you a custom look. Whether you’re dealing with damaged laminate or simply want a fresh aesthetic for your kitchen remodel laminate, this step-by-step approach will help you achieve professional-looking results.
Why Choose Laminate for Your Kitchen Countertop?
Laminate countertops have long been a popular choice for kitchens, and for good reason. They offer a fantastic combination of affordability, durability, and aesthetic versatility. When you’re considering buying new kitchen laminate, you’re opening up a world of possibilities. Unlike natural stone or solid surface materials, laminate is budget-friendly, making it an excellent option for those looking to update their kitchen without breaking the bank.
Beyond the cost-effectiveness, laminate is surprisingly resilient. It can withstand everyday wear and tear, resisting scratches and stains with proper care. Plus, the variety of patterns and colors available is vast. You can find laminate that mimics the look of granite, marble, wood, or even solid colors, allowing you to perfectly match your existing kitchen décor or create a brand-new style. This makes laminate a highly adaptable kitchen countertop material laminate.
Fathoming the Removal of Old Kitchen Laminate
The first major hurdle in your DIY project is removing the old kitchen laminate. This can be the most physically demanding part, but with the right tools and a systematic approach, it’s entirely manageable.
Essential Tools for Removal:
- Pry Bar: A sturdy pry bar is crucial for lifting and separating the old laminate from the substrate.
- Putty Knife or Scraper: Useful for scoring adhesive and lifting smaller sections.
- Hammer: To tap the pry bar and dislodge stubborn sections.
- Utility Knife: For scoring the laminate along edges and seams.
- Safety Glasses: Protect your eyes from flying debris.
- Work Gloves: To protect your hands.
- Dust Mask: Especially important if the laminate is old and potentially brittle.
- Reciprocating Saw (Optional but Recommended): If the laminate is heavily adhered or the substrate is problematic, a reciprocating saw with a demolition blade can significantly speed up the process.
Step-by-Step Removal Process:
- Clear the Counters: Remove everything from your countertops. Empty cabinets beneath the counters as well, as you might encounter dust and debris.
- Score the Laminate: Using your utility knife, score along the edges of the countertop where it meets the backsplash and cabinets. This helps break the adhesive seal.
- Locate Seams and Fasteners: Carefully inspect your countertops. Laminate sheets are often joined together with seams, and sometimes screws are used, especially around the sink cutout.
- Begin Prying: Start at a corner or seam. Insert the pry bar between the laminate and the substrate. Gently tap the pry bar with a hammer to begin lifting. Work slowly and methodically, lifting small sections at a time.
- Address Stubborn Areas: If a section is particularly difficult to lift, use your putty knife to work under the laminate and break the adhesive. A reciprocating saw can be used to cut through the laminate and substrate if it’s severely bonded. Be cautious not to damage your cabinets during this step.
- Remove Adhesive Residue: Once the old laminate is off, you’ll likely have adhesive residue left on the substrate. Use a scraper and possibly a solvent (like mineral spirits, following product instructions and ensuring good ventilation) to clean the surface thoroughly. A clean, smooth surface is essential for the new laminate to adhere properly.
- Inspect the Substrate: Check the condition of the substrate (usually particleboard or plywood). If it’s warped, water-damaged, or structurally unsound, you’ll need to replace it before installing the new laminate.
This stage is critical for a successful DIY laminate countertop installation. Taking your time here will pay off significantly in the final result.
Acquiring Your New Kitchen Laminate
Now that you’ve cleared the way, it’s time to choose and buy your new kitchen laminate. This is where your kitchen remodel laminate vision starts to take shape.
Types of Laminate Sheets:
When you’re buying new kitchen laminate, you’ll primarily be looking at laminate sheets. These are typically made of layers of paper impregnated with resin and then fused under high pressure and heat.
- Post-Formed Laminate: This is a popular choice where the laminate is pre-bent to create a seamless edge that wraps around the front of the countertop. It offers a clean, modern look and is less prone to moisture ingress.
- Square-Edge Laminate: This type has a clean, straight edge. It often requires a separate edging material, such as a laminate edge strip or a metal or wood trim, for a finished look.
Factors to Consider When Buying:
- Pattern and Color: This is your chance to express your style. Consider the overall color scheme of your kitchen, the amount of natural light, and the mood you want to create.
- Finish: Laminate comes in various finishes, from matte to high gloss. Matte finishes tend to hide fingerprints and minor scratches better, while glossier finishes can make a kitchen feel brighter and more spacious.
- Thickness: Standard laminate is typically around 0.025 to 0.030 inches thick. Thicker laminate may be more durable but can be harder to work with for DIYers.
- Sheet Size: Laminate is sold in large sheets. You’ll need to measure your countertops carefully to determine how much you need and ensure you can transport it. Some suppliers will cut sheets to size for you.
- Substrate Compatibility: Ensure the laminate you choose is suitable for countertop applications and compatible with the type of substrate you plan to use or have.
Where to Purchase:
- Home Improvement Stores: Large chains like Home Depot and Lowe’s offer a good selection of laminate sheets and often have knowledgeable staff to help.
- Specialty Countertop Suppliers: For a wider range of patterns or custom options, consider visiting local or online specialty suppliers.
- Online Retailers: Many online stores sell laminate sheets, sometimes at competitive prices. Be sure to check shipping costs and ensure the product is well-packaged for transport.
Laminate Countertop Replacement Cost: The cost of buying new kitchen laminate can vary significantly depending on the brand, pattern, and quality. Expect to pay anywhere from $20 to $70 per linear foot for materials, plus the cost of adhesive, substrate, and tools. This is considerably less than many other countertop materials.
Preparing Your Workspace and Materials
Before you start cutting and adhering, meticulous preparation is key. This is where you lay the groundwork for a successful DIY laminate countertop installation.
Workspace Preparation:
- Ventilation: Ensure your kitchen is well-ventilated, especially when working with adhesives and solvents. Open windows and doors, and consider using fans.
- Protection: Cover your cabinets, appliances, and flooring with drop cloths or old sheets to protect them from dust, adhesive, and potential scratches.
- Lighting: Good lighting is essential for accurate cutting and precise application.
Substrate Preparation:
The substrate is the base material your laminate will be adhered to. Common choices include:
- Particleboard: A cost-effective option, but it’s susceptible to moisture damage. Use moisture-resistant particleboard if possible.
- MDF (Medium-Density Fiberboard): Similar to particleboard, it offers a smooth surface but can also be affected by moisture.
-
Plywood: A stronger and more moisture-resistant option than particleboard or MDF, especially exterior-grade plywood.
-
Ensure Flatness: The substrate must be perfectly flat and smooth. Sand down any high spots or rough areas.
- Cleanliness: Wipe the substrate with a tack cloth or a damp (not wet) cloth to remove all dust.
- Edge Treatment: If you’re using square-edge laminate, you’ll need to prepare the edges for an edge strip. This might involve routing a slight groove or ensuring a clean, square edge.
Cutting the Laminate:
Cutting laminate requires precision and the right tools to avoid chipping or cracking.
- Measuring Twice, Cutting Once: Measure your countertops accurately. Account for overhangs (typically 1 to 1.5 inches) at the front and sides.
- Marking: Use a sharp pencil or a fine-tip marker to mark your cut lines on the underside of the laminate sheet.
- Cutting Tools:
- Circular Saw with a Fine-Tooth Carbide Blade: This is the best tool for cutting laminate. Use a blade with at least 60 teeth, preferably more.
- Jigsaw: Useful for curved cuts, like around a sink cutout. Use a fine-tooth blade for laminate.
- Cutting Technique:
- Support the Laminate: Ensure the laminate is well-supported on both sides of the cut line to prevent sagging and breaking.
- Cut from the Underside: For a clean edge, score the laminate first with a utility knife along your cut line, then cut from the underside with the saw.
- Slow and Steady: Let the saw do the work. Don’t force the blade.
- Sink Cutouts: Trace your sink template onto the laminate. Drill a pilot hole inside the cutout area, then use a jigsaw to carefully cut along the traced line.
Applying the Laminate: The Art of Laminate Countertop Resurfacing
This is the core of the DIY laminate countertop installation. Working with laminate countertop adhesive requires careful application and good timing.
Essential Adhesives:
- Contact Cement: This is the most common adhesive for laminate. It’s a powerful, fast-bonding adhesive that requires application to both surfaces. Once the solvent evaporates, the surfaces become tacky and bond on contact.
- Water-Based Contact Cement: A less toxic and easier-to-clean option, but it may take longer to dry.
- Solvent-Based Contact Cement: Bonds quickly and strongly but has strong fumes and requires careful handling.
- Spray Adhesive: Available in aerosol cans, this is convenient for smaller pieces and edges.
- Contact Cement Roller or Brush: For even application of contact cement.
Tools for Application:
- Putty Knife or Scraper: For applying and spreading contact cement.
- J-Roller or Rolling Pin: To firmly press the laminate onto the substrate and eliminate air bubbles.
- Block of Wood: To tap the roller and ensure even pressure.
- Utility Knife: For trimming excess laminate.
- Straight Edge or Metal Ruler: For guiding cuts.
- Clamps (Optional): For holding edges in place while the adhesive sets.
The Application Process:
- Dry Fit: Before applying adhesive, place the cut laminate pieces onto the substrate to ensure a perfect fit. Make any necessary minor adjustments.
- Apply Adhesive to Substrate: Using a roller or brush, apply a thin, even coat of contact cement to the substrate. Work in sections if you have a large area. Ensure complete coverage, especially at the edges.
- Apply Adhesive to Laminate Backing: Apply an equally thin, even coat of contact cement to the back of the laminate sheet. Be sure to cover the entire surface.
- Allow Adhesive to Dry: This is a crucial step. Let the adhesive dry until it is tacky to the touch but not wet. This typically takes 10-20 minutes, depending on the type of adhesive and ventilation. A good test is to gently touch a small, inconspicuous area; if it doesn’t transfer to your finger, it’s ready.
- Bonding the Laminate: This is where precision is paramount.
- Align Carefully: Starting at one edge or corner, carefully align the laminate sheet with the substrate.
- Use a Release Liner (Optional but Recommended): Some DIYers find it helpful to place a piece of thin cardboard or plastic sheeting between the substrate and the laminate, extending slightly beyond the edge. This allows you to position the laminate precisely before pulling the liner out to make the bond.
- Roll Firmly: Once the laminate touches the substrate, the bond is almost immediate and difficult to reposition. Use your J-roller or rolling pin to firmly press the laminate down, working from the center outwards. Ensure you cover the entire surface, paying close attention to edges and corners. Use a block of wood to tap the roller for extra pressure if needed.
- Address Air Bubbles: If you notice any air bubbles, try to roll them out towards the edges. If a bubble is trapped, you may need to carefully lift the laminate (if the adhesive allows) or make a small slit and press it down.
- Edge Application: Apply laminate to the edges of the countertop. This can be done by wrapping the laminate around the front edge (if using post-formed) or by adhering a separate edge strip. Use contact cement and the roller, ensuring a tight bond.
- Trim Excess: Once the adhesive has set (follow the manufacturer’s instructions), use a sharp utility knife and a straight edge to carefully trim any excess laminate along the edges. Make multiple light passes rather than trying to cut through in one go.
- Sink Cutout Finishing: Apply contact cement to the edges of the sink cutout on both the substrate and the laminate. Carefully fold the laminate into the cutout and press firmly with the roller. Trim any excess laminate from the inside edge of the cutout.
This process might take a few tries to get perfect. Don’t be discouraged if your first attempt isn’t flawless; that’s what the trimming stage is for!
Finishing Touches and Sealing
After the laminate is applied and trimmed, there are a few final steps to ensure a professional and durable finish.
Sealing the Edges:
- Silicone Caulk: For a water-tight seal, especially around the sink and backsplash, apply a bead of silicone caulk. Use painter’s tape to create clean lines on either side of the seam, then apply the caulk and smooth it with a damp finger or caulk tool. Remove the tape immediately after smoothing.
- Edge Sealer (Optional): Some people choose to apply a clear sealant to the exposed edges of the substrate if they are not covered by laminate edging. This can add an extra layer of protection against moisture.
Cleaning Up:
- Adhesive Residue: Clean up any stray adhesive from the laminate surface or surrounding areas using a solvent recommended by the adhesive manufacturer.
- General Cleaning: Give your new countertops a thorough cleaning.
Reinstalling Fixtures:
Once everything is dry and sealed, you can reinstall your sink, faucet, and any other fixtures.
Alternatives and Laminate Countertop Resurfacing
While a full replacement is often the best route for damaged laminate, there are options for laminate countertop resurfacing if the damage is minor.
- Laminate Repair Kits: For small chips or scratches, you can find laminate repair kits that include fillers and touch-up paints to match your countertop color.
- Laminate Repair Paste: For slightly larger areas of damage, a laminate repair paste can be used to fill in missing pieces before being sanded smooth and potentially color-matched.
However, if the laminate is peeling significantly, deeply scratched, or the substrate is damaged, a full replacement is generally the more practical and long-lasting solution.
Frequently Asked Questions (FAQ)
Q: Can I put new laminate directly over old laminate?
A: In some cases, yes, but it’s not always recommended. If the old laminate is in good condition, smooth, and well-adhered, you might be able to adhere new laminate over it using a strong contact adhesive. However, any imperfections in the old laminate will likely show through, and the bond may not be as strong as adhering to a clean substrate. It’s generally best to remove the old laminate for a more durable and professional finish.
Q: What is the best adhesive for kitchen countertop laminate installation?
A: Contact cement is the preferred adhesive for DIY laminate countertop installation due to its strong, fast-bonding properties. Both solvent-based and water-based options are available, with solvent-based typically offering a quicker and stronger bond, while water-based is less toxic and easier to clean.
Q: How long does it take to replace kitchen countertops with laminate?
A: For a DIYer, removing old laminate can take several hours to a full day, depending on how it’s adhered. Installing new laminate might take another day. The entire process, including preparation and drying time, can span 2-3 days.
Q: What are the common problems when installing laminate countertops?
A: Common issues include air bubbles trapped under the laminate, uneven adhesive application leading to poor bonding, chipped edges during cutting, and misalignment during the bonding process. Patience and careful execution are key to avoiding these problems.
Q: Is laminate a good kitchen countertop material laminate?
A: Yes, laminate is considered a good kitchen countertop material laminate for many reasons, including its affordability, variety of designs, ease of maintenance, and decent durability against scratches and stains when cared for properly.
By following these detailed steps, you can successfully tackle the project of replacing your kitchen counter laminate yourself, breathing new life into your kitchen space.