
Can you replace a kitchen sink drain yourself? Yes, you absolutely can! Replacing a kitchen sink drain is a manageable DIY project that can save you money and prevent future leaks. This guide will walk you through the entire process, from identifying the problem to having a brand-new, leak-free drain. We’ll cover everything you need to know about how to replace a kitchen sink drain, including selecting the right parts, tools, and step-by-step instructions.
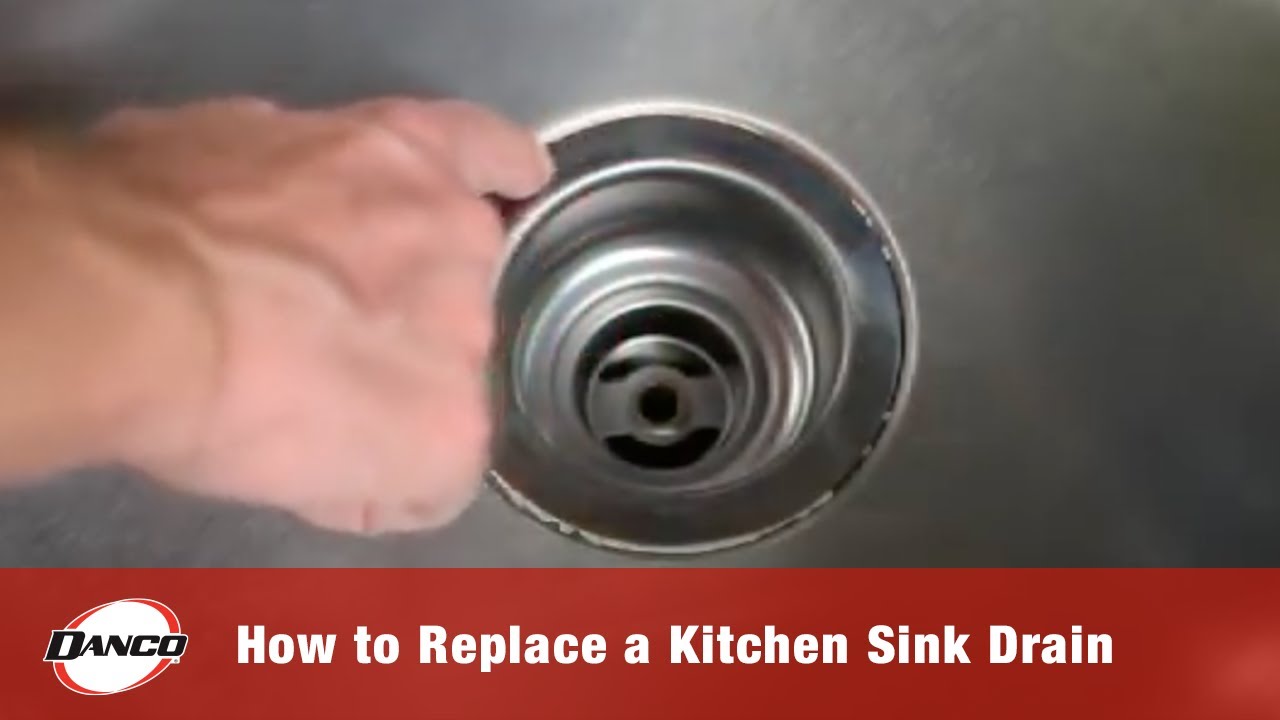
Image Source: i.ytimg.com
Why Replace Your Kitchen Sink Drain?
A damaged or worn-out kitchen sink drain can lead to a variety of problems. The most common reason people seek to replace their drain is a leaky sink drain. This could be due to:
- Cracked or Damaged Strainer: The part that sits in your sink can crack over time from impact or wear and tear.
- Degraded Plumber’s Putty or Sealant: The material that seals the strainer to the sink can dry out and crack, allowing water to seep through.
- Worn-Out Gaskets: Rubber or plastic gaskets in the drain assembly can become brittle and lose their sealing ability.
- Corroded or Damaged Pipe Threads: The threads where the drain connects to the tailpiece or P-trap can corrode, leading to leaks.
- A Stuck or Broken Sink Drain Stopper: While not always a reason to replace the entire drain assembly, a faulty stopper can be frustrating.
Beyond leaks, you might also want to replace your drain if:
- It’s Clogged Frequently: Sometimes, the internal surfaces of an old drain can become rough, trapping debris and causing persistent clogs.
- It’s Aesthetically Unpleasing: You might simply want to upgrade the look of your sink with a new, shiny strainer.
- You’re Renovating: As part of a larger kitchen remodel, replacing the sink drain is a smart move.
What You’ll Need: Tools and Materials
Before you start removing sink drain components, gather all your necessary tools and materials. Having everything on hand will make the process smoother and faster.
Essential Tools:
- Adjustable Wrench or Pipe Wrench: For loosening and tightening plumbing fittings.
- Plumber’s Putty or Silicone Sealant: To create a watertight seal around the new sink strainer. Plumber’s putty is traditional for metal sinks; silicone sealant is often preferred for composite or granite sinks.
- Bucket or Towels: To catch any residual water from the drain pipe.
- Screwdriver (Flathead and Phillips): For disassembling some drain components.
- Pliers (Channel Lock Pliers are useful): For gripping and turning stubborn parts.
- Utility Knife or Putty Knife: To scrape away old plumber’s putty or sealant.
- Gloves: To protect your hands from grime and potential irritants.
- Safety Glasses: To protect your eyes from falling debris or splashes.
- Flashlight or Headlamp: To see clearly under the sink.
New Sink Drain Components:
It’s crucial to get the right parts for your specific sink and plumbing. A standard kitchen sink drain assembly typically includes:
- Sink Strainer: The visible part that fits into the sink basin.
- Lock Nut: A large nut that secures the strainer to the sink from underneath.
- Rubber Gasket(s): Seals that prevent water from leaking between the sink and the drain flange.
- Fiber or Cardboard Washer: Often included for an extra layer of sealing.
- Tailpiece: A short pipe that connects the drain flange to the P-trap.
- Strainer Basket or Sink Drain Stopper: The part that plugs the drain or catches debris.
When purchasing new parts, look for a kitchen drain assembly kit. These kits usually contain all the necessary components for a standard drain replacement. Ensure the strainer opening size matches your sink’s drain opening. Most standard sinks use a 3-1/2 inch diameter opening.
Step-by-Step Guide: Replacing Your Kitchen Sink Drain
Now, let’s get to the practical part – how to install sink drain components. Follow these steps carefully:
Step 1: Preparation and Safety First
- Clear the Cabinet: Remove everything from beneath your sink to give yourself ample working space.
- Turn Off Water Supply: While not strictly necessary for just the drain assembly, it’s always a good habit when working with plumbing. Locate the hot and cold water shut-off valves under the sink (usually two knobs) and turn them clockwise until they stop.
- Place a Bucket and Towels: Position a bucket directly under the P-trap (the U-shaped pipe) and place towels on the cabinet floor to catch any drips or spills.
Step 2: Removing the Old Sink Drain
This is where you’ll be removing sink drain parts.
- Disconnect the P-Trap: Loosen the slip nuts connecting the P-trap to the sink’s tailpiece and the wall drain pipe. You might be able to do this by hand, but if they’re tight, use your adjustable wrench or channel lock pliers. Be prepared for some water to drain out.
- Remove the Tailpiece: Once the P-trap is disconnected, unscrew the slip nut connecting the tailpiece to the sink strainer assembly.
- Loosen the Lock Nut: From underneath the sink, you’ll see a large lock nut holding the sink strainer to the sink basin. Use your adjustable wrench or pipe wrench to loosen this nut. Turn it counter-clockwise. This can sometimes be the trickiest part, as corrosion or old putty can make it stubborn.
- Remove the Old Strainer: Once the lock nut is removed, the old sink strainer should lift out from the top of the sink. If it’s stuck, you might need to gently tap around the edges from above, or carefully use a putty knife to pry it loose.
- Clean the Sink Opening: Use a putty knife or utility knife to scrape away all the old plumber’s putty or sealant from the sink basin’s drain opening. This is critical for a good seal with the new drain.
Step 3: Installing the New Sink Strainer
This is the core of replacing sink strainer work.
- Apply Plumber’s Putty or Sealant: Roll a rope of plumber’s putty about 1/2 inch thick. Place it around the underside of the lip of the new sink strainer. If you’re using silicone sealant, apply a generous bead around the same area.
- Insert the New Strainer: Carefully press the new sink strainer into the drain opening from the top of the sink. Ensure it’s centered.
- Position the Gasket and Washer: From underneath the sink, slide the rubber gasket onto the threaded shank of the strainer. If your kit includes a fiber or cardboard washer, place it over the gasket.
- Thread on the Lock Nut: Screw the large lock nut onto the threaded shank of the strainer. Hand-tighten it first.
- Tighten the Lock Nut: Use your adjustable wrench to tighten the lock nut. Tighten it firmly, but be careful not to overtighten, which could crack the sink basin or damage the strainer. As you tighten, you’ll see excess plumber’s putty squeeze out around the strainer’s lip.
- Clean Up Excess Putty: From the top of the sink, wipe away the excess plumber’s putty that squeezed out.
Step 4: Reconnecting the Plumbing
Now you’ll be working with the kitchen sink drain pipe and drain assembly parts.
- Attach the Tailpiece: If your new drain came with a tailpiece, connect it to the bottom of the new sink strainer assembly. Ensure the rubber gasket is in place and tighten the slip nut hand-tight, then give it a slight turn with pliers for a snug fit.
- Reconnect the P-Trap: Realign the P-trap with the tailpiece and the drainpipe going into the wall. Screw the slip nuts back on, hand-tightening first.
- Tighten P-Trap Connections: Use your pliers or wrench to snug up the P-trap slip nuts. Again, don’t overtighten, as these are usually plastic and can crack.
Step 5: Testing for Leaks
This is the most important step to confirm your how to replace sink drain job was successful.
- Fill the Sink: Close the sink stopper (if you have one) or use a rag to plug the drain. Fill the sink with a few inches of water.
- Inspect for Leaks: Let the water sit for a few minutes. Then, release the stopper or remove the rag and let the water drain. Carefully inspect all the connections you tightened – the lock nut under the sink, the connection to the tailpiece, and the P-trap connections.
- Tighten if Necessary: If you spot any drips, gently tighten the corresponding connection. Sometimes, a slight tightening is all that’s needed. If a leak persists, you may need to disassemble that section, check the gasket seating, and re-apply plumber’s putty or sealant if necessary.
- Check the Stopper: Ensure your new sink drain stopper works smoothly and creates a good seal when closed.
Common Sink Drain Problems and Fixes
Even with a DIY approach, you might encounter minor issues. Here are some common problems and how to address them:
| Problem | Cause | Solution |
|---|---|---|
| Leaky Sink Drain | Loose lock nut, worn gasket, improperly applied putty. | Tighten the lock nut; disassemble and re-seat gaskets; reapply plumber’s putty/sealant around the strainer. |
| Slow Drain | Hair or grease buildup in the drainpipe or P-trap. | Use a drain snake or plunger; pour boiling water with baking soda and vinegar down the drain. |
| Stuck Sink Drain Stopper | Mineral buildup, bent linkage, or worn-out parts. | Clean with vinegar; check for bent parts; replace the stopper or the entire drain assembly if damaged. |
| Corroded Drain Parts | Age, harsh chemicals, or water quality. | Replace corroded parts. Consider stainless steel or brass for longevity. |
| Difficulty Removing Lock Nut | Corrosion or overtightening in the past. | Use penetrating oil and let it sit; use a pipe wrench with good grip; apply heat carefully (if metal). |
Replacing a Sink Strainer Basket or Stopper
Sometimes, you don’t need to replace the entire kitchen drain assembly. If your issue is solely with the strainer basket or the sink drain stopper, the process is much simpler:
Replacing a Strainer Basket:
- Remove the Old Basket: Most strainer baskets simply lift out. Some may have a small knob that you can turn to lock them in place.
- Install the New Basket: Place the new strainer basket into the drain opening. Ensure it sits snugly.
Replacing a Sink Drain Stopper:
- Remove the Old Stopper: This usually involves pulling it straight up. If it’s stuck, you might need to gently pry it.
- Clean the Drain Opening: Wipe away any debris.
- Install the New Stopper: Place the new stopper in the drain opening, ensuring it aligns correctly.
If your stopper is part of a pop-up assembly that connects to a lever, you’ll need to disconnect that linkage before removing the stopper and reconnect it to the new one. This involves unscrewing a clevis strap and pivot rod, which can be a bit more intricate and might require referring to the manufacturer’s instructions for your specific pop-up mechanism.
Choosing the Right Materials for Your Kitchen Sink Plumbing
The longevity and performance of your new drain assembly depend on the quality of the materials you choose.
Strainer Material:
- Stainless Steel: Durable, rust-resistant, and looks good. A popular choice for kitchen sinks.
- Brass: Often plated with chrome or nickel. Very durable and corrosion-resistant. Can be more expensive.
- Plastic (ABS or PVC): Generally less expensive. Suitable for basic replacements but may not be as durable as metal options.
Sealant Type:
- Plumber’s Putty: Traditional and effective for most sink types, especially stainless steel. It remains pliable, allowing for adjustments.
- Silicone Sealant: Often recommended for granite, quartz, or composite sinks as putty can sometimes stain these materials. It creates a very strong, waterproof seal.
When to Call a Professional
While this DIY guide covers most scenarios for how to replace a sink drain, there are times when it’s best to call a plumber:
- Significant Corrosion: If your existing pipes are heavily corroded or crumbling, a professional can assess the extent of the damage and make necessary repairs to your kitchen sink plumbing.
- Persistent Leaks: If you’ve followed the steps and still have leaks, a plumber has specialized tools and experience to diagnose and fix the issue.
- Unusual Plumbing Setups: If your kitchen sink drain pipe configuration is complex or non-standard, a professional can handle it.
- Lack of Confidence: If you’re not comfortable working with plumbing or feel unsure about any step, it’s always safer to hire an expert.
Frequently Asked Questions (FAQ)
Q1: How often should I replace my kitchen sink drain?
A: There’s no set schedule. You should replace your kitchen sink drain when it starts to leak, clog frequently, or if the stopper mechanism fails. With proper care, a drain assembly can last many years.
Q2: What is the difference between plumber’s putty and silicone sealant for sinks?
A: Plumber’s putty is a soft, pliable compound used to create a watertight seal between the sink strainer and the sink basin. It’s generally used for stainless steel sinks. Silicone sealant is a flexible, waterproof adhesive and sealant often recommended for granite, quartz, or composite sinks, as plumber’s putty can sometimes stain these materials.
Q3: Can I replace just the sink strainer without replacing the whole drain assembly?
A: Yes, if the rest of your drain assembly (tailpiece, P-trap connections) is in good condition, you can often replace just the sink strainer. You’ll still need to remove the old strainer and install the new one using plumber’s putty or sealant.
Q4: My drain is clogged. Can I fix it without replacing the drain?
A: Most clogs can be cleared without replacing the drain. Try using a plunger, a drain snake, or a mixture of baking soda and vinegar followed by hot water. If these methods don’t work, you may have a blockage further down the kitchen sink plumbing, and a plumber might be needed.
Q5: What size sink strainer do I need?
A: Most standard kitchen sinks in North America have a 3-1/2 inch diameter drain opening. It’s always a good idea to measure your existing sink’s drain opening to ensure you buy the correct size strainer.
By following this comprehensive guide, you should be well-equipped to tackle the DIY project of replacing your kitchen sink drain. With the right tools, materials, and a little patience, you can ensure your kitchen drain assembly is leak-free and functional for years to come.