
Image Source: i.ytimg.com
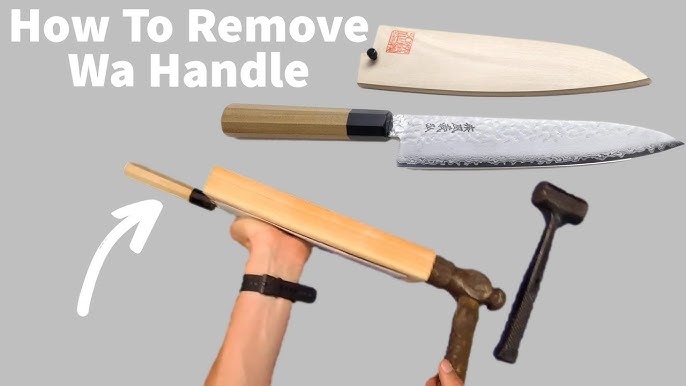
Easy Steps: How To Remove A Handle From A Kitchen Knife
Can you remove a kitchen knife handle? Yes, you can remove a kitchen knife handle, whether for cleaning, repair, or replacement. This guide will walk you through the process, making kitchen knife disassembly straightforward.
What is the best way to remove a knife handle? The best way depends on how the handle is attached. Some handles are glued, others are riveted, and some might be screwed on. We’ll cover methods for each.
Why Remove a Kitchen Knife Handle?
There are several good reasons why you might need to remove a kitchen knife handle.
- Deep Cleaning: Over time, grime, food particles, and bacteria can build up in the gaps between the blade and the handle, especially in older knives. A thorough cleaning might require removing the handle to get to these hard-to-reach spots. This is crucial for hygiene and the longevity of your knife.
- Repairing a Loose Handle: If your knife handle feels wobbly or loose, it’s not only an annoyance but also a safety hazard. A secure knife handle is essential for safe and effective chopping. Removing and re-securing the handle can often fix this problem.
- Replacing a Damaged Handle: Handles can crack, chip, or wear down with use. If your handle is beyond repair, you’ll need to remove the old one to fit a new knife handle replacement.
- Customization: Some knife enthusiasts enjoy customizing their tools. Removing a handle allows you to sand, refinish, or even replace it with a custom material for a personalized look and feel.
Preparing for Handle Removal
Before you start, gathering the right tools and taking safety precautions is key to a smooth process.
Essential Tools You’ll Need:
The specific tools will vary based on how the handle is attached, but a general toolkit includes:
- Safety Glasses: Always protect your eyes.
- Gloves: Protect your hands from cuts and any cleaning agents.
- Utility Knife or Craft Knife: For scoring or cutting adhesives.
- Screwdriver Set: If the handle has screws, you’ll need the right size.
- Pliers: Useful for gripping and pulling.
- Hammer: For gently tapping or driving wedges.
- Wooden Wedges or Thin Metal Shim: To help pry the handle apart.
- Heat Gun or Hair Dryer: To soften some adhesives.
- Rubbing Alcohol or Acetone: For cleaning or dissolving certain glues.
- Sandpaper (various grits): For cleaning up surfaces.
- Rag or Cloths: For wiping and cleaning.
Safety First: Crucial Precautions
- Blade Protection: The most important step is to protect yourself from the sharp blade.
- Wrap the blade in a thick cloth or a specialized blade guard.
- If possible, work with the knife flat on a stable surface.
- Stable Workspace: Ensure you have a clear, well-lit workspace that won’t be easily disturbed.
- Ventilation: If you are using any solvents or adhesives, work in a well-ventilated area.
Identifying Your Knife’s Handle Attachment
The method for detaching knife handle components depends heavily on how they were originally joined. Observing the handle and the area where it meets the blade is your first step.
Common Handle Attachment Methods:
- Riveted Handles: These are very common. Metal rivets go through the handle scales and the tang of the knife. You’ll often see the rounded heads of these rivets on the sides of the handle.
- Glued Handles: Some handles are attached using strong adhesives. You might not see any visible fasteners, or you might see a seam where the handle meets the bolster.
- Screwed Handles: Less common for traditional kitchen knives, but some modern designs might have screws holding the handle scales in place. These will be clearly visible.
- Full Tang vs. Partial Tang:
- A full tang means the metal of the blade extends all the way through the handle. This is the most robust construction. You’ll usually see the metal tang at the pommel (the end of the handle) and sometimes along the sides.
- A partial tang is less common and generally found in cheaper knives. The tang doesn’t extend the full length of the handle.
Examining for Clues:
- Visible Rivets: Look for small, round metal bumps on the sides of the handle.
- Visible Screws: Check for any small screw heads.
- Seams: Are there any obvious lines or gaps where the handle material meets the metal of the knife? This could indicate adhesive.
- Tang Visibility: Can you see the metal of the knife blade extending into the handle? Knife tang visibility is a good indicator of how the handle is secured. If the tang is fully visible along the sides or at the end, it might be easier to work around.
Step-by-Step Guide to Handle Removal
Now that you’ve prepared and identified your knife’s construction, let’s get into the actual removal process.
Method 1: Removing Riveted Handles
Riveted handles are the most common and often the most durable. The goal here is to remove or break the rivets.
h4: Identifying the Rivets
Look for the heads of the rivets on the sides of the handle scales. There are usually two or three rivets per side.
h4: Initial Steps
- Secure the Blade: Ensure the blade is safely covered or sheathed.
- Protect the Handle: If you’re working on a valuable or antique knife, you might want to protect the handle material itself.
h4: Removing the Rivets
This is the trickiest part and requires patience.
- Option A: Grinding Down Rivet Heads
- Use a Dremel tool with a grinding bit or a small metal file.
- Carefully grind down the heads of the rivets. Go slowly to avoid damaging the handle material or the tang.
- Once the rivet heads are flush or removed, you can often push the rivet shaft out from the other side using a punch and hammer, or sometimes by prying.
- Option B: Drilling Out Rivets
- Select a drill bit that is slightly smaller than the diameter of the rivet shaft.
- Center punch the middle of each rivet head to prevent the drill bit from wandering.
- Carefully drill through the rivet head. The goal is to drill away the head, freeing the handle scale.
- Once the head is gone, you can use a punch and hammer to drive the remaining rivet shaft out.
- Option C: Using a Rivet Set and Hammer (Less Common for Home Use)
- If you have specialized tools, a rivet set can be used to mushroom or break the rivet. However, this is more for manufacturing than repair.
h4: Separating the Handle Scales
Once the rivets are removed, the handle scales might still be held in place by old adhesive or a tight fit.
- Gently pry the handle scales away from the tang. Start at the bolster or the pommel.
- You might need to use a thin, flat tool like a putty knife or a shim to carefully work between the scale and the tang.
- If there’s resistance, a little tap with a hammer on the prying tool might help, but be very gentle.
Method 2: Removing Glued Handles
Glued handles rely on the strength of the adhesive. Heat and solvents are your primary tools here.
h4: Identifying the Adhesive Type (If Possible)
If you know the type of glue used, it can help. Epoxy and other strong adhesives are common.
h4: Softening the Adhesive
- Heat Application: Use a heat gun or a hairdryer on a medium-high setting.
- Targeted Heating: Hold the heat source a few inches away from the handle, moving it constantly to avoid overheating one spot. Focus the heat on the area where the handle meets the blade or bolster.
- Test for Looseness: Periodically try to gently wiggle the handle or insert a thin blade into any seams. As the adhesive softens, the handle should start to loosen.
- Patience is Key: This might take several minutes of heating and testing.
h4: Using Solvents
If heat alone doesn’t work, or for residual adhesive:
- Apply Solvent: Apply a solvent like rubbing alcohol (isopropyl alcohol) or acetone to the seams.
- Allow Penetration: Let the solvent sit for a few minutes to work on the adhesive.
- Prying: Use a thin, flat tool (putty knife, shim) to carefully pry the handle scales away. You may need to reapply heat and solvent multiple times.
h4: Removing Residual Adhesive
Once the handle scales are off, there will likely be adhesive residue on the tang and the inside of the scales.
- Scrape: Use a sharp scraper or utility knife to carefully scrape away excess adhesive.
- Sand: Use sandpaper to smooth any remaining residue.
Method 3: Removing Screwed Handles
This is typically the easiest method if your knife has screws.
h4: Locating the Screws
Examine the handle scales for visible screw heads. They are often countersunk.
h4: Unscrewing the Handle
- Select the Right Screwdriver: Use a screwdriver that perfectly fits the screw head to avoid stripping it.
- Turn Counterclockwise: Most screws loosen when turned counterclockwise (lefty-loosey).
- Gentle Pressure: Apply steady, gentle pressure as you turn. If a screw is tight, don’t force it aggressively. A drop of penetrating oil left to sit might help.
- Remove Screws: Once loosened, unscrew them completely and keep them in a safe place.
h4: Detaching Handle Scales
After removing the screws, the handle scales should be free to be pulled away from the tang.
- Gentle Wiggling: Try gently wiggling the scales to loosen them.
- Prying: If they’re still stuck, use a thin, flat tool to carefully pry them off.
Reassembling Your Knife Handle
Reassembly is just as important as disassembly, especially if you’re aiming for a loose knife handle fix or performing a knife handle repair.
Preparing for Reassembly:
- Clean Surfaces: Ensure the tang and the inside of the handle scales are clean and free of old adhesive, debris, or rust. Use sandpaper and rubbing alcohol for this.
- Prepare New Handle (If Applicable): If you’re using a knife handle replacement, ensure it fits correctly. You might need to do some minor fitting with sandpaper.
Securing the New or Old Handle:
- For Riveted Handles:
- Position Scales: Place the handle scales back onto the tang.
- Align Holes: Ensure the holes for the rivets line up.
- Secure with Rivets: You can either use new rivets (requiring riveting tools) or, for a simpler fix, use strong epoxy or even small screws that fit the pre-drilled holes. If you’re using epoxy, clamp the handle tightly while it cures.
- For Glued Handles:
- Apply Adhesive: Use a strong, waterproof epoxy specifically designed for metal and the handle material (wood, micarta, G10, etc.).
- Position Scales: Carefully place the handle scales onto the tang.
- Clamp Tightly: Clamp the handle scales firmly against the tang using clamps or strong tape. Ensure no epoxy oozes out excessively.
- Cure Time: Allow the adhesive to cure fully according to the manufacturer’s instructions. This is critical for a secure knife handle removal and reattachment.
- For Screwed Handles:
- Position Scales: Place the handle scales back onto the tang.
- Insert Screws: Reinsert the original screws or appropriate replacements.
- Tighten Securely: Tighten the screws until the handle is snug, but avoid overtightening, which can strip the threads or crack the handle material.
Testing the Handle:
- Grip Test: Once reassembled and cured (if using adhesive), test how to grip knife handle feels. It should be firm and secure.
- Wiggle Test: Gently try to wiggle the handle. There should be no play or looseness.
Troubleshooting Common Issues
Even with careful work, you might encounter some problems.
- Stripped Screw Heads: If a screw head is stripped, you might need a screw extractor kit. Alternatively, you can try using a small file to create a new slot for a flathead screwdriver.
- Stubborn Rivets: If rivets are extremely difficult to remove, you might need to use a stronger drill bit or a more aggressive grinding approach, always with extreme caution to protect the knife.
- Damaged Handle Material: If the handle material cracks during removal, it will likely need to be replaced.
Maintaining Your Kitchen Knife After Handle Work
Once your knife handle is reattached, proper care ensures it stays that way.
- Regular Cleaning: Clean your knife immediately after use.
- Hand Washing: Avoid putting your knife in the dishwasher, as extreme heat and detergent can damage the handle and loosen adhesives.
- Proper Storage: Store your knives in a knife block, magnetic strip, or blade guards to prevent damage to the blade and handle.
- Occasional Oiling: For wooden handles, a food-safe mineral oil or beeswax blend can help protect and condition the wood, preventing it from drying out and cracking.
Frequently Asked Questions (FAQ)
Q1: Will removing the handle damage my knife?
A1: It can, if done improperly. Always prioritize blade safety and work patiently. Using the wrong tools or too much force can damage the handle material or the tang.
Q2: What kind of glue should I use for knife handle repair?
A2: For most repairs, a high-quality, waterproof epoxy like JB Weld or a specific knife-making epoxy is recommended. Ensure it’s food-safe if it comes into contact with food.
Q3: How do I know if my knife handle is full tang?
A3: Look at the end of the handle, often called the pommel. If you can see the metal of the blade continuing all the way to the end, it’s a full tang. Sometimes, the tang is also visible as a metal strip along the sides of the handle.
Q4: Can I replace a broken handle with something other than the original material?
A4: Absolutely! Many enthusiasts use materials like Micarta, G10, stabilized wood, or even exotic hardwoods for knife handle replacement. Just ensure the material is durable, easy to grip, and suitable for kitchen use.
Q5: How do I ensure a secure knife handle removal and reattachment?
A5: For removal, proceed cautiously, respecting the materials. For reattachment, use appropriate adhesives or fasteners, ensure surfaces are clean, and allow adhesives to cure fully. Clamping is essential for glued handles to create a strong bond.
By following these steps, you can confidently tackle the task of removing and reattaching your kitchen knife handles, ensuring your tools remain safe, hygienic, and in excellent working condition.