
Can you refinish kitchen cabinet doors yourself? Absolutely! Refinishing your kitchen cabinet doors is a fantastic way to give your kitchen a fresh, updated look without the high cost of replacing them. This DIY project breathes new life into tired cabinets, making your kitchen feel brand new.
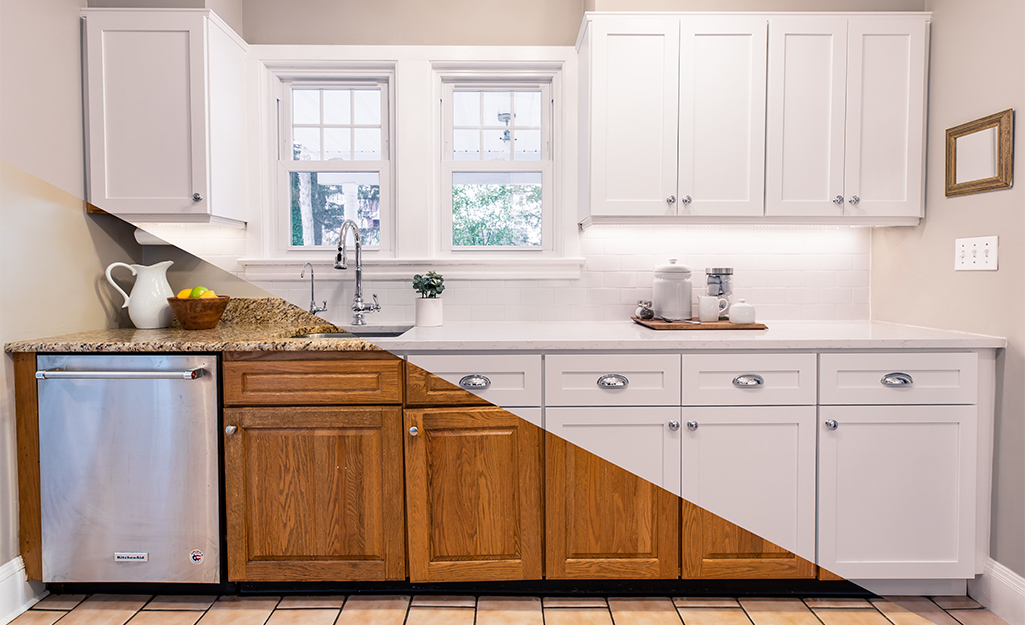
Image Source: contentgrid.homedepot-static.com
Why Refinish Your Kitchen Cabinet Doors?
There are many great reasons to embark on a cabinet door refinishing project. Here’s a look at some of the most compelling:
- Cost Savings: Replacing kitchen cabinets can be incredibly expensive. Refinishing your existing doors is a fraction of the cost, allowing you to achieve a professional look on a budget.
- Customization: You have complete control over the final look. Choose any paint color, stain, or finish to perfectly match your kitchen’s style and your personal taste.
- Environmental Friendliness: By refinishing rather than replacing, you reduce waste and your environmental footprint. It’s a sustainable choice for your home.
- Increased Home Value: A refreshed kitchen can significantly boost your home’s resale value. Updated cabinets are a major selling point for potential buyers.
- Personal Satisfaction: There’s immense pride in transforming your own space. A successful DIY cabinet refinishing project is incredibly rewarding.
Deciding on Your Kitchen Cabinet Update Style
Before you grab any tools, think about the look you want to achieve. This is the most crucial first step for a successful kitchen cabinet update. Your choices will impact the materials, tools, and time you’ll need.
Popular Refinishing Options
- Painting: This is a very popular choice. Painting kitchen cabinets allows for endless color possibilities. You can go with classic white, a bold navy, a soft gray, or anything in between.
- Staining: If your cabinet doors are made of a beautiful wood species like oak, maple, or cherry, staining can enhance their natural grain and warmth. This offers a more traditional or rustic feel.
- Glazing: Glazing adds depth and dimension. A glaze is applied over paint or stain to highlight details, create an aged look, or add subtle color variations.
- Distressing/Antiquing: This technique involves creating a worn, aged appearance, often by sanding edges or using specific products to simulate time and wear.
Considering Your Current Cabinets
- Material: Are your cabinets solid wood, veneer, laminate, or particleboard? This will influence your preparation and the type of finish you can use. Solid wood and veneers are best for staining. Laminate and particleboard are best for painting.
- Existing Finish: Are they currently painted or stained? If they are painted, you’ll likely need to sand them down to the bare wood or at least rough up the surface for new paint to adhere. If stained, you’ll need to de-gloss or strip them.
Gathering Your Tools and Supplies
A successful cabinet door refinishing project requires the right tools. Here’s a comprehensive list to get you started:
Essential Tools
- Screwdriver or Drill with Screw Bits: To remove cabinet doors from hinges and remove hardware.
- Putty Knife or Scraper: For removing old paint or filler.
- Orbital Sander or Sanding Blocks: For smoothing surfaces.
- Assorted Sandpaper Grits: Coarse (80-100 grit), medium (120-150 grit), and fine (180-220 grit).
- Tack Cloths: To remove dust after sanding.
- Paint Brushes: High-quality synthetic brushes for water-based paints, natural bristle brushes for oil-based paints.
- Foam Rollers: For smooth, even application of paint on larger surfaces.
- Paint Trays or Buckets: To hold your paint.
- Drop Cloths or Plastic Sheeting: To protect your work area.
- Painter’s Tape: To mask off areas you don’t want to paint or stain.
- Safety Glasses: To protect your eyes from dust and debris.
- Dust Mask or Respirator: Crucial for protecting your lungs from dust and fumes.
- Gloves: To protect your hands.
Finishing Supplies (Choose based on your desired finish)
- Primer: Essential for good paint adhesion and coverage, especially on bare wood or when changing colors drastically.
- Paint: Choose a durable cabinet paint (e.g., enamel, acrylic latex).
- Stain: For wood cabinets you want to stain.
- Polyurethane or Varnish: A protective topcoat to seal the finish and add durability.
- Wood Filler or Putty: To fill holes or imperfections.
- Denatured Alcohol or Mineral Spirits: For cleaning and thinning some finishes.
The Step-by-Step Guide to Cabinet Door Refinishing
This detailed guide will walk you through the entire process of refurbishing your cabinet doors.
Step 1: Preparation is Key – Removing Doors and Hardware
This initial step is crucial for a clean and professional finish.
- Label Everything: As you remove each cabinet door, number it and corresponding cabinet frame location on the inside. This will save you a huge headache when it comes to reattaching them. You can use painter’s tape and a marker.
- Remove Doors: Use your screwdriver or drill to carefully remove each door from its cabinet.
- Remove Hardware: Take off hinges, knobs, and pulls. Store them in a baggie with the corresponding door label.
Step 2: Cleaning – Banishing Grease and Grime
Cabinets, especially in the kitchen, accumulate grease and grime. Thorough cleaning prevents these contaminants from interfering with your new finish.
- Solution: Mix a solution of warm water and a degreaser (like TSP substitute or a dedicated kitchen degreaser).
- Wipe Down: Use a clean cloth or sponge to wipe down both sides of each cabinet door and all cabinet frames.
- Rinse: Wipe down all surfaces again with a clean cloth dampened with plain water to remove any degreaser residue.
- Dry: Allow all surfaces to dry completely.
Step 3: Cabinet Door Sanding – Creating a Smooth Surface
Sanding is vital for proper adhesion of primer and paint or stain. It also helps remove any imperfections.
- Initial Sanding (Coarse Grit): If your doors have a thick, glossy, or damaged finish, start with 80-100 grit sandpaper. This will remove the old finish and create a good base for adhesion.
- Medium Sanding (120-150 Grit): After the initial sanding, move to 120-150 grit sandpaper. This smooths out the surface and removes any scratches left by the coarser grit.
- Fine Sanding (180-220 Grit): For a super-smooth finish, especially if you are painting, finish with 180-220 grit sandpaper. This prepares the surface for primer.
- Sanding Technique: Always sand in the direction of the wood grain. For flat surfaces, an orbital sander makes the job faster. For raised panels or detailed areas, use a sanding block or fine-grit sandpaper by hand.
- Dust Removal: After each sanding stage, use a vacuum with a brush attachment, then a tack cloth, to remove all dust. This is critical for a smooth finish.
Step 4: Repairing Imperfections – Filling and Patching
Examine your cabinet doors for any holes, dents, or cracks.
- Wood Filler: Use wood filler or putty to fill any imperfections. Apply it with a putty knife, pressing it firmly into the hole. Slightly overfill, as the filler may shrink a bit as it dries.
- Drying Time: Allow the wood filler to dry completely according to the manufacturer’s instructions.
- Sanding Again: Once dry, sand the filled areas smooth with fine-grit sandpaper, feathering the edges into the surrounding wood.
Step 5: Priming – The Foundation for a Flawless Finish
Primer provides a uniform base and ensures your paint or stain adheres well.
- Choosing a Primer:
- For Painted Cabinets: Use a high-quality bonding primer, especially if you’re painting over laminate or a slick surface. A stain-blocking primer is good if there are any wood tannins that might bleed through.
- For Stained Cabinets: You generally do not need a primer for staining; the stain acts as the color layer. However, if you want to achieve a specific color or block old stains, you might use a tinted primer.
- Application:
- Doors: Lay doors flat on your drop cloths. Apply a thin, even coat of primer using a high-quality synthetic brush for edges and details, and a foam roller for flat surfaces.
- Cabinet Frames: Prime the cabinet frames similarly.
- Drying: Let the primer dry completely according to the product instructions.
- Light Sanding: Once dry, lightly sand the primed surfaces with 220-grit sandpaper. This scuffs the primer, creating a better surface for the topcoat. Wipe away dust with a tack cloth.
Step 6: Painting Your Kitchen Cabinets – Achieving a Smooth Finish
This is where your kitchen cabinet update truly begins to take shape.
- Choosing Paint: Opt for a durable, high-quality cabinet paint. Enamel paints, particularly acrylic latex enamels, offer excellent durability and a smooth finish.
- Application Methods:
- Spraying (for pros or ambitious DIYers): Using a paint sprayer (airless or HVLP) provides the smoothest, most professional finish, but requires practice and a well-ventilated area.
- Rolling and Brushing (DIY friendly): This is the most common method for DIY cabinet refinishing.
- Doors: Lay doors flat. Use a high-quality synthetic brush for the edges and any detailed areas. Then, use a foam roller to apply thin, even coats to the main surfaces. Avoid overloading the roller, which can cause drips.
- Cabinet Frames: Brush and roll the cabinet frames.
- Thin Coats are Key: Apply multiple thin coats rather than one thick coat. This prevents drips and ensures even coverage.
- Drying Time Between Coats: Allow each coat to dry thoroughly according to the paint manufacturer’s instructions. This is crucial for durability.
- Light Sanding Between Coats: After each coat of paint (except the final one), lightly sand with 220-grit or finer sandpaper and wipe with a tack cloth. This helps level out any minor imperfections and promotes adhesion of the next coat.
Step 7: Staining Your Cabinet Doors – Enhancing Natural Beauty
If you’ve chosen to stain your cabinet doors, follow these steps.
- Wood Preparation: Ensure your cabinet doors are sanded to at least 150-grit, with a final pass of 180-220 grit for the best stain absorption.
- Applying Stain:
- Technique: Apply stain evenly with a foam brush, cloth, or a staining pad. Work in the direction of the wood grain.
- Wiping Off Excess: After letting the stain penetrate for the time recommended by the manufacturer (usually 5-15 minutes), wipe off the excess stain with a clean, lint-free cloth, again following the grain.
- Multiple Coats for Deeper Color: For a deeper or richer color, apply additional coats of stain, allowing each coat to dry before applying the next.
- Even Coverage: Be mindful of getting an even coat and wiping off excess uniformly to avoid blotchiness.
Step 8: Applying a Topcoat – Protection and Shine
A topcoat protects your painted or stained cabinets and adds durability.
- Choosing a Topcoat:
- For Painted Cabinets: A clear polycrylic or a cabinet-specific topcoat is recommended. Polyurethane can yellow over time, especially over lighter colors.
- For Stained Cabinets: Polyurethane (oil-based or water-based) or a durable varnish is ideal.
- Application:
- Doors: Apply thin, even coats using a high-quality synthetic brush or a foam roller.
- Cabinet Frames: Apply to the frames as well.
- Drying and Sanding: Allow each coat to dry completely. Lightly sand with very fine-grit sandpaper (320-400 grit) between coats and wipe with a tack cloth.
- Number of Coats: Typically, two to three coats are sufficient for good protection.
Step 9: Reassembling Your Kitchen Cabinets
Once everything is fully dry and cured (check product instructions, as curing takes longer than drying), it’s time to put your kitchen back together.
- Reattach Hardware: Screw hinges, knobs, and pulls back onto the cabinet doors.
- Rehang Doors: Carefully reattach the cabinet doors to their corresponding frames using your pre-labeled numbers.
- Final Touches: Step back and admire your work!
Refinishing Cabinet Hardware – A Small Detail, Big Impact
Don’t forget your cabinet hardware! Refinishing cabinet hardware can complete the look of your kitchen cabinet update.
Cleaning and Preparing Hardware
- Remove Hardware: As mentioned earlier, remove knobs and pulls along with the doors.
- Clean Thoroughly: Use a degreaser and warm water to remove any grease or grime. If they are heavily tarnished, you might need a specialized metal cleaner.
- Light Sanding (if needed): For certain finishes or to help paint adhere, a light sanding with fine-grit sandpaper can be beneficial.
Refinishing Options for Hardware
- Spray Paint: This is the easiest and most effective method for updating hardware.
- Primer: Use a spray primer designed for metal.
- Paint: Choose a spray paint suitable for metal, available in countless colors and finishes (e.g., matte black, brushed nickel, antique brass).
- Application: Apply thin, even coats in a well-ventilated area, holding the can about 8-12 inches away. Allow adequate drying time between coats.
- Rub ‘n Buff: This product adds a metallic sheen and can revive old or dull hardware. Apply with a finger or cloth and buff to a shine.
- New Hardware: If your old hardware is beyond repair or you want a completely new look, replacing it is also an option.
Tips for the Best Way to Refinish Cabinets
Achieving the best results often comes down to attention to detail and following best practices.
- Work in a Well-Ventilated Area: Especially when painting or using spray finishes.
- Temperature and Humidity: Avoid painting or staining in extreme temperatures or high humidity, as this can affect drying and curing.
- Patience is Key: Rushing the process, especially drying times between coats, can lead to a subpar finish.
- Test Samples: If you’re unsure about a color or stain, test it on a scrap piece of wood or an inconspicuous area of the cabinet door.
- Invest in Quality Tools and Materials: Using good brushes, rollers, and paints will make a significant difference in the final outcome.
- Cleanliness: Maintain a clean work area throughout the project. Dust is the enemy of a smooth finish.
Frequently Asked Questions (FAQ)
Q1: How long does it take to refinish kitchen cabinet doors?
A1: The time can vary greatly depending on the size of your kitchen, the chosen finish, and your preparation. However, a typical DIY cabinet door refinishing project can take anywhere from a weekend for a small kitchen to a full week or more for larger kitchens, including drying and curing times.
Q2: Can I paint over stained cabinets?
A2: Yes, you can paint over stained cabinets. The key is proper preparation. You’ll need to thoroughly clean the cabinets, sand them well to create a good surface for adhesion, and then apply a quality primer before painting.
Q3: Do I need to prime if I’m staining?
A3: Generally, no. Stain is designed to penetrate and color the wood directly. However, if you are using a wood conditioner to ensure even stain absorption, or if you are trying to achieve a very specific color that might require a tinted primer, then you might use a primer.
Q4: What’s the most durable finish for kitchen cabinets?
A4: For painted cabinets, a high-quality acrylic enamel paint is very durable. For stained cabinets, a good quality polyurethane or a lacquer-based topcoat will offer excellent protection against moisture and wear.
Q5: How do I prevent brush marks when painting cabinets?
A5: Use high-quality brushes with synthetic bristles for latex paints. Apply paint in thin, even coats. Avoid overworking the paint. Rolling with a high-density foam roller for flat surfaces and using a good quality brush for edges and details will help minimize brush marks.
Q6: Can I refinish laminate cabinets?
A6: Yes, you can refinish laminate cabinets, but it requires specific preparation. You’ll need to thoroughly clean and degrease the laminate, then lightly sand it to create a surface that primer can adhere to. Use a bonding primer specifically designed for slick surfaces before painting. Staining laminate is generally not recommended as it doesn’t absorb stain.
Q7: How long should I wait before reassembling cabinets?
A7: Always check the manufacturer’s instructions for both paint and topcoat drying and curing times. While doors might feel dry to the touch in a few hours, full curing can take several days or even weeks. Reassembling too soon can lead to damage. It’s best to wait at least 24-48 hours after the final coat before reattaching the doors, and longer if possible for full curing.
Refinishing your kitchen cabinet doors is a rewarding project that can dramatically transform your kitchen’s appearance and functionality. With careful preparation and the right techniques, you can achieve beautiful, long-lasting results that you’ll be proud of for years to come. Happy DIYing!