
Can you redo a kitchen yourself? Yes, many homeowners can successfully redo a kitchen with careful planning and effort. This guide will walk you through every step of a successful kitchen renovation, from initial concept to final touches. A kitchen remodel is a significant undertaking, but with the right approach, it can transform your home. This kitchen makeover can be a rewarding experience, whether you’re looking for a full gut job or just a refresh.
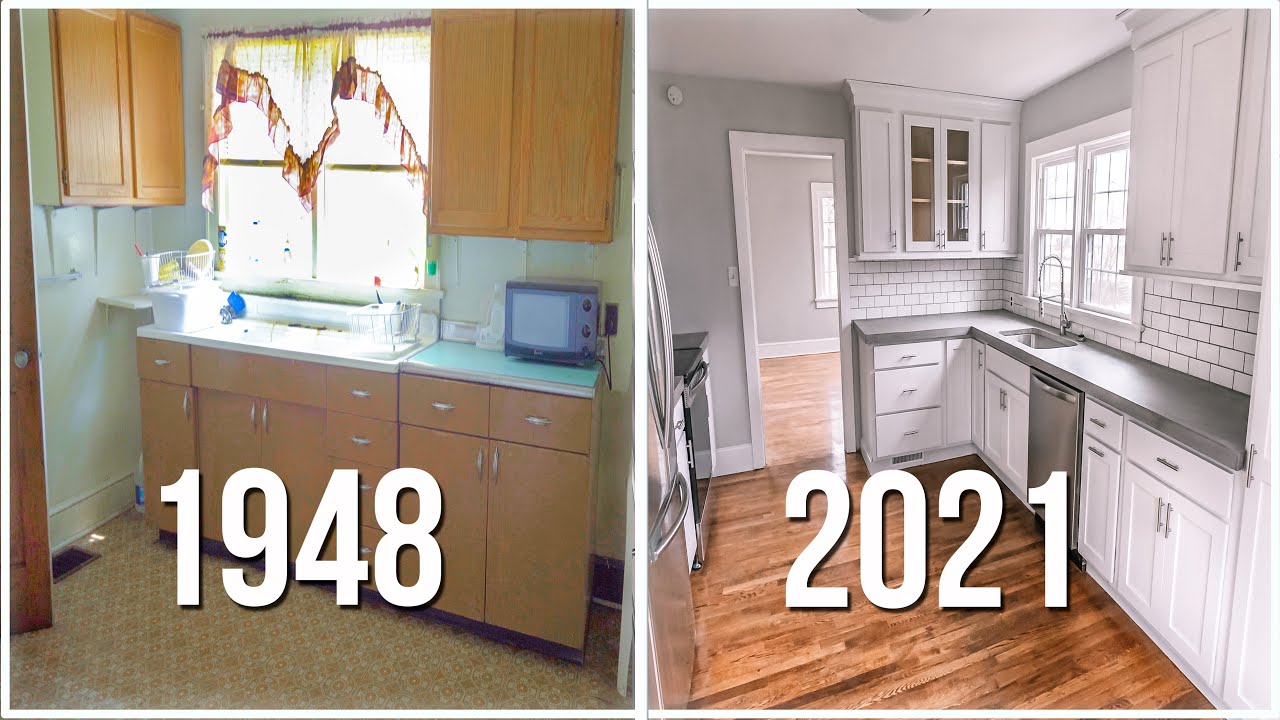
Image Source: i.ytimg.com
Planning Your Kitchen Renovation
The first step in any major home improvement project, especially a kitchen renovation, is thorough planning. This isn’t just about picking out pretty colors; it’s about creating a functional, beautiful space that meets your needs and budget.
Setting Your Budget
A realistic budget is crucial for a successful kitchen remodel. Without one, costs can quickly spiral out of control.
- Determine Your Overall Spending Limit: Be honest about what you can afford. Consider savings, home equity loans, or personal loans.
- Break Down Costs: Allocate funds for different aspects:
- Cabinets: Often the largest expense.
- Countertops: Varies greatly by material.
- Appliances: Factor in new refrigerators, stoves, dishwashers, etc.
- Flooring: Consider durability and style.
- Backsplash: Adds personality and protection.
- Lighting: Essential for both function and ambiance.
- Plumbing & Electrical: Updates can be necessary.
- Labor: If you’re hiring professionals.
- Permits: Check local requirements.
- Contingency Fund (15-20%): Always set aside extra for unexpected issues.
Creating a Realistic Timeline
A kitchen renovation can take anywhere from a few weeks to several months. Creating a timeline helps manage expectations and keeps the project on track.
- Phase 1: Planning & Design (2-4 weeks): Budgeting, layout, material selection.
- Phase 2: Demolition (1-3 days): Removing old cabinets, flooring, etc.
- Phase 3: Rough-in Work (1-2 weeks): Plumbing, electrical, HVAC adjustments.
- Phase 4: Installation (2-4 weeks): Cabinets, countertops, appliances, flooring.
- Phase 5: Finishing Touches (1-2 weeks): Backsplash, lighting, paint, final inspections.
Designing Your Dream Kitchen
This is where your vision comes to life. A good kitchen design considers both aesthetics and practicality.
Layout Considerations
The layout dictates how you move and work in your kitchen.
- Work Triangle: The classic concept connects the sink, stove, and refrigerator. Aim for efficient movement between these points.
- Kitchen Zones: Modern designs often break the kitchen into zones: prep, cooking, cleaning, and storage.
- Island or Peninsula: Can provide extra counter space, storage, and seating.
- Appliance Placement: Consider workflow and accessibility.
Material Selection
Choosing the right materials impacts durability, maintenance, and style.
- Cabinets: Options include stock, semi-custom, and custom. Materials range from particleboard to solid wood.
- Countertops: Popular choices include granite, quartz, marble, laminate, and solid surface. Each has pros and cons regarding cost, durability, and maintenance.
- Flooring: Vinyl, tile, hardwood, and laminate are common. Consider water resistance and ease of cleaning.
- Backsplash: Tile, stone, or glass can add a decorative element and protect walls.
Hiring Professionals vs. DIY Kitchen
Deciding whether to tackle parts of the project yourself or hire professionals is a key decision.
- DIY Pros: Cost savings, satisfaction of doing it yourself.
- DIY Cons: Requires time, skill, tools, and can be stressful. Mistakes can be costly.
- Professional Pros: Expertise, speed, quality of work, often faster completion.
- Professional Cons: Higher cost.
If you’re considering a DIY kitchen project, focus on tasks you’re comfortable with. Cabinet installation and backsplash tiling are often good starting points for DIYers.
Executing Your Kitchen Renovation
Once the planning is complete, it’s time to get to work.
Demolition
This is the messy part, but it’s essential for preparing the space for new elements.
- Safety First: Wear protective gear like gloves, safety glasses, and a dust mask. Turn off electricity and water to the kitchen area.
- Careful Removal: If salvaging any old materials, remove them carefully. Otherwise, focus on efficient removal of cabinets, countertops, flooring, and fixtures.
- Waste Disposal: Have a plan for disposing of debris, such as renting a dumpster.
Plumbing and Electrical Updates
This is often best left to licensed professionals to ensure safety and compliance with building codes.
- Plumbing: Moving pipes for a new sink or dishwasher location requires expertise.
- Electrical: Updating wiring, adding new outlets, or moving circuits for appliances and new kitchen lighting needs a qualified electrician.
Cabinet Replacement
Cabinets are the backbone of your kitchen’s functionality and aesthetics.
Choosing Your Cabinets
- Style: Shaker, slab, raised panel, or inset doors?
- Material: Solid wood (maple, oak, cherry), MDF, or plywood?
- Construction: Framed or frameless? Drawer construction (dovetail, ball-bearing glides)?
- Finish: Painted, stained, or laminated?
Installing Cabinets
- Layout and Marking: Measure and mark wall studs for secure mounting.
- Wall Cabinets First: Start with upper cabinets, using shims to ensure they are level and plumb. Secure them firmly to wall studs.
- Base Cabinets: Place base cabinets, ensuring they are level and securely fastened to the floor and wall.
- Check for Squareness: Ensure cabinets are aligned and square.
Countertop Installation
Countertops are a major focal point and a significant investment.
Measuring and Templating
- Accurate Measurements: Measure cabinet bases precisely, accounting for any overhang.
- Professional Templating: For stone or solid surface countertops, the fabricator will create precise templates after cabinets are installed.
Material Considerations: A Quick Look
| Material | Pros | Cons | Cost (Approx. per sq ft) |
|---|---|---|---|
| Granite | Durable, heat-resistant, unique patterns | Porous (needs sealing), can chip | $50 – $200+ |
| Quartz | Non-porous, stain-resistant, uniform look | Can be damaged by extreme heat, less natural look | $60 – $250+ |
| Marble | Beautiful veining, classic look | Porous, stains easily, scratches, needs regular sealing | $75 – $250+ |
| Laminate | Affordable, wide range of styles, durable | Can chip or scratch, heat sensitive, not repairable | $20 – $60 |
| Solid Surface | Seamless, non-porous, repairable, versatile | Can scratch, sensitive to heat | $50 – $150 |
Installation Process
- Delivery and Placement: Countertops are typically delivered and installed by professionals.
- Seaming and Sealing: Seams are minimized and sealed for a smooth finish.
- Sink and Faucet Installation: The sink and faucet are usually installed during this phase.
Kitchen Flooring
The right kitchen flooring needs to be durable, easy to clean, and visually appealing.
Popular Flooring Options
- Tile (Ceramic/Porcelain): Highly durable, water-resistant, and easy to clean. Many styles and patterns available. Can be cold underfoot.
- Vinyl (Sheet/Plank): Water-resistant, comfortable underfoot, and budget-friendly. Modern vinyl planks can mimic wood or stone convincingly.
- Hardwood: Warm and beautiful, but can be susceptible to moisture and scratches. Requires proper sealing.
- Laminate: Affordable, durable, and easy to install. Often designed to look like wood or tile. Can be prone to water damage.
Installation Tips
- Subfloor Preparation: Ensure the subfloor is clean, level, and smooth.
- Expansion Gaps: Allow for expansion and contraction of materials, especially wood and laminate.
- Grouting (for Tile): Choose a grout color that complements your tiles and seal it for stain resistance.
Kitchen Backsplash Installation
A kitchen backsplash protects your walls from splatters and adds a decorative touch.
Choosing Your Backsplash Material
- Ceramic/Porcelain Tile: Versatile, affordable, and easy to clean.
- Glass Tile: Reflects light, creating a bright and airy feel. Can be more expensive.
- Natural Stone: Offers a luxurious and unique look, but can be porous and require sealing.
- Metal Tile: Modern and sleek, but can show fingerprints.
Installation Steps
- Surface Preparation: Clean the wall thoroughly.
- Layout and Spacing: Plan your tile layout, considering any patterns or mosaics. Use spacers for consistent grout lines.
- Adhesive Application: Apply tile adhesive evenly to the wall or the back of the tiles.
- Tile Placement: Press tiles firmly into the adhesive.
- Grouting: Once the adhesive has dried, apply grout and wipe away excess.
- Sealing: Seal grout lines to protect against stains.
Kitchen Lighting
Good kitchen lighting is essential for both task performance and creating atmosphere.
Types of Kitchen Lighting
- Ambient Lighting: Provides overall illumination. Recessed ceiling lights or a central pendant light are common.
- Task Lighting: Focused light for specific work areas like countertops and the stove. Under-cabinet lighting is excellent for this.
- Accent Lighting: Highlights features like cabinetry or artwork. It can be in-cabinet lighting or spotlights.
Planning Your Lighting Scheme
- Layering Light: Combine different types of lighting for a well-lit and inviting space.
- Dimmer Switches: Allow for control over light intensity, enhancing flexibility.
- Fixture Style: Choose fixtures that complement your kitchen’s overall design.
Finishing Touches and Final Checks
The final stages bring everything together and ensure your new kitchen is ready to use.
Painting and Finishing
- Wall Preparation: Clean walls, fill any holes or imperfections, and prime if necessary.
- Choosing Paint: Opt for durable, washable paint in a finish suitable for kitchens (e.g., satin or semi-gloss).
- Application: Apply paint evenly with rollers and brushes, allowing adequate drying time between coats.
Appliance Installation and Hook-up
- Follow Manufacturer Instructions: Each appliance will have specific installation requirements.
- Plumbing and Electrical Connections: Ensure proper hook-ups for refrigerators with water dispensers, dishwashers, and ranges.
Final Inspection and Cleanup
- Check Everything: Inspect all new installations for proper function, stability, and finish.
- Deep Clean: Thoroughly clean all surfaces, inside and out, removing any dust or debris from the renovation.
- Remove Protection: Take off any protective coverings from new surfaces.
Maintaining Your Redone Kitchen
Proper maintenance will keep your newly renovated kitchen looking great for years to come.
Cleaning and Care
- Countertops: Use specific cleaners recommended for your countertop material. Avoid harsh chemicals.
- Cabinets: Wipe down with a damp cloth and mild soap. Avoid abrasive cleaners.
- Flooring: Sweep or vacuum regularly. Clean spills immediately, especially on wood or laminate.
- Appliances: Follow manufacturer guidelines for cleaning and maintenance.
Regular Inspections
- Check for Leaks: Periodically inspect under sinks and around appliances for any signs of leaks.
- Tighten Fixtures: Ensure cabinet handles, drawer pulls, and faucet fixtures are secure.
Frequently Asked Questions (FAQ)
Q1: What is the average cost of a kitchen remodel?
A1: The cost can vary significantly depending on the scope of the renovation, the quality of materials chosen, and whether you hire professionals. A minor kitchen update might cost a few thousand dollars, while a high-end, full gut renovation can easily run into tens of thousands. A good ballpark figure for a mid-range kitchen renovation is often between $20,000 and $50,000, but this is highly variable.
Q2: How long does a kitchen renovation typically take?
A2: A typical kitchen remodel can take anywhere from 6 to 8 weeks for a standard-sized kitchen if you’re hiring professionals and ordering materials in advance. However, this can extend to several months if you encounter unexpected issues, choose custom or special-order items, or if you’re doing a significant portion as a DIY kitchen project.
Q3: Can I update my kitchen without replacing the cabinets?
A3: Absolutely! You can often refresh your kitchen by painting or refinishing existing cabinets. You can also replace the cabinet doors and drawer fronts for a completely new look. New hardware like knobs and pulls can also make a big difference.
Q4: What are the most durable kitchen countertop materials?
A4: Quartz and granite are generally considered among the most durable kitchen countertop materials. They are resistant to scratches, heat, and stains. Porcelain and some types of solid surface materials also offer excellent durability.
Q5: What is the best flooring for a kitchen?
A5: The “best” flooring depends on your priorities. For durability and water resistance, porcelain tile or high-quality vinyl are excellent choices. For warmth and a classic look, hardwood is popular, but requires more care. Consider ease of cleaning, comfort underfoot, and budget when making your decision.
Q6: Do I need a permit for a kitchen renovation?
A6: It depends on your local building codes and the extent of the renovation. Structural changes, moving plumbing or electrical lines, or adding or removing walls typically require permits. It’s always best to check with your local building department before starting any work.
This comprehensive guide should equip you with the knowledge to approach your kitchen renovation with confidence. Remember, careful planning, thoughtful material selection, and attention to detail are key to achieving a beautiful and functional kitchen remodel.