
Can you paint wooden kitchen cupboards? Yes, you absolutely can! Painting your wooden kitchen cupboards is a fantastic way to update your kitchen’s look without a major renovation. This guide will walk you through every step, from preparing your cabinets to applying the final coat of paint, ensuring a beautiful, lasting finish. This kitchen cabinet painting tutorial is designed for DIYers of all skill levels.
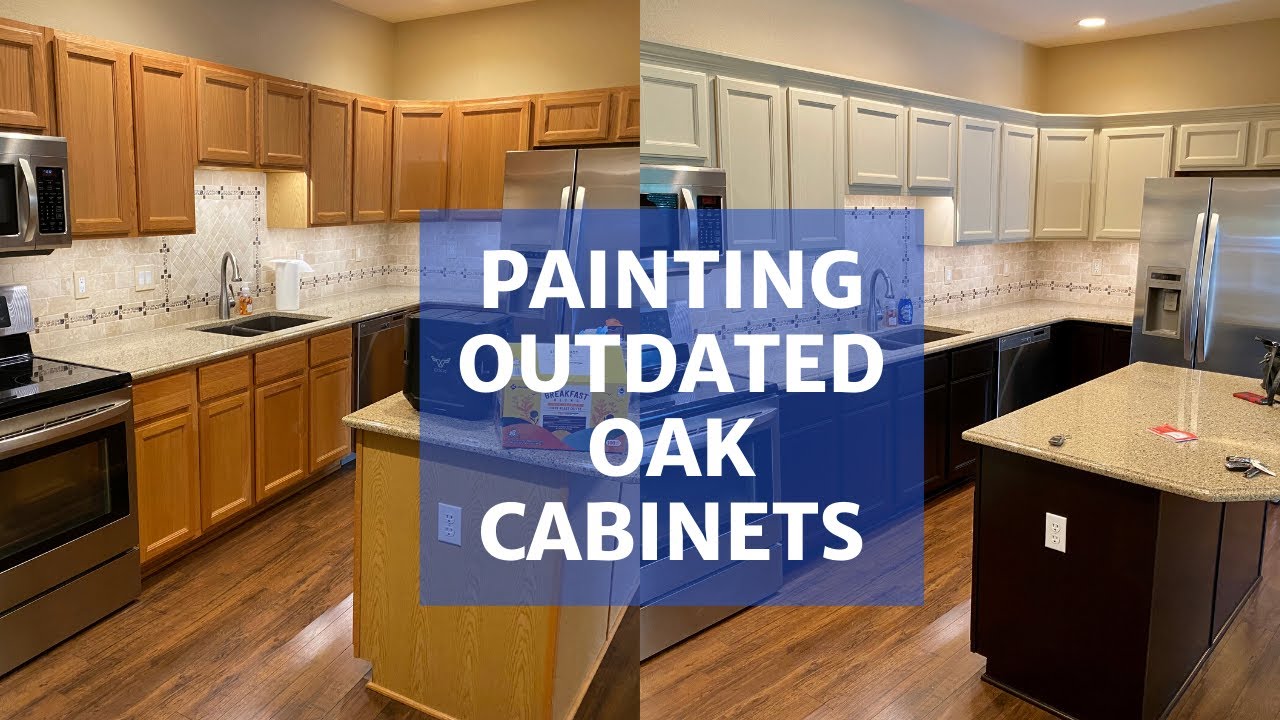
Image Source: i.ytimg.com
Why Paint Your Kitchen Cupboards?
Updating your kitchen doesn’t always mean a complete overhaul. Painting your wooden cabinets can:
- Transform your kitchen’s aesthetic: A fresh coat of paint can dramatically change the style and feel of your kitchen.
- Be budget-friendly: Compared to replacing cabinets, painting is a significantly more affordable option.
- Revitalize worn-out cabinets: If your existing cabinets are in good structural shape but the finish is dated or damaged, painting is an excellent solution.
- Allow for customization: You can choose any color to match your decor, from classic whites and grays to bold statement hues.
This comprehensive guide will cover everything you need to know for a successful diy cabinet makeover.
Step 1: Planning Your Project
Before you pick up a brush, careful planning is key. This ensures you have the right materials and a clear vision for the final outcome.
Deciding on Your Color and Finish
Your color choice is the most significant decision. Consider:
- Your kitchen’s overall style: Modern, farmhouse, traditional, eclectic?
- Natural light: Lighter colors can brighten a dark kitchen.
- Existing decor: Match or complement your countertops, backsplash, and flooring.
- Durability: Kitchens see a lot of action, so a durable finish is important.
You can also choose between different finishes:
- Matte: Soft, sophisticated, hides imperfections well. Can be less durable and harder to clean.
- Eggshell/Satin: The most popular choice for kitchens. Offers a slight sheen, is durable, and easy to clean.
- Semi-Gloss: Offers a noticeable shine. Very durable and easy to wipe down, but shows imperfections more.
- High-Gloss: Very shiny and modern. Extremely durable but highlights every flaw.
Choosing the Best Paint for Kitchen Cabinets
Not all paints are created equal, especially for a high-traffic area like your kitchen. The best paint for kitchen cabinets offers durability, washability, and adhesion.
- Alkyd Enamel (Oil-Based): Traditionally known for its hard, durable finish. However, it has strong fumes, requires mineral spirits for cleanup, and yellows over time, especially in lighter colors.
- Water-Based Acrylic Enamel: Modern water-based paints, particularly those labeled “cabinet enamel” or “high-performance acrylic enamel,” are excellent choices. They offer good durability, are low in VOCs (Volatile Organic Compounds), and clean up easily with soap and water.
- Chalk Paint Kitchen Cabinets: Chalk paint is beloved for its matte finish and minimal prep. However, it requires a durable wax or polycrylic topcoat to withstand the wear and tear of a kitchen. It’s a good option if you love the look and are prepared for the extra sealing.
Table: Paint Types for Kitchen Cabinets
| Paint Type | Pros | Cons | Best For |
|---|---|---|---|
| Water-Based Acrylic Enamel | Low VOCs, easy cleanup, good durability, wide color selection | Can be less durable than oil-based without proper prep and primer | Most kitchen cabinet projects, DIY-friendly |
| Alkyd Enamel (Oil-Based) | Very hard, durable finish, excellent adhesion | Strong fumes, difficult cleanup, can yellow over time | High-traffic kitchens needing maximum durability |
| Chalk Paint | Minimal prep, matte finish, beautiful patina, good adhesion | Requires robust topcoat for durability, can be prone to scratching | Distressed or vintage looks, those prioritizing ease |
| Latex Enamel | Water-based, easier cleanup, lower VOCs | Can be less durable than acrylic enamels unless specifically formulated | Light-use areas or as a primer |
Gathering Your Supplies
Having all your supplies ready before you start will make the process much smoother.
Essential Supplies:
- Screwdrivers or drill: To remove cabinet doors and hardware.
- Putty knife: For scraping and removing old finish if needed.
- Degreaser or TSP substitute: For thorough cleaning.
- Sponges, rags, buckets: For cleaning.
- Painter’s tape: For masking.
- Drop cloths or plastic sheeting: To protect your floors and countertops.
- Sandpaper: Various grits (e.g., 120-grit, 180-grit, 220-grit).
- Sanding block or electric sander: For efficient sanding.
- Tack cloths: For removing dust after sanding.
- Primer: High-quality bonding primer.
- Paint: Your chosen cabinet paint (water-based acrylic enamel is recommended for most).
- Applicators:
- High-quality synthetic bristle brushes (for cutting in edges).
- High-density foam rollers or small microfiber rollers (for smooth surfaces).
- Paint trays.
- Wood filler or Bondo: For filling holes or imperfections.
- Small putty knife or spatula: For applying wood filler.
- Topcoat (optional but recommended for some paints): Polycrylic or a durable furniture wax if using chalk paint.
- Safety gear: Gloves, safety glasses, respirator mask (especially if sanding or using oil-based paint).
Step 2: Prepping Wooden Cabinets for Paint
This is arguably the most crucial step for a professional-looking finish. Proper prepping ensures paint adheres well and lasts.
Removing Doors and Hardware
- Label Everything: As you remove doors and drawers, label them with masking tape and a marker. This ensures you put them back in the right place. For example, “Upper Left,” “Drawer Front 3.”
- Store Hardware: Place all screws, hinges, and knobs in separate, labeled plastic bags or containers. This prevents them from getting lost.
- Remove Doors and Drawer Fronts: Use a screwdriver or drill to detach the cabinet doors from the hinges and the drawer fronts from the drawers.
Cleaning Wooden Cupboards
Thorough cleaning is essential to remove grease, grime, and any residue that could prevent paint adhesion.
- Degrease: Use a good degreaser like a TSP (trisodium phosphate) substitute or a strong dish soap mixed with warm water. Apply it with a sponge or rag and scrub gently.
- Rinse: Wipe down all surfaces with a clean, damp cloth to remove any degreaser residue.
- Dry: Ensure all surfaces are completely dry before proceeding.
Filling Holes and Imperfections
If you’re changing hardware or have minor dings, you’ll need to fill them.
- Choose Filler: Use a good quality wood filler for small dents and nail holes. For larger gouges or if you’re filling existing hardware holes, a Bondo-type filler might be more durable.
- Apply Filler: Using a putty knife or spatula, press the filler into the hole or crack. Slightly overfill the area, as it will shrink slightly as it dries.
- Let it Dry: Allow the filler to dry completely according to the product instructions.
- Sand Smooth: Once dry, sand the filled areas flush with the surrounding wood.
Sanding Kitchen Cabinets
Sanding creates a smooth surface for the primer and paint to adhere to. This is a key part of refinishing wood cabinets.
- Start with a Medium Grit: For most wooden cabinets with a smooth finish, start with 120-grit sandpaper. If there’s a thicker finish or some roughness, you might start with 100-grit.
- Sand All Surfaces: Sand all cabinet doors, drawer fronts, and the cabinet frames. Focus on creating a dull, matte surface. You don’t need to remove the old finish entirely, just scuff it up.
- Use a Sanding Block or Sander: A sanding block is good for edges and details. An orbital sander can speed up the process for larger, flat areas.
- Progress to Finer Grits: After the initial sanding, use 180-grit sandpaper for a smoother finish.
- Final Sanding: For a super smooth feel, finish with 220-grit sandpaper.
- Dust Removal: This is critical. Use a vacuum with a brush attachment to remove as much dust as possible. Then, wipe down all surfaces with a damp cloth or tack cloth. Tack cloths are excellent for picking up fine dust particles. Repeat this dust removal process until no dust remains.
Priming Kitchen Cabinets
Primer is essential for good paint adhesion and coverage, especially when changing from a dark to a light color or painting over a slick surface.
- Choose the Right Primer: Use a high-quality bonding primer. For wood, especially if there are knots or tannins that might bleed through, a stain-blocking primer is ideal. Look for a water-based formula that’s compatible with your chosen topcoat.
- Application:
- Brush: Use a quality synthetic brush for edges and detailed areas.
- Roller: Use a high-density foam roller or a small microfiber roller for flat surfaces.
- Coat Evenly: Apply a thin, even coat of primer. Avoid drips and runs.
- Allow to Dry: Let the primer dry completely according to the manufacturer’s instructions.
- Light Sanding: Once dry, lightly sand the primed surfaces with 220-grit sandpaper or a sanding sponge. This will create a smooth surface for the paint and knock down any imperfections from the primer.
- Dust Removal: Again, use a vacuum and tack cloth to remove all dust.
- Second Coat (If Needed): If the primer coverage is uneven, or if you’re painting a very dark color over a light one, you may need a second coat of primer. Follow the same sanding and dust removal steps.
Step 3: Painting Your Kitchen Cupboards
Now for the exciting part! The cabinet finishing techniques you use here will impact the final look.
Applying the Paint
- Stir, Don’t Shake: Stir your paint thoroughly. Shaking can create air bubbles.
- Paint Doors and Drawer Fronts First:
- Lay them flat: Work on a clean, dust-free surface. You can place doors on sawhorses or on top of upside-down plastic containers to keep them elevated.
- Brush Edges: Start with your brush to paint the edges and any detailed areas.
- Roll Surfaces: Use your roller for the main surfaces. Apply thin, even coats. Roll in one direction for a consistent finish.
- Avoid Overworking: Don’t go back over areas too many times with the roller, as this can lead to an uneven texture.
- Paint Cabinet Frames:
- Masking: Use painter’s tape to protect countertops, backsplashes, and appliances.
- Brush and Roll: Use a brush for corners and edges, and a roller for the larger flat areas. Work in manageable sections.
- Maintain a Wet Edge: Try to maintain a “wet edge” by painting from one unpainted section into the painted section to avoid lap marks.
Applying Multiple Coats
- Thin Coats are Key: Apply thin, even coats of paint rather than one thick, heavy coat. This prevents drips, runs, and brush marks, and ensures better adhesion.
- Drying Time: Allow each coat to dry thoroughly according to the paint manufacturer’s instructions. This is crucial for durability. Rushing this step can ruin your finish.
- Light Sanding Between Coats: After the first coat of paint is dry, lightly sand with 220-grit sandpaper or a fine-grit sanding sponge. This helps to knock down any imperfections or dust nibs and creates a smoother surface for the next coat.
- Dust Removal: Always remove dust with a tack cloth after sanding between coats.
Applying a Topcoat (Optional but Recommended)
For added durability and protection, especially with chalk paint or some water-based enamels, a topcoat is advisable.
- Polycrylic: This is a water-based polyurethane that dries clear and is very durable. It’s excellent for kitchen cabinets. Apply 2-3 thin coats with a high-quality synthetic brush or foam applicator, allowing for drying and light sanding (with 320-grit or higher) between coats.
- Furniture Wax (for Chalk Paint): If you’ve used chalk paint, a good quality furniture wax will seal and protect the finish. Apply thinly with a wax brush or lint-free cloth, buffing it in well. You may need to reapply wax periodically.
Step 4: Reassembling Your Kitchen
Once all parts are painted and dry, it’s time to put your kitchen back together.
- Reattach Hardware:
- New Hardware: If you’ve opted for new knobs and pulls, install them now.
- Old Hardware: Reattach your original hardware.
- Rehang Doors: Carefully rehang the cabinet doors onto the hinges. Adjust hinges as needed so the doors hang straight and close properly.
- Reinsert Drawers: Slide the drawer boxes back into place and reattach the drawer fronts.
Popular Cabinet Finishing Techniques
When it comes to cabinet finishing techniques, there are various approaches to achieve different looks and levels of durability.
Spray Painting Kitchen Cabinets
For a factory-smooth finish, spray painting is an excellent option.
- Pros: Achieves a very smooth, even finish with no brush strokes or roller marks. Faster application for large areas.
- Cons: Requires specialized equipment (air sprayer, compressor). Significant masking is needed to protect surrounding areas. Requires practice to achieve an even coat without runs.
- Process: Requires the same prep steps. Use thin, even coats, working in a well-ventilated area, ideally with a spray shelter or in an outdoor space.
Using Chalk Paint Kitchen Cabinets
Chalk paint is popular for its ease of use and matte finish.
- Pros: Minimal prep (often just cleaning and degreasing). Quick drying time. Beautiful matte, chalky finish.
- Cons: Requires significant sealing to be durable enough for kitchen use. Can be prone to scratching or water marks if not sealed properly.
- Process: After cleaning, apply chalk paint in thin coats. Once dry, apply 2-3 coats of furniture wax or a durable polycrylic topcoat.
Refinishing Wood Cabinets with Stain and Sealant
This method preserves the natural wood grain.
- Pros: Highlights the beauty of the wood. Offers a natural, warm look.
- Cons: Requires more extensive sanding to remove the old finish entirely. Stain color can be unpredictable.
- Process: Strip old finish, sand down to bare wood, apply stain, and then seal with a durable polyurethane or varnish.
Frequently Asked Questions (FAQ)
Q1: Do I need to sand kitchen cabinets before painting?
A: Yes, sanding is crucial. It scuffs up the existing finish, creating a surface for the primer and paint to adhere to properly. This step is vital for a long-lasting finish.
Q2: What is the best type of paint for kitchen cabinets?
A: The best paint for kitchen cabinets is typically a high-quality water-based acrylic enamel specifically formulated for cabinets. It offers durability, washability, and a smooth finish with lower VOCs than oil-based paints.
Q3: Can I use chalk paint on my kitchen cabinets?
A: Yes, you can use chalk paint on kitchen cabinets. However, chalk paint needs a very durable topcoat (like multiple layers of furniture wax or a polycrylic) to withstand the moisture and wear in a kitchen environment.
Q4: How many coats of paint do I need?
A: Typically, you’ll need two to three thin coats of paint for good coverage and durability. Always allow adequate drying time between coats, and consider a light sanding and dust removal between coats for the smoothest finish.
Q5: What are good cabinet finishing techniques?
A: Good cabinet finishing techniques include using high-density foam rollers for smooth surfaces, quality synthetic brushes for edges, and proper application of primer and topcoats. Spray painting is also an option for a factory-like finish.
Q6: How do I prep wooden cabinets for paint?
A: Prepping wooden cabinets involves cleaning them thoroughly to remove grease and grime, filling any holes or imperfections with wood filler, sanding the surfaces to create a dull, matte finish, and then removing all dust.
Q7: Can I paint over existing varnish or lacquer?
A: Yes, you can paint over varnish or lacquer, but proper preparation is key. You’ll need to clean, lightly sand (de-glaze), and prime with a bonding primer to ensure adhesion.
Q8: How long does it take to paint kitchen cabinets?
A: The entire process, including drying and reassembly, can take anywhere from a weekend to a week or more, depending on the number of cabinets, the drying times of your chosen products, and how much time you can dedicate each day.
By following these steps and tips, you can achieve a beautiful, professional-looking finish on your wooden kitchen cupboards, transforming your kitchen with a fresh, updated look. Happy painting!