
Can you make concrete kitchen countertops yourself? Yes, you absolutely can! With careful planning and execution, DIY concrete countertops are achievable for the determined homeowner. This guide will walk you through every step, from design to sealing, making it possible to achieve beautiful, durable, and custom concrete kitchen island surfaces without a professional contractor.
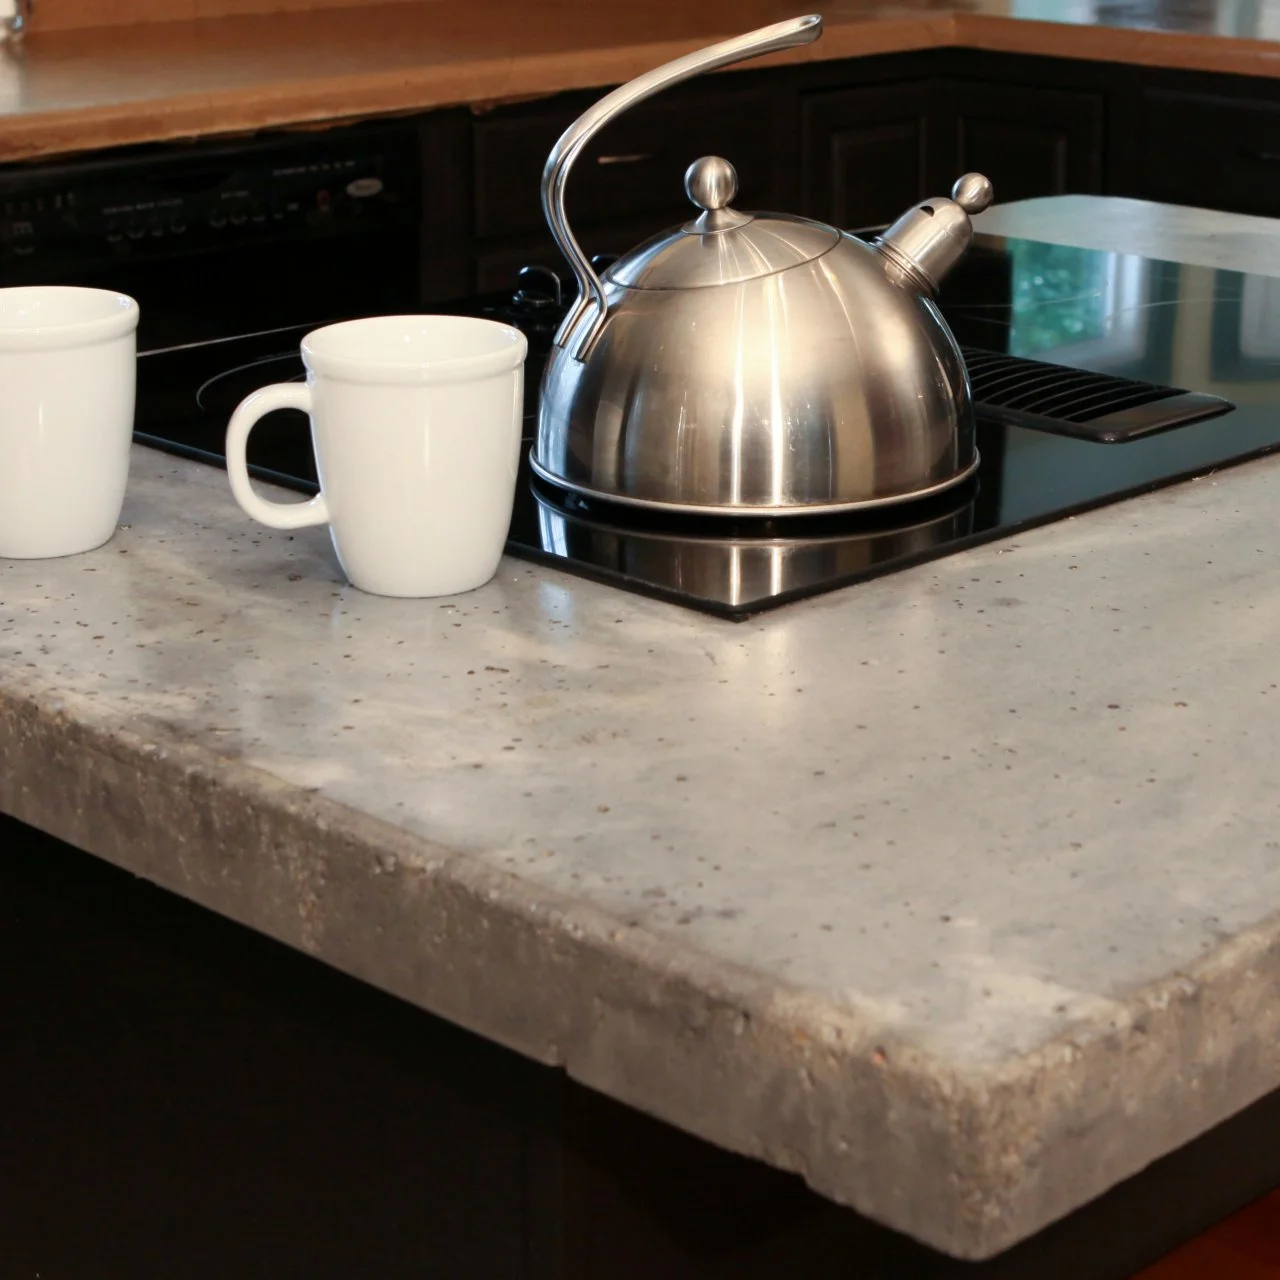
Image Source: diy.sndimg.com
Designing Your Concrete Kitchen Countertops
The beauty of DIY concrete countertops lies in their customizability. You’re not limited by standard sizes or shapes. Think about the overall aesthetic of your kitchen. Do you want a sleek, modern look, or a more rustic, industrial feel? Your concrete countertop design is the first crucial step.
Considering Functionality and Aesthetics
- Edge Profiles: Will you have a simple square edge, a rounded bullnose, or something more elaborate? The edge profile significantly impacts the final look.
- Color: Concrete can be dyed to almost any color. Consider integral colorants mixed into the concrete or acid stains applied after curing for unique finishes.
- Inclusions: Want to add a personal touch? You can embed objects like glass, tiles, or even metallic flakes into the concrete.
- Sink Integration: Will you have an undermount, drop-in, or integrated sink? This will affect how you build your molds.
- Thickness: Standard countertop thickness is around 1.5 to 2 inches, but you can customize this.
Sketching Your Vision
Before you mix a single bag of concrete, sketch out your countertop design. Measure your existing countertops or cabinet base precisely. Note the dimensions, including length, width, and thickness. Mark the placement of your sink, faucet holes, and any cooktops. This detailed plan will be your blueprint throughout the project.
Gathering Your Materials and Tools
This project requires a specific set of materials and tools. Investing in quality items will make the process smoother and result in a better finish.
Essential Materials
- Concrete Mix: High-strength, low-shrinkage concrete mix is ideal. Look for mixes specifically designed for countertops or pre-cast applications. Avoid standard bagged concrete meant for sidewalks.
- Reinforcement: Steel rebar, wire mesh, or fiberglass reinforcing fibers are crucial for preventing cracks.
- Colorants (Optional): Integral liquid or powder colorants for consistent color throughout.
- Release Agent: A mold release spray or paste to prevent the concrete from sticking to the mold.
- Sealant: A food-safe, durable concrete countertop sealant to protect against stains and etching.
- Polishing Compounds (Optional): For achieving a polished concrete look.
- Grout/Patching Compound: For filling small voids or imperfections.
- Acetone or Denatured Alcohol: For cleaning tools and surfaces.
Essential Tools
- Measuring Tape and Pencil: For accurate measurements.
- Safety Gear: Heavy-duty gloves, safety glasses, dust mask or respirator, and work boots.
- Mixing Tub or Wheelbarrow: For mixing the concrete.
- Shovels and Hoe: For mixing concrete.
- Buckets: For water and measuring.
- Trowels: Various sizes for smoothing and finishing.
- Vibrator (Optional but Recommended): A concrete vibrator or orbital sander to help remove air bubbles.
- Sander and Sanding Discs: For smoothing and polishing.
- Orbital Sander: If you plan to polish the concrete.
- Diamond Grinding/Polishing Pads: For achieving a polished finish.
- Caulking Gun and Caulk: For sealing the mold.
- Utility Knife or Scraper: For removing cured concrete.
- Level: To ensure your mold is perfectly flat.
Building Your Countertop Molds
The mold is where the magic happens – it dictates the final shape and dimensions of your countertop. For most DIYers, constructing melamine molds is the most common and effective method.
Why Melamine?
Melamine-coated particleboard is ideal for countertop molds because it’s smooth, rigid, and relatively inexpensive. The melamine coating provides a slick surface that releases easily from the concrete.
Constructing the Mold
- Measure and Cut: Based on your design sketches, carefully measure and cut your melamine panels. Remember to account for the thickness of the concrete. If you want a 2-inch thick countertop, your mold’s internal dimensions will be the countertop’s desired dimensions, and the base will be the outer dimensions.
- Assemble the Sides: Attach the melamine side panels to the base panel using screws. Ensure all joints are perfectly square and flush. Predrill holes to prevent the melamine from splitting.
- Seal the Seams: Apply a bead of silicone caulk along all interior seams where the panels meet. Smooth the caulk with your finger or a caulk tool. This prevents concrete from seeping into the seams and creates a slight radius on the edges, which can be desirable.
- Reinforce the Mold: For larger or heavier countertops, reinforce the base of the mold with extra melamine or bracing to prevent bowing under the weight of the wet concrete.
- Prepare for Sink/Faucet Cutouts: If you’re creating cutouts for a sink or faucet, use melamine or sturdy foam to build these forms and secure them within the main mold. Ensure they are precisely placed according to your plan.
Mixing Your Concrete
The concrete mix ratios are critical for achieving the desired strength, color, and finish. Always follow the manufacturer’s instructions for your specific concrete mix.
Understanding Concrete Mix Ratios
Concrete is a mixture of cement, aggregate (sand and gravel), and water. The ratio determines its properties. For countertops, you want a mix that is strong and dense with minimal aggregate, which is why specialized countertop mixes are recommended. If using a general-purpose mix, you might need to adjust the aggregate size by screening it.
A typical high-strength concrete mix might have a water-to-cement ratio of around 0.4 to 0.5. This means for every 100 pounds of cement, you’ll use 40 to 50 pounds of water. Too much water weakens the concrete; too little makes it unworkable.
The Mixing Process
- Dry Mixing: In your mixing tub or wheelbarrow, thoroughly combine the dry concrete mix and any dry colorants. Ensure the color is evenly distributed.
- Adding Water: Gradually add the measured amount of water. Mix thoroughly, ensuring no dry pockets remain. The consistency should be like thick oatmeal or peanut butter – workable but not soupy.
- Adding Reinforcement (Fibers): If you’re using fiberglass reinforcing fibers, mix them in during the dry mixing stage or as you add water, following the manufacturer’s instructions.
- Adding Integral Color: If using liquid colorants, add them with the water according to the manufacturer’s recommendations.
Casting Your Concrete Countertops
This is the concrete pouring stage. Precision and care are essential to achieve a smooth, void-free surface.
Preparing the Mold for Pouring
- Apply Release Agent: Thoroughly spray or wipe down the inside of your mold with a mold release agent. Pay special attention to corners and edges.
- Place Reinforcement: If you are using rebar or wire mesh, cut it to size so it sits about halfway up the thickness of your countertop. This provides strength throughout the slab. Position it carefully, ensuring it’s not touching the mold surfaces directly. You can use small plastic chairs or blocks to elevate it.
- Install Sink Forms: Double-check that your sink and faucet cutout forms are securely in place and sealed to the mold base.
The Pouring Process
- Fill the Mold: Begin pouring the mixed concrete into the mold. Fill it about halfway.
- Place Reinforcement: If you are using rebar or wire mesh, now is the time to place it into the partially filled mold, ensuring it’s about halfway through the thickness of the concrete.
- Continue Pouring: Fill the mold to the desired thickness, leveling the surface as you go.
- Vibrate the Concrete: This is a critical step for eliminating air bubbles. Gently tap the sides of the mold with a rubber mallet or use an orbital sander against the mold’s exterior. If you have a concrete vibrator, use it carefully, inserting it into the concrete at intervals to release trapped air. Aim for a consistent, smooth surface with minimal pitting.
- Screed and Trowel: Use a straight edge (like a piece of lumber) to screed the surface, leveling it flush with the top of the mold. Then, use trowels to smooth the surface.
Curing Your Concrete Countertops
Proper curing is essential for the strength and durability of your concrete. Concrete doesn’t “dry”; it “cures” through a chemical reaction with water.
The Importance of Curing
- Strength Development: Adequate moisture during curing allows the cement to fully hydrate, leading to maximum strength.
- Crack Prevention: Proper curing helps prevent shrinkage cracks from forming.
- Durability: A well-cured countertop will be more resistant to abrasion and stains.
Curing Methods
- Keep it Moist: Cover the mold with plastic sheeting immediately after the initial set. This traps moisture. You can also mist the surface periodically if it’s exposed.
- Duration: Allow the concrete to cure for at least 7 days. For maximum strength, a 28-day cure is recommended, but for DIY countertops, 7-10 days is generally sufficient before demolding.
- Temperature: Maintain a consistent temperature between 50°F and 80°F (10°C and 27°C) during the curing process. Extreme temperatures can negatively affect curing.
Demolding and Initial Finishing
Once the concrete has cured sufficiently, it’s time to reveal your creation.
The Demolding Process
- Gentle Removal: Carefully unscrew or pry apart the mold sides. Work slowly and gently to avoid chipping the edges or corners.
- Flipping (if applicable): If you cast your countertops upside down (which is common for a smoother top surface), carefully flip the slab onto a protected surface. This is often a two-person job.
- Initial Inspection: Inspect the surface for any small voids or imperfections.
Addressing Imperfections
- Filling Voids: Use a concrete patching compound or a slurry made from cement and water for small pinholes or voids. Mix it to a paste consistency and press it into the imperfections.
- Grinding Edges: If the edges are rough, you can use an angle grinder with a diamond blade or a concrete rubbing stone to smooth them.
Grinding and Polishing Your Countertops
This is where you achieve that beautiful, smooth finish, whether you prefer a honed or highly polished look. This process, often referred to as how to polish concrete, can transform the appearance of your countertops.
Grinding and Honing
- Start with Coarse Grit: Begin with a coarse diamond grinding pad (e.g., 50-100 grit) on your orbital sander or angle grinder. Work in a consistent pattern, covering the entire surface.
- Progress to Finer Grits: Gradually move to finer grits (e.g., 200, 400, 800 grit). Clean the surface thoroughly between each grit to remove dust and slurry. This step is crucial for removing trowel marks and achieving a smooth, even surface.
- Honed Finish: Stop at around 400-800 grit for a honed, matte finish.
Polishing for a High Shine
- Continue with Finer Grits: For a polished finish, continue with progressively finer grits (e.g., 1500, 3000 grit).
- Wet Polishing: Many prefer wet polishing as it controls dust and helps slurry the surface, aiding the polishing process. Use a spray bottle to keep the surface wet as you polish.
- Achieving the Shine: The final grits will bring out the shine in the concrete.
Sealing Your Concrete Countertops
Sealing is vital to protect your DIY concrete countertops from stains, etching, and moisture.
Choosing the Right Sealant
There are two main types of sealants:
- Penetrating Sealers: These soak into the concrete, providing protection from within. They are generally more breathable and less prone to flaking but may offer slightly less stain resistance.
- Topical Sealers (Waxes and Acrylics): These form a protective layer on the surface. They offer excellent stain and moisture resistance but can wear down over time and may require reapplication.
For kitchen countertops, a food-safe, high-performance penetrating sealer is often recommended, sometimes followed by a food-safe topical wax for added protection and sheen.
The Sealing Process
- Clean Thoroughly: Ensure the countertop is completely clean and dry. Any dust or residue will be sealed in.
- Apply the First Coat: Apply the first coat of sealer according to the manufacturer’s instructions. Use a foam applicator, roller, or lint-free cloth. Work in thin, even coats.
- Allow for Drying: Let each coat dry completely as recommended by the product.
- Apply Additional Coats: Most sealants require 2-3 coats for adequate protection.
- Apply Top Coat (Optional): If using a wax, apply it after the final sealer coat has dried. Buff it to a shine.
Maintaining Your Concrete Countertops
With proper care, your concrete countertops will last for years.
Daily Care
- Wipe up spills immediately.
- Use coasters for glasses and mugs.
- Avoid placing hot pots or pans directly on the surface. Use trivets.
Cleaning
- Use a mild, pH-neutral soap and water for regular cleaning.
- Avoid abrasive cleaners or harsh chemicals, as they can damage the sealant.
Re-sealing
- Depending on the type of sealant used and your usage, you may need to reapply a sealant or wax every 1-3 years. You’ll know it’s time when water no longer beads on the surface.
Frequently Asked Questions (FAQ)
Q: Are concrete countertops durable?
A: Yes, concrete countertops are very durable when properly mixed, cured, and sealed. They are resistant to heat and impact.
Q: How much do DIY concrete countertops cost?
A: The cost can vary significantly depending on the size, complexity of the design, and the materials you choose. Generally, you can expect to spend between $5-$15 per square foot for materials, significantly less than professionally installed granite or quartz.
Q: Can I install a sink into my concrete countertop?
A: Absolutely! You can create forms in your mold for undermount or drop-in sinks, or even cast an integrated sink.
Q: Will my concrete countertops stain?
A: Without proper sealing, concrete can stain. However, a good quality food-safe concrete countertop sealant will make them highly stain-resistant.
Q: Can I repair cracks in concrete countertops?
A: Yes, minor cracks can be repaired with a specialized concrete patching compound or epoxy.
Q: How heavy are concrete countertops?
A: Concrete countertops are very heavy. A typical 1.5-inch thick slab can weigh around 18-20 pounds per square foot. Ensure your cabinetry can support the weight.
Q: What is the best concrete mix for countertops?
A: High-strength, low-shrinkage concrete mixes specifically designed for countertops or pre-cast applications are best. These often have finer aggregate and additives for better workability and a smoother finish.
Conclusion
Creating your own concrete kitchen island or countertop is a rewarding project that allows for immense personalization. By following these detailed steps for casting concrete countertops, paying attention to your concrete mix ratios, using appropriate countertop molds, and applying a quality concrete countertop sealant, you can achieve a stunning, durable, and functional centerpiece for your kitchen. Remember that patience, meticulousness, and a willingness to learn are your greatest assets in this DIY endeavor. With careful concrete countertop finishing, your custom creation will be a source of pride for years to come.