
Can I install kitchen hardware myself? Yes, absolutely! Installing new kitchen hardware, like cabinet knobs and drawer pulls, is a fantastic DIY project that can dramatically update the look of your kitchen. It’s a relatively simple process that requires minimal tools and can be completed in a short amount of time.
Updating your kitchen doesn’t always require a full renovation. Sometimes, all it takes is a fresh set of cabinet knobs or drawer pulls to completely transform the look and feel of your space. This guide will walk you through the process of installing kitchen hardware with easy-to-follow steps, making it a manageable project for anyone. Whether you’re doing a complete kitchen cabinet installation or simply want to refresh your existing cabinets with new hardware, these instructions will help you achieve a professional-looking result.
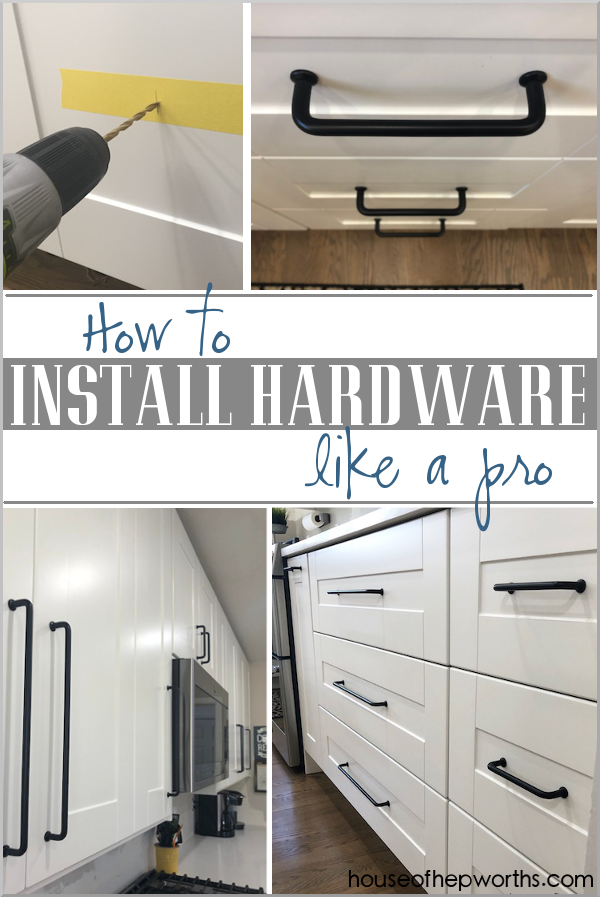
Image Source: images.houseofhepworths.com
Getting Started: What You’ll Need
Before you begin, gather all the necessary items. Having everything ready will make the installation process smooth and efficient.
Essential Tools for Hardware Installation
- Screwdriver: A Phillips head screwdriver is usually required, but it’s good to have both Phillips and flathead screwdrivers on hand.
- Drill: A cordless drill with a drill bit set will speed up the process, especially if you’re installing many pieces of hardware.
- Measuring Tape: Essential for accurate placement.
- Pencil: For marking drilling points.
- Level: To ensure hardware is straight, especially on drawer fronts.
- Drill Stopper or Painter’s Tape: To prevent drilling too deep into your cabinets.
- Cabinet Knobs and Drawer Pulls: Your chosen new hardware!
- Mounting Hardware: Screws usually come with your hardware, but double-check.
Choosing the Right Hardware
The world of kitchen hardware is vast! From sleek modern pulls to vintage-inspired knobs, the choices are endless. Consider your kitchen’s style and your personal taste.
- Knobs vs. Pulls: Knobs are typically round or decorative and are usually placed on cabinet doors. Pulls are longer and are generally used for drawers, but can also be used on larger cabinet doors.
- Material: Hardware comes in various materials like brass, stainless steel, brushed nickel, chrome, ceramic, and wood. Each offers a different aesthetic and durability.
- Finish: Consider how the finish will complement your cabinet color and other kitchen fixtures like faucets. Common finishes include polished chrome, brushed nickel, oil-rubbed bronze, and matte black.
- Style: Match the style of your hardware to your kitchen’s overall design. Modern kitchens often suit clean lines and minimalist designs, while traditional kitchens might benefit from more ornate or classic styles.
Pre-Installation Steps: Preparation is Key
Proper preparation ensures a clean and professional finish. Don’t skip these important steps!
Examining Existing Hardware and Cabinets
Before you remove anything, take a moment to assess your current situation.
- Hole Spacing: Measure the distance between the screw holes on your existing drawer pulls. This is crucial if you’re doing a cabinet hardware replacement and want to avoid drilling new holes. Standard measurements are 3 inches, 4 inches, or 96mm, but custom sizes exist.
- Cabinet Condition: Check your cabinets for any damage or weakness where the hardware will be mounted. If the wood is soft or damaged, you might need to reinforce it or use anchors.
- Door Hinges: If you’re also replacing door hinges, ensure you have the correct type and size to fit your cabinet doors and frames.
Removing Old Hardware (If Applicable)
If you’re replacing existing hardware, this is the first physical step.
- Locate Screws: You’ll usually find one or two screws on the back of the drawer or door.
- Unscrew: Use your screwdriver to carefully remove the screws.
- Remove Hardware: Gently pull the old knob or pull off the cabinet.
Cleaning the Surface
Once the old hardware is off, it’s time to clean the area.
- Wipe Down: Use a soft cloth and a mild cleaning solution to wipe down the cabinet surface where the hardware was. This removes dust, grime, and any sticky residue.
- Dry Thoroughly: Ensure the surface is completely dry before proceeding.
Installing New Hardware: Step-by-Step
Now for the exciting part – adding your new hardware!
Step 1: Marking Your Placement
Accurate placement is vital for a polished look, especially for drawer pulls which often have two screw holes.
Using a Template for Hardware Placement
A template can be a lifesaver, ensuring consistent spacing and alignment.
- Pre-made Templates: You can find plastic or cardboard templates online or at hardware stores. These often have guides for common hole spacings.
- DIY Template: For perfect alignment, you can create your own template.
- Take a piece of sturdy paper or thin cardboard.
- Measure the distance between the screw holes of your new hardware.
- Mark this distance on your template.
- Punch small holes through the marked points on the template.
- Hold the template against your cabinet or drawer where you want the hardware, ensuring it’s level.
- Use your pencil to mark the drilling points through the template’s holes.
Measuring and Marking Directly
If you don’t have a template, precise measurement is key.
- For Knobs (Single Hole):
- Decide on the placement – usually centered on the door or drawer front.
- Use your measuring tape to find the center point.
- Mark the spot with your pencil.
- For Drawer Pulls (Two Holes):
- Measure the distance between the screw holes on your pull (center-to-center measurement).
- Measure from the edge of the drawer front to where you want the first screw hole to be. Mark this point.
- Using your measuring tape and ensuring the pull will be level, mark the second hole’s position. Use a level to draw a faint, straight line between the two marks for alignment.
Step 2: Drilling the Holes
This is where your drill comes in handy. Using the correct drill bit and technique prevents damage.
Selecting the Right Drill Bit
The screw size for your hardware will determine the drill bit size.
- Consult Hardware Instructions: Your new hardware should come with screws. Check the diameter of these screws.
- Drill Bit Size: Choose a drill bit that is slightly smaller than the diameter of the screw threads, but larger than the screw shaft. This ensures the screw has something to grip in the wood.
- If your screws are small (e.g., #6 or #8), a 3/32 inch or 7/64 inch bit might be appropriate.
- For larger screws (e.g., #10), a 1/8 inch or 9/64 inch bit may be better.
- Tip: It’s always a good idea to test drill a scrap piece of wood first to ensure the screw fits snugly.
- Material: Use a wood-specific drill bit.
Drilling Techniques for a Clean Finish
- Set Drill Depth: Before drilling, wrap a piece of painter’s tape around your drill bit at the depth of the screw, or use a drill stopper. This prevents you from drilling all the way through your cabinet door or drawer front.
- Drill Straight: Hold the drill perpendicular to the cabinet surface. Go slowly and steadily.
- Drill from the Front: For a cleaner finish, drill from the outside of the cabinet door or drawer front. This means the burr (a small raised edge of material) will be on the inside of the cabinet, where it’s less visible.
- Backside Chamfer (Optional but Recommended): If you want a truly professional finish and are drilling from the front, you can use a larger drill bit (one that matches the diameter of the screw head or slightly larger) to create a small, shallow countersink or chamfer on the back of the hole. This allows the screw head to sit flush or slightly recessed, preventing it from pushing against the cabinet material. Be careful not to drill too deep!
Step 3: Attaching the Hardware
This is the final step where your new hardware comes to life.
Installing Knobs
- Insert Screw: From the inside of the cabinet door or drawer, push the screw through the pre-drilled hole.
- Align Knob: Place the knob onto the screw on the outside.
- Tighten: Use your screwdriver to tighten the screw until the knob is snug. Be careful not to overtighten, which could strip the screw or damage the cabinet.
Installing Drawer Pulls
Drawer pulls typically have two screws.
- Insert Screws: From the inside of the drawer front, insert the screws through the pre-drilled holes.
- Align Pull: Place the drawer pull onto the screws on the outside, ensuring both screws go into their respective holes.
- Tighten: Use your screwdriver to tighten the screws evenly, alternating between them to ensure the pull is pulled flush against the drawer front. Again, avoid overtightening.
- Check Alignment: Use your level to ensure the drawer pull is perfectly straight before fully tightening.
Step 4: Final Checks
Once all hardware is installed, give everything a final inspection.
- Tightness: Ensure all knobs and pulls are secure.
- Alignment: Check that they are straight and centered as intended.
- Functionality: Open and close drawers and doors to make sure the hardware doesn’t snag or impede movement.
Hardware Installation Tips for Success
Here are some extra tips to ensure your project goes smoothly:
- Work in Batches: If you have many cabinets, tackle them in sections. This helps maintain consistency.
- Protect Surfaces: Lay down a drop cloth or towels to protect your floors and countertops from dropped tools or hardware.
- Keep a Drawer for Hardware: Store all your new hardware and screws in a designated place, like a small container or zip-top bag, to avoid losing them.
- When in Doubt, Get a Template: For drawer pulls, a template is highly recommended for perfect symmetry and alignment.
- Consider Cabinet Door Thickness: Ensure your screws are the correct length for your cabinet doors and drawer fronts. If screws are too long, they can poke through the other side. If too short, they won’t get a good grip. Most hardware comes with standard screw sizes, but it’s worth checking.
- For Painted Cabinets: If your cabinets are painted, be aware that removing old hardware might leave behind small paint chips around the holes. Touch-up paint can be used afterward.
- When Replacing Door Hinges: If you’re also undertaking a cabinet hardware replacement that includes door hinges, it’s a slightly more involved process. Ensure you have the correct hinge type (e.g., Euro hinges, overlay hinges) and that you measure the existing cutouts carefully.
Common Questions About Kitchen Hardware Installation
Here are some answers to frequently asked questions to help you with your project.
Q1: What if my new hardware doesn’t match the existing holes?
A1: If the hole spacing on your new hardware differs from your existing cabinets, you have a few options. The easiest is to use a template to drill new holes. You can also fill the old holes with wood filler, sand them smooth, and then repaint or refinish the cabinet before installing the new hardware in its desired location. For drawer pulls with two holes, you might be able to get away with one hole if the new hardware only requires one, but this can affect stability.
Q2: Can I use a template if my cabinets are not perfectly flat?
A2: Yes, you can. If your cabinet fronts have a slight curve or decorative molding, a flexible template or careful freehand measurement with a level is recommended. For very ornate cabinets, you might need to attach the template temporarily with painter’s tape to ensure it stays put while you mark.
Q3: What are the most common screw sizes for hardware installation?
A3: The most common screw sizes for cabinet hardware are typically #8 or #10 machine screws. The length will vary depending on the thickness of your cabinet doors and drawer fronts, but 1-inch or 1.5-inch screws are very common. Always refer to the specifications of your chosen hardware or measure your existing screws.
Q4: How do I ensure my drawer pulls are perfectly level?
A4: Using a level is crucial for drawer pulls. After marking your holes, hold the drawer pull up to the marks and use a level to ensure it’s straight. If it’s not, adjust your marks accordingly. When installing, tighten the screws alternately to keep the pull from tilting.
Q5: Is it okay to reuse old screws if they fit the new hardware?
A5: While it might be tempting, it’s generally best to use the new mounting hardware that comes with your cabinet knobs and drawer pulls. New screws are often designed to work perfectly with the hardware, ensuring a secure fit and a good finish. Old screws might be worn, the wrong length, or have a different head type that won’t look as good or fit as well.
Q6: What if I accidentally drill a hole in the wrong place?
A6: Don’t panic! For small mistakes, you can often fill the hole with wood filler. Let it dry completely, sand it smooth, and then touch it up with paint or stain to match your cabinets. If the mistake is very noticeable or too large to fix easily, you might consider repositioning the hardware slightly to cover the mistake, or even replacing the cabinet door or drawer front if it’s a significant error.
By following these detailed steps and tips, you can confidently install new kitchen hardware, giving your kitchen an instant facelift and a refreshed, personalized look. Enjoy your upgraded kitchen!