
A leaking mobile home kitchen faucet can waste a surprising amount of water and become a persistent annoyance. Yes, you can repair a leaking mobile home kitchen faucet by replacing worn-out parts like washers, O-rings, or cartridges. This guide will walk you through the steps to fix a leaky mobile home faucet, tackle common mobile home faucet problems, and help you stop a mobile home kitchen sink leak effectively. We’ll cover everything from identifying the source of the drip to performing a mobile home faucet washer replacement or even a complete cartridge swap.
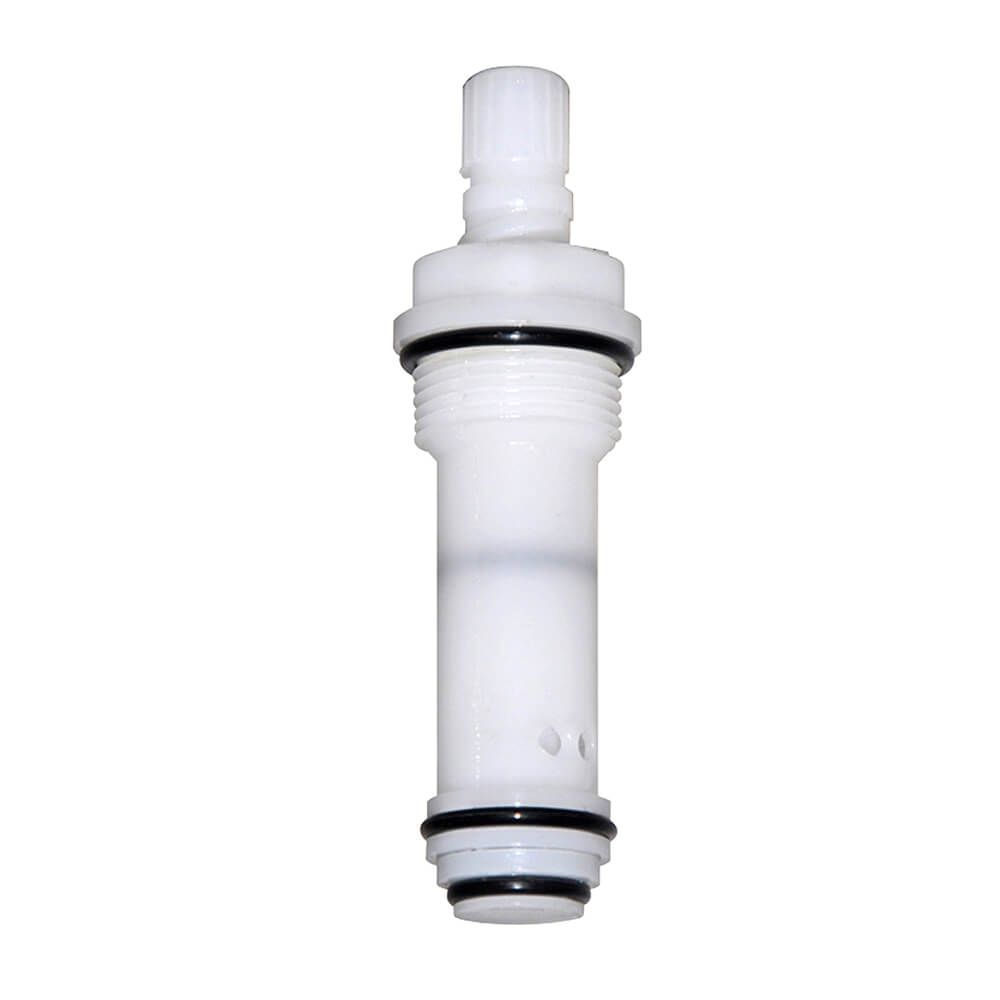
Image Source: www.danco.com
Pinpointing the Dripping Mobile Home Kitchen Sink
Before you can fix a dripping faucet in a mobile home, you need to know where the leak is coming from. Mobile home kitchen sink leaks can originate from several places:
- The Spout: This is the most common place for drips. It usually means a worn-out washer or O-ring inside the faucet body.
- The Handle(s): If water leaks around the base of the handle when the faucet is on or off, it points to a problem with the packing nut or the stem seals.
- Under the Sink: Leaks under the sink are often a sign of loose connections to the water supply lines or a faulty spray hose if your faucet has one.
Essential Tools for Mobile Home Faucet Repair
Gathering the right tools beforehand will make your mobile home plumbing faucet fix much smoother. Here’s a list of common items you’ll likely need:
- Adjustable wrench
- Phillips head screwdriver
- Flathead screwdriver
- Plumber’s grease (silicone-based)
- Penetrating oil (like WD-40, if parts are stuck)
- Rags or towels
- Bucket
- Replacement parts (washers, O-rings, cartridge – have these ready based on your faucet type)
- Utility knife or scraper (for cleaning old sealant)
- Flashlight
Step-by-Step Guide to Mobile Home Kitchen Faucet Repair
Let’s get to work on that mobile home kitchen faucet repair! The process will vary slightly depending on the type of faucet you have, but the core principles remain the same.
Step 1: Shut Off the Water Supply
This is the most crucial first step for any mobile home plumbing faucet fix.
- Look for the shut-off valves located directly beneath the kitchen sink. There will be one for hot water and one for cold water.
- Turn both valves clockwise until they are snug. Do not overtighten.
- Turn on the faucet to relieve any remaining water pressure in the lines and confirm that the water is indeed off.
Step 2: Disassemble the Faucet Handle
The goal here is to access the inner workings of the faucet.
For Single-Handle Faucets:
- Locate the Set Screw: Most single-handle faucets have a small set screw, often hidden under a decorative cap or plug on the handle. This cap might be a small plastic piece that pries off with a flathead screwdriver or a coin.
- Remove the Handle: Once the set screw is exposed, use an Allen wrench or screwdriver (depending on the screw type) to loosen and remove it. The handle should now lift straight off. If it’s stuck, a gentle wiggle or a specialized “faucet handle puller” might be needed.
For Two-Handle Faucets:
- Remove Decorative Caps: These are usually on top of the handles and can be pried off with a flathead screwdriver.
- Unscrew the Handles: Underneath the caps, you’ll find screws holding the handles in place. Unscrew these.
- Lift Off Handles: The handles should now lift off the faucet stem. Again, if they are stuck, a bit of penetrating oil and gentle persuasion might be necessary.
Step 3: Access the Cartridge or Stem Assembly
This is where the magic happens for a mobile home kitchen sink dripping issue. The internal component that controls water flow is usually a cartridge or a stem with washers.
For Cartridge Faucets:
- Remove the Retaining Nut/Clip: After the handle is off, you’ll see the top of the cartridge. It’s often held in place by a retaining nut or a clip.
- Unscrew the Retaining Nut: Use an adjustable wrench to carefully unscrew the retaining nut. Keep it safe, as you’ll need it later.
- Remove the Clip (if applicable): Some cartridges are secured with a small metal clip. This usually pulls straight out with pliers.
- Extract the Cartridge: The cartridge can now be pulled straight up and out. Sometimes, it requires a gentle wiggle or a special cartridge puller tool, especially if it’s old and corroded. This is often the part needed for a mobile home faucet cartridge repair.
For Compression Faucets (older style, often found in mobile homes):
- Unscrew the Packing Nut: Below the handle, you’ll see a hexagonal packing nut. Use your adjustable wrench to unscrew it counter-clockwise.
- Remove the Stem: Once the packing nut is off, you can usually unscrew or pull out the entire stem assembly.
Step 4: Inspect and Replace Worn Parts
This is the core of how to repair a leaking mobile home kitchen faucet.
For Cartridge Faucets:
- Examine the Cartridge: Look for any cracks, mineral deposits, or obvious damage on the old cartridge.
- Identify Your Faucet Brand/Model: It’s crucial to get the exact replacement cartridge. Take the old one to a hardware store or check your faucet’s manufacturer for the correct part number. Trying to force the wrong cartridge can damage your faucet.
- Install the New Cartridge: Apply a thin layer of plumber’s grease to the O-rings on the new cartridge. Insert it into the faucet body, ensuring it’s oriented correctly (there are usually notches or tabs that line up).
- Reassemble: Put the retaining nut or clip back on, then reattach the handle.
For Compression Faucets:
- Identify the Washer: At the bottom of the stem assembly, you’ll find a rubber washer, usually held in place by a screw. This is the most common culprit for a mobile home kitchen sink dripping.
- Remove the Washer: Unscrew the small screw holding the washer. Remove the old washer.
- Mobile Home Faucet Washer Replacement: Clean the seat inside the faucet body where the washer sits. Place a new, identical washer onto the stem and secure it with the screw.
- Replace the O-ring: There’s often a small O-ring around the stem as well, which can also cause leaks. If it looks worn or cracked, replace it. Apply plumber’s grease to the new O-ring.
- Reassemble: Screw the stem back into the faucet body. Tighten the packing nut (snug, not too tight) and then reattach the handle.
Step 5: Test for Leaks
Turn the water supply back on slowly.
- Check for drips from the spout and around the handle.
- If the leak persists, you may need to re-examine the components or consider a more complex issue.
Common Mobile Home Faucet Problems and Solutions
Mobile home plumbing can sometimes present unique challenges. Here are some common issues and how to address them as part of your mobile home plumbing faucet fix:
The Mobile Home Kitchen Sink is Dripping from the Spout
This is almost always a worn-out washer (in compression faucets) or a faulty O-ring or worn seal within the cartridge (in cartridge faucets).
- Action: Follow the steps above for replacing the washer or cartridge. Ensure you get the correct replacement parts.
Water Leaks Around the Faucet Handle
This usually indicates a problem with the packing nut or the O-rings on the stem (in compression faucets) or cartridge (in cartridge faucets).
- For Compression Faucets:
- Tighten the Packing Nut: Sometimes, simply tightening the packing nut a quarter turn can stop a leak around the handle.
- Replace Stem O-rings: If tightening doesn’t work, you’ll need to remove the stem, replace the O-ring(s) on it, apply plumber’s grease, and reassemble.
- For Cartridge Faucets:
- Check Cartridge Seals: The O-rings or seals on the cartridge itself might be worn. Replacing the entire cartridge will usually resolve this.
The Faucet Handle is Loose or Stiff
A loose handle can mean the screw holding it is loose or the spline on the stem or cartridge is worn. A stiff handle often means mineral buildup or a need for lubrication.
- Loose Handle: Tighten the handle screw. If the screw just spins, the stem or cartridge spline might be stripped, requiring a replacement.
- Stiff Handle: Remove the handle and stem/cartridge. Clean off any mineral deposits with vinegar or a descaling solution. Apply plumber’s grease to the stem or cartridge and reassemble.
Low Water Pressure from the Faucet
This can be due to clogged aerators, mineral buildup in the faucet lines, or issues with the water supply itself.
- Clean the Aerator: The aerator is the screen at the tip of the spout. Unscrew it and clean out any debris or mineral deposits.
- Check Supply Lines: Ensure the shut-off valves under the sink are fully open and that the supply lines aren’t kinked.
- Flush the Faucet: With the cartridge removed, you can briefly turn on the water supply to flush out any debris from the faucet body. Be ready with a bucket!
Spray Hose Leaks (if applicable)
If your mobile home faucet has a pull-out sprayer, leaks can occur at the connection point under the sink, at the sprayer head, or along the hose itself.
- Check Connections: Ensure the hose is securely attached to the faucet body and the supply line.
- Inspect the Hose: Look for cracks or damage along the hose.
- Replace Sprayer Head/Hose: If the hose or sprayer head is damaged, you’ll likely need to replace the entire assembly.
Replacing a Mobile Home Faucet Cartridge
This is a common mobile home faucet repair that often resolves persistent dripping.
When to Replace the Cartridge:
- The faucet continues to leak after replacing washers and O-rings.
- The handle is very difficult to turn.
- You suspect the internal seals of the cartridge have failed.
Steps for Mobile Home Faucet Cartridge Replacement:
- Shut off water (as described in Step 1).
- Remove the handle (as described in Step 2).
- Remove any decorative cover or bonnet nut that might be covering the cartridge.
- Remove the retaining clip or nut holding the cartridge in place (as described in Step 3).
- Gently pull the old cartridge out. Use a cartridge puller if it’s stuck. Note the orientation of the cartridge.
- Clean the faucet body where the cartridge sits.
- Apply plumber’s grease to the O-rings of the new cartridge.
- Insert the new cartridge, ensuring it’s aligned correctly with any notches or tabs.
- Reinstall the retaining clip or nut.
- Reassemble the faucet handle.
- Turn the water back on and test for leaks.
What if I Can’t Find the Right Replacement Cartridge?
- Take the old cartridge to a plumbing supply store or a well-stocked hardware store. They can often help you match it.
- Identify the faucet brand and model. Look for a logo on the faucet or check any documentation that came with your mobile home. You can then search online for the specific part.
- Consider replacing the entire faucet if you can’t find the correct cartridge or if the faucet is very old and showing other signs of wear.
Mobile Home Faucet Handle Repair
If your issue is solely with the handle itself (e.g., it’s loose, wobbly, or the decorative part is broken), the repair might be simpler.
- Loose Handle: As mentioned, this is usually due to a loose set screw or handle screw. Find and tighten it. If the threads are stripped, you might need to replace the handle or the entire stem/cartridge assembly.
- Wobbly Handle: This often points to wear on the spline where the handle connects to the stem/cartridge. Replacing the cartridge or stem is the most common fix.
- Broken Decorative Handle: For plastic decorative handles, sometimes you can find replacements. For metal handles, if the connection point to the stem is damaged, you might need to replace the handle assembly or the entire faucet.
Stopping a Mobile Home Kitchen Sink Leak: General Tips
- Regular Maintenance: Periodically check your faucets for small drips or leaks. Addressing them early can prevent larger problems.
- Know Your Faucet Type: Familiarize yourself with whether you have a compression, cartridge, ball, or ceramic disc faucet. This will help you identify the correct parts for repair. Mobile homes often have simpler, older types like compression or basic cartridges.
- Use Plumber’s Grease: Always use plumber’s grease on O-rings and seals. It lubricates them, prevents drying out, and helps create a better seal, extending the life of your faucet.
- Don’t Force Parts: If a part is stuck, use penetrating oil and gentle persuasion rather than brute force, which can damage the faucet body.
- Cleanliness is Key: Before installing new parts, ensure the faucet body is clean and free of debris or mineral buildup.
Table: Common Mobile Home Faucet Problems and Solutions
| Problem | Likely Cause | Solution |
|---|---|---|
| Dripping from Spout | Worn washer (compression) or faulty cartridge | Replace washer and O-ring (compression); Replace cartridge (cartridge faucet). Ensure correct part. |
| Leaks around Handle | Loose packing nut, worn stem O-ring, or cartridge seals | Tighten packing nut. For compression faucets, replace stem O-rings. For cartridge faucets, replace the entire cartridge. |
| Low Water Pressure | Clogged aerator, mineral buildup, kinked hose | Clean aerator. Check shut-off valves and supply lines. Flush faucet body with water (cartridge removed). |
| Faucet Handle Loose/Wobbly | Loose handle screw, stripped spline | Tighten handle screw. If stripped, replace handle or stem/cartridge. |
| Faucet Handle Stiff to Operate | Mineral buildup, lack of lubrication | Disassemble, clean stem/cartridge of mineral deposits, apply plumber’s grease, reassemble. |
| Leak from Spray Hose/Sprayer Head | Loose connection, damaged hose/head | Tighten connections. Inspect hose for damage. Replace sprayer head or hose assembly if necessary. |
| Leak Under Sink (not at faucet connection) | Loose supply line connections, faulty valve | Tighten supply line connections at shut-off valve and faucet. Check/replace shut-off valve if leaking. |
Frequently Asked Questions (FAQ)
Q: How often should I replace faucet parts in a mobile home?
A: There’s no set schedule. You should replace parts when you notice leaks or problems with operation. Regular visual checks can help catch issues early.
Q: Can I use a universal repair kit for my mobile home faucet?
A: While some kits offer a variety of washers and O-rings, specific faucet models often require exact replacement cartridges. It’s best to identify your faucet type and brand for the most reliable repair.
Q: What if my mobile home has very old, outdated faucets?
A: If your faucets are very old, corroded, or you can’t find replacement parts, it might be more cost-effective and reliable to replace the entire faucet. This is a more involved DIY project but can solve multiple problems at once.
Q: Do I need to turn off the main water supply to my mobile home?
A: Generally, no. Shutting off the individual hot and cold water valves under the sink is sufficient for faucet repairs. Only turn off the main supply if you can’t locate or operate the under-sink valves.
Q: Is mobile home plumbing different from standard home plumbing?
A: Yes, sometimes. Mobile homes often use PEX tubing for water lines, and the fixtures might be simpler or designed for space efficiency. However, the basic principles of faucet repair are the same across most residential plumbing.
By following these detailed steps, you should be well-equipped to tackle that leaky mobile home kitchen faucet. With a little patience and the right tools, you can stop the drip and save water!